Swapping hard drives in a laptop is possible but not always straightforward. There are a few key factors to consider when replacing a laptop hard drive:
Compatibility
The new hard drive needs to be compatible with your laptop’s internal connections and specifications. Most modern laptops use 2.5″ SATA hard drives, but older laptops may use IDE or other connections. The drive height, interface, and connector all need to match what your laptop supports.
Physical Size
Laptop hard drives come in different physical sizes, even among 2.5″ drives. The most common sizes are:
- 2.5″ 9.5mm – The standard thickness for most laptop drives
- 2.5″ 7mm – Thinner, often used in ultraportable laptops
- 2.5″ 12.5mm – Thicker drives, used where extra storage space is needed
Matching the correct physical size is crucial so the new drive will fit properly into the laptop’s drive bay.
Interface Adapters
Some laptops, especially older models, use non-standard connectors for the hard drive. In these cases you may need a special adapter bracket or cable to connect the standard SATA drive to the proprietary laptop interface.
Drive Caddies
Many laptop hard drives are installed into plastic drive caddies before inserted into the bay. This helps align the drive and protects it. Make sure to transfer any caddies or mounting brackets when swapping hard drives in these laptops.
Operating System
Swapping the hard drive will wipe out the existing operating system installation. You will need to reinstall your OS on the new drive and restore any personal data from backups.
Many laptops have recovery partitions on the original hard drive to reinstall Windows and drivers. Make sure you have recovery media before replacing the drive.
Data Migration
To migrate your programs, settings, and files to a new laptop hard drive, you will need to create backups and then transfer the data. Options include:
- Cloning the old drive to the new one
- Using file backup software
- Manually copying files to external storage
Installation Steps
The general steps to replace a laptop hard drive are:
- Backup important data
- Open the laptop case
- Remove any screws securing the drive in place
- Slide the existing drive out from the drive bay
- Transfer any mounting brackets or connectors to the new drive
- Insert the new drive into the drive bay
- Secure the new drive into place with screws
- Reassemble the laptop case
- Boot into the BIOS and confirm drive detection
- Install operating system to new drive
- Install drivers and applications
- Migrate data from backups
The specific steps can vary by laptop model. Refer to the hardware maintenance manual for your laptop for the precise instructions.
Conclusion
Swapping in a new hard drive is possible for most laptops, but needs some preparation. As long as you get a physically and electrically compatible drive, reinstall the OS, drivers, apps, and migrate your data, you can upgrade or replace a laptop hard drive.
Pay close attention to physical size, interface, adapters, caddies, recovery partitions, and data migration when planning the swap. With care taken at each step, you can successfully breathe new life into an old laptop with a hard drive upgrade.
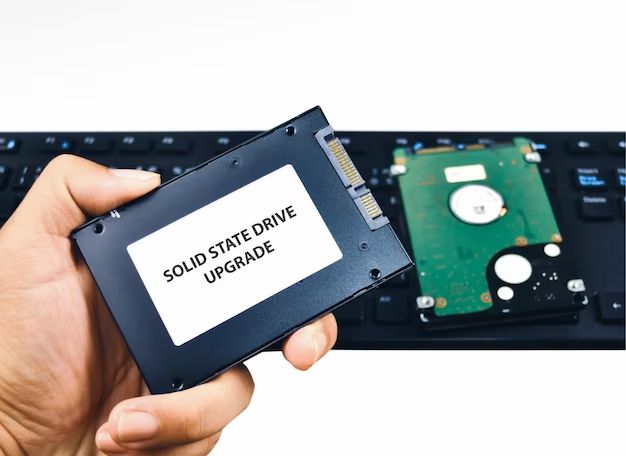
Hard drives provide cost-effective storage, but solid state drives (SSDs) offer much better performance. When replacing a laptop drive, you may want to consider upgrading to an SSD for a serious speed boost.
An SSD with the same capacity as the original hard drive typically costs more. You’ll need to decide if the performance benefits of an SSD are worth the higher price over a standard hard drive.
Whether you stick with traditional hard drives or go for a speedy new SSD, upgrading your laptop’s storage is a great way to get more years of use out of your device.
Frequently Asked Questions
Can I replace a laptop hard drive with an SSD?
Yes, you can replace a traditional hard drive with a solid state drive in most laptops. As long as the physical size is the same, and the connector type matches, an SSD will work. You’ll need to reinstall the operating system and migrate data over.
How do I transfer data to a new laptop hard drive?
To move your data to a new laptop hard drive, you can clone the original drive, use file backup software, or manually copy files to external storage. After installing the OS on the new drive, transfer the data from backup.
What do I need to reinstall Windows on a new hard drive?
To install Windows on a new hard drive, you’ll need installation media like a DVD disc, USB drive, or recovery partition. You’ll also need your Windows license key to activate it after installation.
Can I upgrade to a bigger hard drive in my laptop?
Yes, you can upgrade to a larger capacity hard drive as long as it has the same physical size and interface. Bigger 2.5″ laptop drives let you upgrade storage space.
How do I tell if a new hard drive is compatible?
To check compatibility, match the replacement drive’s physical size, height, interface (SATA or IDE), and connector type to the specs of your laptop’s drive bay. Consult hardware manuals for exact compatibility.
Tips for Swapping Laptop Hard Drives
Follow these tips for a smooth hard drive swap:
- Use an anti-static wrist strap when handling drives
- Note which screws go where during dismantling
- Transfer mounting brackets and connectors over
- Don’t force connectors into place
- Check for dust and debris in the drive bay
- Confirm the new drive is detected in BIOS
- Organize all spare parts and screws
The Advantages of SSDs vs HDDs
Solid state drives (SSDs) offer big advantages over hard disk drives (HDDs):
| Feature | SSD | HDD |
|---|---|---|
| Speed | Much faster read/write times | Slower due to moving parts |
| Noise | Silent operation | Audible spinning sounds |
| Shock Resistance | More durable with no moving parts | Risk of damage if bumped while operating |
| Power Draw | Uses less electricity | Higher power requirements |
| Heat Output | Runs cooler | Can get hot with prolonged use |
While SSDs are at a price premium, the gains in performance and reliability often make upgrading worthwhile for laptop hard drive replacements.
Step-By-Step Upgrade Instructions
Let’s walk through the specific steps for replacing a laptop hard drive using a common Dell model as an example:
1. Backup Data
Before doing any work on the laptop, backup your files, photos, media etc. Copy important data to an external hard drive or cloud storage. This protects your data in case anything goes wrong during the upgrade.
2. Gather Tools
You’ll need a precision screwdriver set, anti-static wrist strap, plastic spudger/pry tool, and external drive enclosure if migrating the old drive. Arrange your workspace to have easy access to the tools.
3. Remove Battery
Turn off the laptop, unplug AC power, and use the release latch to detach the battery. Removing the battery protects against accidental shorts during service.
4. Remove Case Cover
Use a plastic spudger to pop up the edges around the case cover to release the snaps. Lift off the case cover and set it aside.
5. Disconnect Cables
Use a plastic spudger to gently pry up and disconnect the small ribbon cable attaching the hard drive to the motherboard. Also disconnect any other cables in the way.
6. Unscrew Drive
Use the precision screwdriver to remove the single small screw holding the drive sled to the laptop frame. This screw may be located on the side or underside of the drive.
7. Slide Out Old Drive
Slide the drive toward the side to remove it from the sled, then lift it out. Be careful not to bend or touch the pins on the drive connector.
8. Place New Drive in Sled
Align the new drive into the sled the same as the old drive sat. Ensure the holes line up properly.
9. Replace Screw
Insert the small screw to secure the new drive into the sled frame.
10. Reconnect Cables
Gently press the ribbon cable into the socket on the drive to reattach it. Reconnect any other cables moved during disassembly.
11. Replace Case Cover
Place the plastic case cover back onto the laptop base. Press down along the edges to snap the cover clips back into place.
12. Reinsert Battery
Slide the battery pack back into the laptop and press gently until it clicks and locks into place.
At this point, the physical hard drive replacement is complete. Now we need to finish up with software tasks.
13. Install Operating System
Turn on the laptop, insert OS installation media, and follow the on-screen prompts to install the operating system to the new drive.
14. Install Drivers & Software
After OS installation, download drivers from the laptop manufacturer’s website and install them. Reinstall your software applications as well.
15. Migrate Personal Data
Finally, use your backups to transfer over personal files, photos, music, documents, and other important data.
Those are the steps for smoothly swapping in a new hard drive on a common laptop PC. The key things to watch out for are physical compatibility, properly reconnecting any dislodged cables, installing the OS from scratch, and migrating your data.
Troubleshooting Hard Drive Issues
If you encounter problems after replacing a laptop hard drive, try these troubleshooting tips:
Drive Not Detected in BIOS
- Reseat the drive cable connections
- Try a different drive cable if possible
- Verify the drive is compatible with your laptop
- Try inserting the old drive again to test the bay
OS Installation Failing
- Wipe the drive and repartition it before installing OS
- Attempt installing OS from different media
- Try a different bootable USB or DVD
- Ensure external drivers are loaded at boot if needed
Blue Screen Crashes
- Update BIOS, chipset, and other system drivers
- Try resetting the laptop to factory condition
- Test with a Linux live CD/USB to isolate hardware issue
- If problem persists, replace the drive
Carefully going through drive detection, OS installation, and stability testing will help identify and remedy any problems that crop up with a new hard drive.
Conclusion
While not always straightforward, replacing a laptop hard drive is quite doable for most models. The key steps are:
- Selecting a physically compatible new drive
- Backing up important data
- Opening up the laptop case
- Swapping out the old drive for the new one
- Reassembling the laptop
- Cleaning installing the operating system
- Installing device drivers and apps
- Migrating personal data from backups
With care taken at each stage, you can upgrade your laptop’s storage capacity or performance with a new hard drive or SSD and extend the system’s useful lifespan. Just be sure to research drive compatibility, properly reassemble components, and take time transferring software and data to the new drive.