What is iTunes and Why Remove it Completely?
iTunes is Apple’s media library and app store software that lets you manage your music, movies, TV shows, apps, books, and more across your devices. Originally launched in 2001 for the iPod, iTunes has expanded over the years to include many different media types and serve as a desktop hub for iOS devices (iTunes – Apple).
There are a few key reasons you may want to completely uninstall and reinstall iTunes:
- To troubleshoot issues – A clean install can help resolve problems with syncing, app connectivity, media playback, etc.
- To free up disk space – The iTunes folder can get quite large over time and removing it completely can recover a significant amount of storage.
- For a fresh start – Reinstalling iTunes ensures you have the latest version and none of the old program files are left behind.
Completely removing iTunes also gives you a chance to backup your library, re-authorize your computer, and reset program preferences before reinstalling.
Back Up Your iTunes Library
Before uninstalling iTunes, it is crucial to back up your entire iTunes library. This includes your music, movies, TV shows, apps, books, and any other media purchased through or stored in iTunes. Backing up ensures you don’t lose your valuable iTunes content in the uninstall process.
To back up your iTunes library on Windows 10 or 11:
- Quit iTunes if it is currently open.
- Connect an external hard drive with enough storage space for your full iTunes library.
- Open File Explorer and navigate to the iTunes folder location:
C:\Users\[username]\Music\iTunes - Copy the entire iTunes folder to your external hard drive. This may take some time depending on your library size.
- When finished copying, eject and safely disconnect your external hard drive.
Your iTunes media and data is now backed up on the external drive. You can now proceed to uninstall iTunes from your Windows PC knowing your library is safe. For more details, refer to the official Apple support guide on backing up your iTunes library.
Uninstall iTunes Using the Control Panel
The easiest way to uninstall iTunes on Windows is through the Control Panel. Here are the steps:
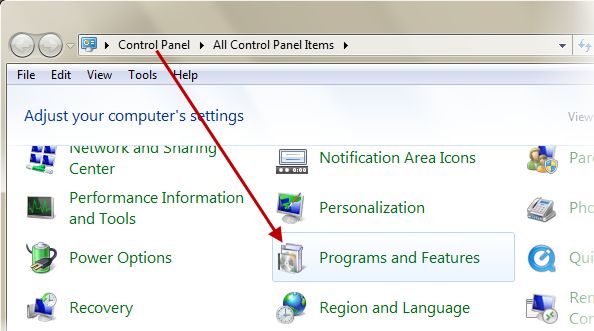
1. Open the Control Panel on your Windows PC. You can access it by searching for “Control Panel” from the Start menu.
2. In the Control Panel, click on “Programs and Features”. This will display a list of installed applications on your computer.
3. In the programs list, locate “iTunes”. Click on it and then select “Uninstall” at the top.
4. This will launch the iTunes uninstaller. Follow the on-screen prompts to fully uninstall iTunes and all its components from your Windows PC.[1]
5. Restart your computer once the uninstallation is finished.
This process will completely remove iTunes from your Windows machine, including any related files and settings. After restarting, iTunes will no longer be present on your system.
Delete Remaining iTunes Files and Folders
After uninstalling iTunes, some related files and folders may still remain on your computer. It’s important to delete these as well for a clean removal. Here are the main locations to check:
The iTunes folder in AppData – This can be found at C:\Users\YOURUSERNAME\AppData\Roaming\Apple Computer\iTunes. AppData is a hidden folder, so you’ll need to unhide hidden items in File Explorer to view it. Delete the entire iTunes folder.
iTunes preference files – These are usually located at C:\Users\YOURUSERNAME\AppData\Roaming\Apple Computer\iTunes\iTunesPrefs.xml and C:\Users\YOURUSERNAME\AppData\Roaming\Apple Computer\iTunes\iTunesPrefs64.xml. Delete both files.
The iTunes Media Folder – This is where your iTunes library content is stored, such as music, movies, apps, and books. The default location is C:\Users\YOURUSERNAME\My Music\iTunes. You can leave this folder intact if you want to preserve your iTunes content.
Apple Application Support Folder – Check for a folder called Apple Application Support at C:\Program Files\Common Files and delete it if present.
Once you’ve checked and removed any remaining files and folders, you should have a clean slate for reinstalling iTunes.
Install the Latest iTunes Version
To install the latest version of iTunes on your Windows computer, first download it directly from Apple’s website (https://www.apple.com/itunes/). The download should start automatically once you visit the page.
Once the installer finishes downloading, run it and follow the on-screen prompts. The installer will guide you through the process of installing the latest iTunes version on your computer. You may need to accept license agreements and select installation options.
The installation typically doesn’t take long. Once complete, iTunes will launch automatically. You now have the latest version installed and can proceed with re-authorizing your computer and restoring your library.
Authorize Your Computer
After reinstalling iTunes, you will need to authorize your computer to access content associated with your Apple ID account, such as previously purchased music, movies, apps, and more.
To authorize your computer, open iTunes and select Account > Authorizations from the menu bar. Then choose “Authorize This Computer” [1].
iTunes will prompt you to sign in with your Apple ID and password. After signing in successfully, your computer will be authorized and linked to your account. This allows you to download, play and manage content from your iTunes library.
If you have multiple computers, you can authorize up to 5 at a time. Just repeat the authorization process on each device.
Restore Your iTunes Library
After reinstalling iTunes, you’ll want to restore your music, apps, settings, and other data from a backup. The easiest way is to restore from your latest iTunes backup. Connect your iPhone, iPad or iPod Touch to your computer using a USB cable. Open iTunes and go to the device summary page. Click “Restore Backup” and select the most recent backup from the dropdown menu. iTunes will sync the backup data to your device, transferring your music, apps, settings and more. You can also choose to sync only specific content like music or apps if you don’t want to overwrite everything.
To restore your entire iTunes library including playlists, play counts, ratings, and other metadata, you can copy your iTunes folder back to its original location, usually username/Music/iTunes on Windows or /Users/username/Music/iTunes on Mac. Quit iTunes, locate your iTunes folder backup, copy it back to the Music folder, then reopen iTunes. Your full library details should be intact. If you backed up your iTunes library to iCloud, you can follow Apple’s instructions to restore your library from iCloud.
Configure iTunes Preferences
Once iTunes is installed, it’s important to configure the preferences to suit your needs. The key iTunes preference panes include:
General
The General preferences allow you to customize options like the library name, iTunes Store access, and what happens when you insert a CD.
Playback
The Playback preferences let you configure settings for shuffling, repeating, volume levels, and playback quality.
Sharing
Configure options for Home Sharing, sharing libraries over your local network, and other sharing features in the Sharing preferences pane.
Devices
Manage preferences for how iTunes syncs information and content to your iPhone, iPad, or iPod touch in the Devices preferences.
Store
The Store preferences allow you to manage settings for iTunes Store access, downloading, parental controls, and more.
Advanced
Advanced users can customize performance, network, and playback options in the Advanced preferences.
Configuring these preferences helps ensure iTunes performs to your preferences and syncs properly with your other Apple devices.
Troubleshoot Issues
Here are some solutions for common issues that may occur after reinstalling iTunes:
Library Not Syncing or Missing Files
If your iTunes library is not syncing properly or files seem to be missing after reinstalling iTunes, try the following:
- Make sure you properly restored your iTunes library backup. Any files not included in the backup will be missing.
- Check that the library XML file path is properly configured in iTunes preferences. The path should point to the location of your iTunes library backup.
- Restart your computer and retry syncing your iOS device to see if that resolves any library sync issues.
- As a last resort, delete the iTunes library, re-add the files to iTunes, and sync again. This can resolve stubborn library sync problems.
For more help, see this Apple Support article on how to troubleshoot iTunes sync issues.
Errors During iTunes Installation
If you encounter errors when reinstalling iTunes, try these troubleshooting steps:
- Restart your computer and try reinstalling again – this can clear out any stalled processes or files from the previous install.
- Check for and install any pending Windows or macOS updates, which may include fixes for iTunes installation issues.
- Temporarily disable antivirus software, which can sometimes interfere with program installations.
- Delete the iTunes folder from Program Files (Windows) or Applications (Mac) before reattempting installation.
For additional help, refer to this Apple Support page on troubleshooting iTunes installation problems.
Summary
To recap, completely removing and reinstalling iTunes involves backing up your library, uninstalling iTunes through the Control Panel, deleting any remaining files and folders, downloading the latest version, authorizing your computer, restoring your library, and configuring preferences.
The benefits of a clean install include resolving technical issues caused by outdated or corrupt files, decluttering your system by removing unused legacy files, and getting a fresh start with the latest features and updates. A clean iTunes install can optimize performance, provide a smoother user experience, fix bugs or crashes, and improve syncing with iOS devices.