Finding missing files on your Mac can be frustrating, but there are several useful tools and techniques you can use to track them down. In this comprehensive guide, we’ll walk you through the top methods for locating lost files and recovering deleted documents on a Mac.
Check the Trash
When you delete a file on your Mac, it gets sent to the Trash folder. The Trash works like a recycling bin – files stay there until you permanently erase them or restore them to their original location. So the very first place you should look for missing files is in the Trash.
To open the Trash, click the Trash icon in your Dock or choose Finder > Empty Trash from the top menu bar. You’ll see all recently deleted files inside. If you find your missing document here, simply right-click on it and choose Put Back to move it back to its original location.
Use Spotlight Search
Spotlight is Apple’s built-in desktop search feature for quickly finding files, apps, system preferences and more on your Mac. You can use it to easily search your entire hard drive for missing documents.
To use Spotlight search, click the magnifying glass icon in the top-right corner of your screen or press Command-Space on your keyboard. This opens up a search bar where you can type in keywords related to the missing file, like the filename, type of document or content contained inside it. Spotlight will automatically return results related to your search query.
Some tips for effective Spotlight searching:
- Use unique keywords – Include distinct words, filenames or file types that will help narrow down the search
- Check spelling – Make sure you enter keywords correctly to find accurate results
- Try partial names – If you don’t remember the full filename, try searching for just the first or last few words
- Filter by file type – Use the menu on the left to filter results by Images, PDFs, Documents, Messages and more
Browse File System Locations
Often, missing files are simply saved in a location you haven’t checked yet. The best way to find them is to manually browse common folders where they may have been saved.
Start by checking the most obvious locations like your Desktop, Documents folder and Downloads folder. Open each one and visually scan through icons to see if you notice the file.
Next, open Finder and click through folders for areas you frequently save content, like your project folders, external drives or cloud storage. Carefully check each folder – sometimes a file can end up in an unexpected location if you saved it incorrectly.
Other places to check include:
- Applications folder – for missing app files or documents opened with a certain program
- Creative Cloud files – for missing design assets or media if you use Adobe Creative Cloud
- iCloud Drive – check here if you use iCloud file syncing
- Office applications – Microsoft Office apps like Word often have auto-save draft versions
When Was It Last Opened?
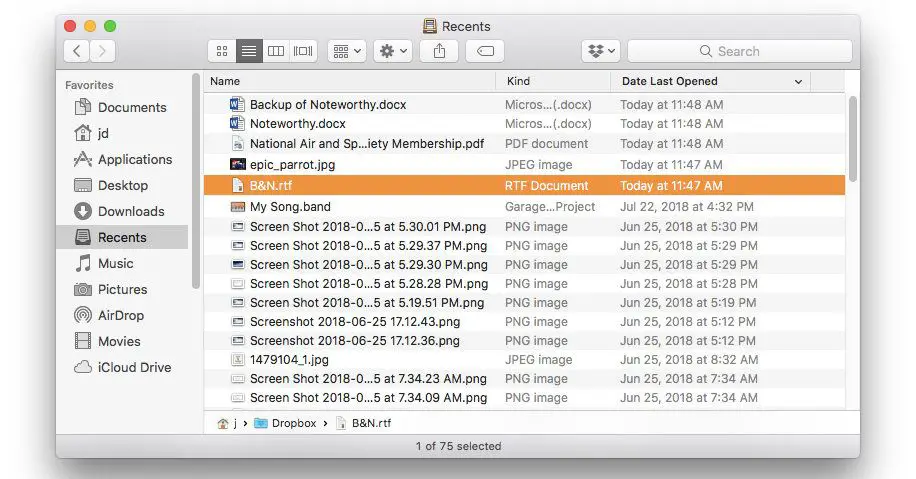
If you’re struggling to locate a file, try to remember when you last viewed or edited it. macOS keeps track of recently opened files to help you quickly access them again.
Go to the Apple menu and choose Recent Items. You’ll see a list of your recently opened files, with the last opened ones at the top. Scan through this list to see if you can find your missing document.
You can also click Recent Tags in the sidebar to filter recents by app, or Show All in the top-right to see files opened further back in time. This might jog your memory on when and where you last accessed the file.
Check Time Machine
Time Machine is Apple’s built-in backup software that creates hourly, daily and weekly snapshots of your system and files. If you have Time Machine enabled, you may be able to recover previous versions of missing documents from your backups.
To browse Time Machine backups:
- Open Finder and click Time Machine in the menu bar
- Enter Time Machine by clicking “Enter Time Machine”
- Navigate back through time by clicking through folder structures on the right side. Older backups are further to the right.
- Preview versions of the missing file by selecting them on the right
- Choose Restore to recover the file, or Restore All to restore everything from that backup date
With Time Machine, you can rescue lost files as long as the backup containing them still exists. Keep in mind Time Machine automatically deletes older backups as your storage fills up.
Try Third-Party Recovery Software
If you can’t find a file through conventional search methods, your next step is to try data recovery software. These tools scan and restore deleted content from your Mac’s hard drive. Two options to consider are:
Disk Drill
Disk Drill can recover hundreds of different file types from internal and external drives connected to your Mac. It scans drive sectors for traces of deleted data and reconstructs files so they can be viewed and recovered.
Features include:
- Deep scan capability to extract files from formatted or damaged disks
- Scans internal and external hard disks, memory cards, USB drives and more
- Filter results by file type to pinpoint your missing document
- Preview found files before recovery
Disk Drill has both a free Quick Scan and more advanced Deep Scans available in their paid Pro version.
Stellar Data Recovery
Stellar Data Recovery is a professional-grade recovery tool for both Windows and Mac. It can recover lost or deleted files from hard drives, external media and even virtual machine disks.
Key features:
- Recovers documents, photos, music, videos, email files and more
- Has quick, deep and deleted file recovery scans
- Creates disk images to recover files non-destructively
- Retrieves data from unmountable drives and corrupted volumes
- Supports APFS, HFS, HFS+, FAT, exFAT and NTFS drives
Stellar Data Recovery has a free trial so you can see if it finds your missing files before purchasing.
Contact Apple Support
If you still can’t locate a missing file after exhausting all self-help options, Apple may be able to help recover it for you. Contact Apple Support and describe the issue with your missing file.
Be prepared to answer questions like:
- When did you last have the file?
- What app was used to create or access it?
- What troubleshooting have you tried so far?
Apple Support has internal tools and techniques that may be able to find and restore deleted files from backups or drive scans. However, there is no guarantee.
Restore From a Backup
If a file is well and truly lost, the last resort may be to restore your entire Mac from a full system backup containing the missing document. macOS offers several backup options:
- Time Machine – Restore files from a Time Machine backup
- Local Snapshots – Use a local APFS snapshot to revert the system
- Mac App Store – Reinstall macOS and applications from the App Store
- Migration Assistant – Transfer user data and settings from another Mac
The downside is restoring an entire system backup will overwrite your current apps and settings. Only use this method if the missing file is absolutely critical.
Prevent Future Missing Files
To avoid lost files in the future, implement these proactive strategies:
- Enable Time Machine – Automated hourly backups let you quickly restore missing documents
- Store files in cloud sync services like iCloud, Dropbox or OneDrive. You’ll have an online copy if your local one goes missing.
- Organize important files in dedicated folders and back them up regularly
- Deleteold unused files to declutter your system and keep space free
- Use Trash shortcuts like Command-Delete to avoid accidentally deleting files forever
Following best practices for organizing, backing up and safeguarding your files will help keep them from going missing in the future.
Conclusion
Tracking down lost files can be a headache, but using Mac search tools, data recovery software and backups make it possible to get them back. Try retracing your steps to locations where the file may have been saved. Use Spotlight and Time Machine to search across your system. If all else fails, recovery apps and Apple Support can resurrect deleted files in many cases.
Implementing organized storage habits, regular automated backups and syncing to the cloud are the best ways to avoid misplaced documents. But when important files do go missing, use this guide to get them back where they belong.