The Photoshop cache is a folder on your computer that stores temporary files to help speed up your workflow and improve performance. It saves copies of your work so images, brushes, and other assets can load faster. Over time, this cache can grow quite large and start to slow Photoshop down.
Clearing the Photoshop cache deletes these temporary files and frees up space. This is useful when you are getting error messages that your scratch disks are full or if Photoshop is running slowly. Deleting the cache forces Photoshop to rebuild it, which can optimize performance, especially after major updates. It also removes any corrupted files that may be causing crashes or other issues.
While a larger cache can improve speed, an overly full cache will start to have diminishing returns. Periodically clearing out the cache helps keep it a reasonable size so Photoshop can function efficiently.
Locate the Photoshop Cache Folder
On Mac, Photoshop stores its cache files in a folder called “Adobe Photoshop [Version] Settings” located in your user account’s Library folder. To access this folder:
1. Open Finder and select Go > Go to Folder from the menu bar.
2. Type in /Users/[username]/Library/Preferences/Adobe Photoshop [Version] Settings and click Go. Replace [username] with your Mac user account name and [Version] with your version of Photoshop e.g. CC 2019.
3. The Adobe Photoshop [Version] Settings folder contains several cache subfolders such as: PLCache, WebCache, etc. This is where Photoshop stores temporary files and previews.
You can navigate here directly in Finder to view and manage Photoshop’s cache. However, the best way to clear the cache is within Photoshop itself.
Clear Cache in Photoshop CC
To clear the cache in Photoshop CC on Mac, follow these steps:
1. Open Photoshop CC.
2. Go to Edit > Purge in the menu bar.
3. Select “All” to clear all caches.
You can also choose specific caches like Undo, Clipboard, etc. Purging the caches will free up disk space Photoshop CC uses for temporary files and data.
Clearing the caches forces Photoshop CC to regenerate the cache files when needed again. This can help resolve performance issues or scratch disk errors in some cases.
Just keep in mind purging caches means losing undo history and some other temporary data. Save your work first before clearing caches if needed.
Clear Cache in Photoshop CS6
For older versions of Photoshop like CS6, the process to clear cache is slightly different than the latest Creative Cloud versions. Here are the steps to clear cache in Photoshop CS6:
- Open Photoshop CS6 on your Mac.
- Go to Edit > Purge > Image Cache to clear the image cache.
- Go to Edit > Purge > Undo Cache to clear the undo cache.
- Go to Edit > Purge > Clipboard Cache to clear the clipboard cache.
- Go to Edit > Preferences > Performance. Uncheck ‘Use Graphics Processor’ and click OK to reset performance preferences.
- Restart Photoshop CS6 for the changes to take effect.
Clearing the various Photoshop caches and resetting performance preferences can help free up disk space used by the caches and troubleshoot slow performance issues in older versions like CS6. See this guide for more details on clearing scratch disks in Photoshop CS6.
Delete the Cache Folder
Deleting the entire Photoshop cache folder will clear all cached data that Photoshop stores to improve performance. This is a more aggressive option to reset the cache if you are still experiencing issues after using Purge or the Preferences reset.
To delete the cache folder on Mac:
- Quit Photoshop if it is open.
- Open the Finder app and hit Command+Shift+G to open the ‘Go to Folder’ dialog.
- Type in
/Users/[your username]/Library/Caches/Adobe/Photoshop/and hit Go. This will take you directly to the Photoshop cache folder. - Select the
Photoshop Cachefolder and move it to the Trash. - Restart Photoshop – it will generate a new empty cache folder.
Deleting the cache folder forces Photoshop to rebuild its cache files and scratch data from scratch. This clears any corrupted cache data that may be causing performance issues or errors like ‘Scratch Disk Full’. Just be aware that Photoshop’s performance may slow down temporarily as the cache is regenerated.
Reset Photoshop Preferences
One way to clear the Photoshop cache on Mac is by resetting the Photoshop preferences. When you reset preferences, it deletes all settings files that Photoshop uses to remember your customized preferences. This has the effect of clearing cached data like the history states, along with resetting any customized settings you may have changed.
To reset preferences in Photoshop CC or CS6:
- Go to Photoshop > Preferences > General (Edit > Preferences > General on Windows)
- Check the box for “Reset Preferences on Quit”
- Quit and relaunch Photoshop
This will delete the stored preferences and clear the cache the next time you open Photoshop. It resets all preferences to the default settings, so you’ll need to reconfigure any custom options you had set up previously.
Resetting preferences is an easy way to give Photoshop a fresh start and clear any cached data that may be causing performance issues. According to Astropad, resetting preferences can often resolve problems with sluggish behavior in Photoshop.
Use a Third Party App
While Photoshop provides built-in options to clear cache and reset preferences, you may want to try using a dedicated third party app for more thorough cleaning. Apps like CleanMyMac include specific tools to scan and remove Photoshop cache files.
Third party cleaners like CleanMyMac X offer a simple interface to scan your entire system and identify unnecessary files that can be safely removed. This includes clearing out the Photoshop scratch disk, cache folders, logs, and more. The cleaning process typically only takes a few minutes.
An advantage of using a dedicated Mac cleaner app is that it clears out cache and temporary files from many applications, not just Photoshop. This can help reclaim significant storage space and improve overall system performance. Just be cautious not to delete any files you may still need.
For most users, a third party cleaning utility is an easy way to clear Photoshop cache alongside general Mac maintenance and optimization. Be sure to use a reliable and well-reviewed app like CleanMyMac X for the best results.
Troubleshooting Cache Issues
If clearing the Photoshop cache doesn’t resolve performance problems, here are some tips for troubleshooting further:
Check that you have adequate free space on your scratch disk drive. Photoshop needs free space to create cache files. If your scratch disk is full or nearly full, clear space or change the scratch disk location to a disk with more free space.
Make sure your scratch disks are on a fast local drive, not a slow external or network drive. Cache files need to be read/written quickly to be useful.
If using a laptop, check it is plugged in and not running on battery during intensive Photoshop tasks. This enables better CPU/GPU performance.
Quit other applications using RAM/GPU while working in Photoshop to maximize the resources available to it.
Disable or uninstall any antivirus or security software temporarily to rule out conflicts.
Update to the latest version of Photoshop and your Mac OS to fix bugs.
Reset Photoshop preferences to eliminate any corrupted settings causing problems (see above).
Reinstall Photoshop as a last resort if no other fixes resolve persistent performance issues.
Improving Photoshop Performance
In addition to clearing the cache, there are other ways to optimize Photoshop’s performance:
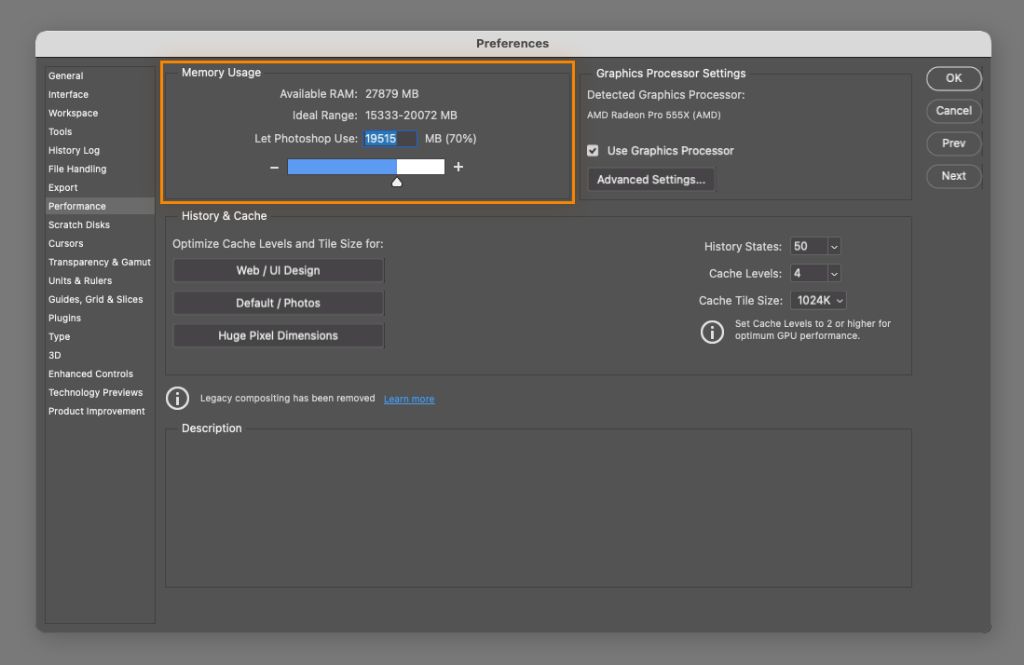
Allocate more RAM to Photoshop – Go to Edit > Preferences > Performance and increase the RAM allocation. The more RAM Photoshop can access, the better it will perform with large files and complex edits.1
Use a faster scratch disk – Set your fastest drive as the primary scratch disk under Edit > Preferences > Scratch Disks. This is where Photoshop stores temporary data when editing files.2
Work with lower resolution – Edit and save copies of files at lower resolutions, which take up less RAM and scratch disk space.
Update hardware and software – Using modern hardware and keeping Photoshop up-to-date can boost performance. An SSD scratch disk and graphics card with more VRAM help with large files.
Record less history states – Reduce the number of undo steps under Edit > Preferences > Performance to limit the history log size.
Flatten layers – Work with fewer layers whenever possible, flattening areas that don’t need to remain editable.
Close unneeded documents – Having multiple large files open taxes RAM and scratch disk usage.
Conclusion
In summary, clearing the Photoshop cache on Mac can provide several benefits. It helps free up disk space by deleting temporary files that are no longer needed. This can improve Photoshop’s overall performance and responsiveness. Clearing the cache also ensures that any corrupt cache files are removed, which can resolve crashes or other issues in Photoshop.
While clearing the cache means Photoshop has to re-render image previews and thumbnails next time you open files, the trade-off for faster performance is usually worth it. Just be sure to save your work first before clearing the cache. Overall, periodically cleaning out the Photoshop cache by deleting the cache folder, resetting preferences, or using a dedicated app helps keep Photoshop running smoothly.