When a hard drive is not detected in BIOS, it can be frustrating trying to figure out what’s going on and how to fix it. There are a few potential causes and solutions to try when troubleshooting a hard drive not showing up in BIOS.
Quick Overview of Potential Issues
Here’s a quick rundown of some of the most common potential issues that could cause a hard drive to not be detected in BIOS:
- Faulty or loose SATA cable connection
- Damaged hard drive
- Incorrect BIOS settings
- Disabled SATA controllers in BIOS
- Incompatibility issues between drive and motherboard
The good news is that in many cases, this issue can be resolved with some basic troubleshooting steps. Let’s go through each potential cause and solution in more detail.
Check SATA Cable Connections
One of the first things to check is the physical SATA cable connections. A loose or faulty SATA data or power cable is one of the most common reasons why a hard drive won’t show up in BIOS.
Follow these tips for checking the SATA cables:
- Make sure both ends of the SATA data cable are securely plugged into the motherboard SATA port and hard drive SATA port.
- Re-seat the SATA cable connections at both ends to ensure a tight fit.
- Try switching the SATA port on the motherboard that the hard drive is plugged into.
- Inspect the SATA data cable for any damaged or broken pins.
- Check that the power cable from the PSU is firmly plugged into the hard drive.
- Try swapping out the SATA cables with new ones to rule out a faulty cable.
Properly seating both the SATA data and power cables is crucial for the hard drive to be detected and communicate properly with the BIOS.
Check for Hard Drive Damage
If re-seating the SATA cables does not help, the hard drive itself may be damaged or non-functional. Some signs of a damaged hard drive include:
- Clicking or beeping noises coming from the hard drive
- Visible physical damage like dents or cracks on the drive casing
- Corrupted data or operating system errors indicating drive errors
- Failed drive detection tests within the BIOS itself
To check if the hard drive is damaged, try these steps:
- Listen closely to the hard drive when powered on for any clicking or beeping sounds which can indicate drive failure.
- Run the BIOS hard drive diagnostics tool if available to check the drive functionality.
- Try removing the hard drive and installing it in another computer to see if it is detected.
- As a last resort, open up the hard drive casing carefully and check for visible physical damage on the internal hardware.
If the hard drive itself appears to be faulty or damaged, it will likely need to be replaced before it can function properly again.
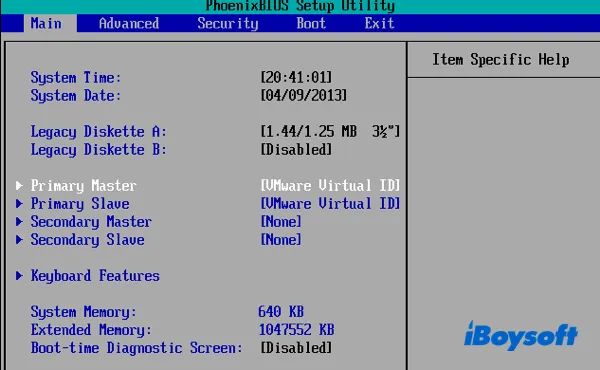
Confirm BIOS Settings
Incorrect BIOS settings can sometimes lead to drives not being detected properly. Here are a few things to check in the system BIOS:
- Make sure the SATA controller and SATA ports are enabled. Older systems may have these disabled by default.
- Confirm that AHCI or RAID mode is enabled for the SATA controller if supported.
- Verify hard drive detection is enabled under the “Standard CMOS Features” or “Integrated Peripherals” menu.
- Check that the hard drive model is selected correctly if there are drive type options.
- Reset BIOS settings to default and re-enable SATA and hard drive detection if issues persist.
Save changes and exit BIOS to allow settings to take effect after making any changes. The motherboard manual can provide more details on accessing BIOS and available settings.
Update BIOS and Drivers
Outdated BIOS or disk controller drivers can also result in drives not being detected properly. Here are some update best practices:
- Check the motherboard website for the latest BIOS update and install it.
- Look for SATA or disk controller driver updates from manufacturer websites and install them.
- For older systems, a motherboard BIOS update may be needed to support larger hard drives.
- Updating drivers and the BIOS is safe when following the manufacturer’s instructions.
After updating the necessary drivers and BIOS, shutdown and restart the system to allow changes to take effect before rechecking hard drive detection.
Test with a Different SATA Port or Cable
Intermittent detection issues may come down to problems with a specific SATA port or cable. Try the following troubleshooting steps:
- Plug the hard drive SATA cable into a different SATA port on the motherboard if available.
- Test with a different SATA data cable, preferably a brand new one.
- Try connecting the hard drive in another computer system to rule out broader compatibility problems.
- Inspect the SATA ports on the motherboard for any bent or broken pins.
Swapping ports and cables helps determine if the issue is isolated to one component. Using a separate computer can confirm if the drive works at all versus a problem specific to the original motherboard.
Examine for Physical Damage on Motherboard
Rarely, physical damage to the SATA ports or circuitry on the motherboard itself may cause detection issues. Look closely for any signs of:
- Pins bent out of place or broken off completely in the SATA ports.
- Burnt or discolored areas around the SATA ports or other circuitry.
- Cracks or melted plastic on or around the SATA ports.
- Leaking or bulging capacitors near the SATA ports.
Severe physical damage on the motherboard may require replacing the motherboard entirely. The manufacturer can also be contacted for potential warranty support if available.
Try Alternate Power Supply Connections
Very occasionally, detection issues may come down to inadequate or unstable power delivery to the hard drive itself. Things to try include:
- Connecting the hard drive power cable to a different power supply cable or modular PSU connector.
- Plugging the hard drive power into a molex adapter instead, if available.
- Testing the hard drive with another compatible power supply unit if possible.
Using a separate power cable or supply can determine if the issue is tied to one connector or PSU. An adapter can reroute power from a different source as well.
Scan for Viruses and Malware
When troubleshooting any system problems, don’t overlook the potential for viruses and malware. Scan the system with antivirus software and malware removal tools.
Powerful infections can sometimes interfere with proper hardware detection and functionality. Scan the system outside of the operating system environment if possible.
Look for Loose Internal Connections
It’s also worth examining internal power and data connections. Things to inspect include:
- Check that the motherboard power cables are fully inserted.
- Reseat memory modules in their slots to make good contact.
- Examine connectors for loose or damaged pins.
- Look for any cables touching or shorting out components.
Loose motherboard connections can contribute to a wide range of boot and detection issues. Reseating components helps ensure good contacts are made.
Consider Compatibility Issues
In rare cases, there may be inherent hardware incompatibilities between the hard drive model and the computer motherboard or BIOS version. Things to check include:
- Verify the hard drive is supported by the motherboard and meets all interface requirements.
- Check online forums and user reviews for any known compatibility issues.
- Confirm the BIOS has been updated to the latest version if applicable.
- Test the drive in another computer system to see if the incompatibility issues persist.
Using a proven compatible hard drive is ideal when upgrading or replacing a boot drive. Checking for BIOS updates, user reports of issues, and testing in alternate systems can confirm or rule out compatibility as the root cause.
Attempt a BIOS Reset
Resetting the CMOS on the motherboard will revert BIOS settings to factory defaults and can resolve detection problems at times. Here is the general process:
- Power down the system and unplug power cord.
- Open case and locate the CMOS reset or clear CMOS jumper on motherboard.
- Turn jumper to reset position for a few seconds before turning back to default.
- Replace side panel, reconnect power cord, and power back on.
- The system may prompt to reconfigure BIOS settings if CMOS was cleared.
Consult the motherboard manual for the exact reset jumper location and procedure. Resetting CMOS can clear any settings conflicts or glitches impacting drive detection.
Rule Out RAID Configuration Issues
If RAID is enabled and configured in the BIOS, the hard drive may not show up as an individual drive. Things to check include:
- Enter the RAID BIOS settings menu and check drive assignments and RAID set status.
- Make sure the hard drive is not assigned to a RAID array, which can hide it from the system.
- Resetting the RAID configuration to clear settings may allow the drive to be detected normally.
- Disable RAID mode if not needed and configure drives for AHCI or IDE mode as needed.
Drives assigned to RAID arrays can still function but won’t appear as individual drives. Exiting RAID mode entirely can confirm if that is the source of the detection issue.
Conclusion
Troubleshooting a hard drive not detected in BIOS will primarily focus on connections, potential damage, and compatibility issues. Following SATA cable connections and power delivery carefully is crucial, along with confirming BIOS settings are correct.
If those steps do not resolve the issue, testing the hard drive itself for errors or physical issues is recommended. From there, inspecting hardware contacts, updating firmware, trying alternate configurations, and examining compatibility will help narrow down underlying problems.
While a hard drive not showing up in BIOS can be frustrating, using a step-by-step process of elimination and testing hardware will usually pinpoint the cause and lead to solutions. In severe cases of drive failure or motherboard damage, replacement of those components may ultimately be required.