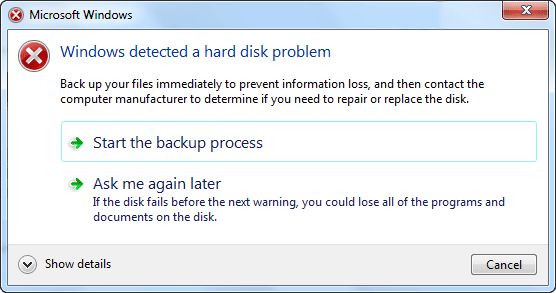
What does the Windows detected a hard disk problem error mean?
The “Windows detected a hard disk problem” error occurs when your hard drive is failing or has bad sectors that are preventing Windows from reading data properly. This error usually shows up as a notification from the Action Center or as a pop-up message when you try to boot into Windows.
It indicates that Windows has detected either physical damage on your hard drive or logical errors that are preventing it from working correctly. The most common causes are:
- Bad sectors – Parts of the hard drive that can no longer reliably store data due to physical damage or corruption.
- Mechanical failure – Issues with the physical hard drive mechanics like the read/write heads or motor.
- File system errors – Corruption in the NTFS or FAT32 file systems on the hard drive.
- Outdated drivers – Using generic or outdated drivers for the hard drive controller instead of the ones from the manufacturer.
If left unchecked, hard disk problems can get worse over time and lead to complete failure where Windows can no longer read any data from the drive. So it’s important to troubleshoot and resolve this issue as soon as possible.
How to check for hard disk problems in Windows
Here are some steps to diagnose hard disk issues in Windows:
1. Run CHKDSK
CHKDSK is a built-in Windows utility that scans your hard drive and attempts to fix logical file system errors and bad sectors. To run it:
- Open the Command Prompt as administrator.
- Type “chkdsk C: /f” (without quotes) and hit Enter to scan drive C (replace C with the letter of the drive you want to scan).
- Add the /r option if you want CHKDSK to locate bad sectors and recover readable data.
- The process may take some time to complete depending on drive size and errors found. Be patient and let it finish.
- Restart your PC afterwards for the changes to take effect.
CHKDSK might be able to fix file system problems and mark bad sectors to prevent their use. But it’s not able to repair physical damage on the drive.
2. Check S.M.A.R.T. status
S.M.A.R.T (Self-Monitoring, Analysis and Reporting Technology) is a monitoring system built into hard drives to detect problems before failure.
To check it:
- Open Windows Explorer and right-click on the hard drive you want to inspect.
- Select “Properties” and switch to the “Tools” tab.
- Under Error checking, click “Check” to open Check Disk.
- Tick “Scan drive” and select “Start.”
- This will run an extended test of your drive and report any errors found.
If the Status shows “Caution” or “Failure,” it indicates physical damage on the drive. Back up your data immediately and consider replacing the drive if errors persist.
3. View Event Viewer system logs
System logs in the Event Viewer may show disk error events that can help narrow down the source:
- Type “Event Viewer” into the Start menu and open it.
- Go to “Windows Logs” > “System” and browse the list for any disk-related error events.
- Look for event sources like “Disk,” “storahci,” or specific disk driver names.
- The details can indicate what type of disk errors were detected.
Major disk events here reinforce that your drive has problems.
4. Update or reinstall disk drivers
Using outdated or generic drivers for your disk controller instead of the right ones can cause compatibility issues.
To update them:
- Go to Device Manager using Start menu search.
- Expand Disk drives, right-click your hard disk and select “Properties.”
- Go to the Driver tab and click “Update driver.”
- Select “Search automatically…” to fetch the latest driver for your hardware.
- You can also try uninstalling the driver entirely, rebooting, and letting Windows reinstall it fresh.
Be sure to get your disk controller drivers directly from the manufacturer (e.g. Intel, AMD) rather than using Microsoft’s generic ones.
5. Monitor HDD health with utilities
There are many third-party utilities that can provide more insight into your disk’s health status and performance:
- CrystalDiskInfo – Checks S.M.A.R.T attributes and monitors temperature.
- Hard Disk Sentinel – Comprehensive disk health testing and monitoring.
- HDTune – Scans for errors, benchmarks transfer speeds.
- Speccy – System information tool that identifies disk issues.
Run various tools to get a better overall assessment of potential problems. Slow transfer rates, high temperatures, pending sectors, etc. indicate a failing drive.
How to fix hard disk problems
If your diagnostics reveal a damaged hard drive, here are some steps you can take to attempt fixing it:
1. Run the manufacturer’s disk utility
Most hard drive makers like Seagate, WD, etc. provide their own disk tools for testing and repairing drives:
- Search for “[brand name] disk diagnostic tool” and download it.
- Run the lengthy comprehensive test. It will attempt to fix remap damaged sectors.
- Tools like Seagate SeaTools or WD Data Lifeguard can help recover data from problematic drives.
Try using the utility from the same company as your drive’s manufacturer first.
2. Wipe and reformat the drive
If you don’t have important data on the drive, reformatting can mark bad sectors as unusable and set up a fresh file system:
- Open Disk Management (type into Start menu and select Create and format hard disk partitions).
- Right-click the disk partition and choose Format.
- Select NTFS file system, uncheck “Perform a quick format”, and click OK.
This will wipe the drive and scan it completely while setting up the file system, essentially giving you a clean slate.
3. Replace the SATA/power cables
Faulty SATA data or power cables can sometimes cause weird disk errors. Try swapping them:
- Switch SATA ports on the motherboard if you have multiple.
- Replace the SATA cable with a new high-quality one.
- Use a different power cable from your PSU to the hard drive.
Cables are cheap to replace. This can resolve connection issues if the disk is otherwise healthy.
4. Try a different SATA port/controller
Attaching the disk to a different SATA controller directly on the motherboard can isolate controller driver issues:
- Attach the drive to a different onboard SATA controller if available.
- Use a PCIe SATA expansion card as an alternative controller.
If disk errors disappear when connected via another controller, it indicates the previous controller/drivers were faulty.
5. Update BIOS/firmware on motherboard
An outdated BIOS on your motherboard can have bugs affecting disk connectivity. Updating it may help:
- Check your motherboard manual for how to access the BIOS/UEFI setup utility.
- Find the version number and check the manufacturer’s website for a newer BIOS.
- Download the latest BIOS and update from within the interface.
Just be sure to avoid power loss during the flashing process to prevent corruption.
6. Back up data and replace the drive
If all else fails, the hard drive itself is likely failing and needs to be replaced:
- Use disk utilities to back up any important data you can read from the drive.
- Buy a new equivalent hard drive with equal or greater capacity.
- Install the new drive in your PC, connecting the same power/SATA cables.
- Restore your OS and data from backups.
Eventually all mechanical drives fail. Disk errors indicate your drive has reached the end of its lifespan.
How to prevent hard disk problems
You can employ some preventive measures to keep your hard drives healthy and help avoid problems:
- Defragment your disks regularly to prevent file fragmentation issues.
- Clean install Windows occasionally to clear out OS corruption.
- Don’t move or bump your PC when the hard drive is active.
- Install an SSD as a secondary drive for the OS and apps.
- Maintain a stable voltage in your PC to avoid power spikes.
- Keep your PC dust-free and avoid overheating disk drives.
- Replace drives after 3-5 years of use before problems occur.
Catching and addressing hard drive issues early is key. Monitor your disk health proactively with tools like CrystalDiskInfo. This gives you a chance to back up data and take corrective action before a complete failure.
Conclusion
The “Windows detected a hard disk problem” error is a serious early warning sign you shouldn’t ignore. It likely means physical damage or file system corruption is present on your hard drive. Don’t continue booting into Windows without addressing it.
Carefully diagnose the disk using CHKDSK scans, S.M.A.R.T. checks, Event Viewer, and third-party tools. Try to isolate the cause, whether it’s bad sectors, a faulty drive controller, or failing drive mechanics.
Attempt fixes like reinstalling drivers, using disk utilities, replacing cables, reformatting, or ultimately swapping out the drive. And be sure to backup your data as a precaution before troubleshooting too extensively.
With the right warning signs and preventive care, you can maximize the lifespan of your hard drives. But all will eventually fail – the key is being prepared for that inevitable day.