Upgrading to a solid state drive (SSD) can provide a significant performance boost for your computer. However, you may encounter issues getting your computer to recognize the new SSD properly. Don’t worry – with some basic troubleshooting, you can get your new SSD up and running quickly.
Make Sure the SSD is Installed Correctly
The first step is to double check that the SSD is installed correctly in your computer. Here are some tips for proper installation:
- Consult your motherboard manual for which SATA port to use. Some motherboards have specific ports for boot drives.
- Make sure the SSD is securely mounted and all cables are fitted snugly.
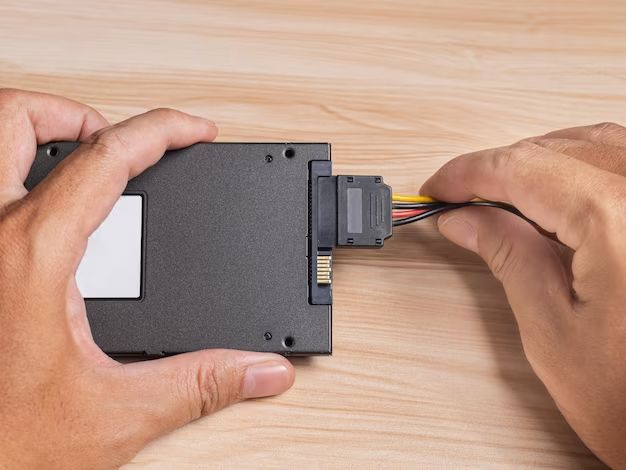
- If installing in a desktop, use the correct power and data cables. Laptop drives may only need a single cable.
- Ensure the SSD is getting sufficient power by checking cable connections.
If the SSD is loose, not connected properly, or underpowered, it may not be detected accurately. Physically inspecting the installation can help troubleshoot boot issues.
Update SSD Firmware
SSD manufacturers periodically release firmware updates to fix bugs and improve performance. An outdated firmware version can sometimes cause detection issues. Check the manufacturer’s website for any available firmware updates.
The process for updating SSD firmware varies between manufacturers. Many provide a utility that can update the firmware from within Windows. If not, you may need to use a bootable USB drive for the update process. Refer to your manufacturer’s instructions.
Enable AHCI Mode in BIOS
Your motherboard’s SATA mode must be set to AHCI for an SSD to function properly. AHCI (Advanced Host Controller Interface) enables advanced SSD features like native command queuing.
Here are the steps for entering your BIOS and enabling AHCI mode:
- Restart your computer and press the BIOS key during bootup. This is usually F2, F12, or Delete.
- Navigate to the SATA settings.
- Change the mode from IDE to AHCI.
- Save changes and exit BIOS.
Enabling AHCI prevents errors from the SSD not being detected properly at boot.
Disconnect Other Disk Drives
If your computer has other internal disk drives connected like HDDs or optical drives, try removing those to get the SSD detected properly. Boot with only the SSD connected to the motherboard.
If the computer then detects the SSD correctly, reconnect devices one at a time to determine if one is interfering with detection. Try updating drivers for the other devices or connect them to different SATA ports.
Wipe Existing Disk Partitions
If your SSD is new without any partitions, or reusing a drive that was secure erased, you can skip this step. But if repurposing an existing SSD with leftover partitions, you may need to wipe the drive first before the computer can access it properly.
You can use diskpart in Windows to clean all existing partitions:
- Type diskpart in the Windows search box and open the DiskPart console.
- Enter list disk to view available disks. Identify your SSD’s disk number.
- Select your SSD by entering select disk # (replace # with your disk number)
- Enter clean to delete all partitions and format the drive.
- Enter create partition primary to create fresh partition space.
- Format the partition: format fs=ntfs quick
- Assign a drive letter: assign letter=X (use any letter)
- Enter exit to close DiskPart
With the disk wiped clean, the computer should now be able to detect it.
Initialize the SSD in Disk Management
The Disk Management utility in Windows can also prepare your SSD drive.
- Open Disk Management. Right-click the start menu and select it or search for it.
- The SSD should appear as an unknown drive. Right-click and select Initialize Disk.
- Select GPT partition style and check OK.
- Right-click unallocated space on the SSD and create a new simple volume.
- Go through the wizard to format and assign a drive letter.
This will make your SSD accessible to Windows if it was previously undetected.
Update or Reinstall Storage Drivers
Outdated, misconfigured, or corrupt chipset and storage drivers can prevent proper SSD detection. Updating drivers can often resolve the issue.
To update drivers in Windows:
- Open Device Manager.
- Expand Disk drives and Storage controllers.
- Right-click devices and select Update driver.
- Search automatically for updated driver software.
- Reboot the computer.
If updating does not work, try uninstalling the controllers/drivers and scanning for changes to reinstall them fresh. You can also visit your motherboard manufacturer’s website for the latest storage drivers.
Change SATA Port
If your motherboard has multiple SATA ports, try connecting the SSD to a different port than currently used. In some cases, one specific port may not detect the drive properly.
Also try using a different SATA data cable in case the cable is defective. Rule out any issues with ports or cables by swapping them out.
Enable Hot-plug Support
Hot-plug support in the BIOS allows SATA devices to be connected and detected while the system is running. Enabling hot-plugging may allow your SSD to be recognized without restarting.
To enable:
- Enter BIOS setup on boot.
- Locate the hot-plug or remapping settings for SATA.
- Enable support for hot-plugging/remapping.
- Save changes and exit BIOS.
Now try inserting the SSD while Windows is running to see if it detects the drive.
Initialize SSD Before Installation
For fresh installations, initializing the SSD beforehand can ensure it is detected smoothly:
- Connect only the SSD, no other drives.
- Boot from the Windows installer USB.
- Open Disk Management in the installer.
- Initialize the SSD, create a partition, and format it.
- Proceed with clean Windows installation.
With the SSD prepared in advance, Windows Setup should detect it automatically and install without issues.
Reseat Cables and Power Cycle
Sometimes the simplest hardware troubleshooting steps can resolve problems. Try reseating cables and power cycling the SSD:
- Disconnect data and power cables from the SSD.
- Check ends of cables for damage before reconnecting.
- Firmly reconnect data and power cables.
- Power down the computer and SSD.
- Start computer and SSD.
This resets connections and clears any errors that may interfere with detection. Do this for both internal and external SSDs.
Replace Cables and Ports
Faulty cables and ports can cause connectivity issues:
- Try a different SATA data cable if you have a spare.
- For desktops, change SATA ports on the motherboard.
- For laptops, test the SSD in another SATA bay if available.
- As a last resort, replace the SSD’s SATA-to-USB adapter if using externally.
Isolating the cables and ports determines if they are preventing drive communication. Replace any questionable cables or damaged ports.
Update BIOS
An outdated system BIOS can result in impaired SSD functionality. Motherboard manufacturers release BIOS updates to fix compatibility bugs.
To update the BIOS:
- Go to your motherboard supplier’s website.
- Find the product page for your specific motherboard.
- Search for the latest BIOS update files.
- Follow provided instructions to flash the BIOS.
Use caution when flashing the BIOS. A failed or interrupted update can brick the motherboard.
Troubleshoot SSD Not Detected During Installation
If your SSD is not showing up in the Windows installation process, here are some specific troubleshooting tips:
- Unplug all drives except the target SSD.
- Try a different SATA port and cable.
- Reset BIOS to default settings.
- Confirm SSD is getting sufficient power.
- Update motherboard storage drivers and firmware.
- Use manufacturer tools to secure erase SSD.
Retrying installation with minimal hardware attached helps isolate detection issues. Do not proceed until the SSD is recognized properly.
Take SSD to Computer Repair Shop
For difficult cases where the SSD still fails detection across multiple computers:
- The SSD itself may be defective.
- Professional diagnosis and tools may be required.
- Take the SSD to a qualified repair shop for assessment.
Tech repair specialists can evaluate the SSD hardware, run diagnostics, and determine if replacement is needed. Avoid wasting time on a faulty drive.
Contact Manufacturer Support
If you are still unable to get your computer detecting the SSD, contact the manufacturer’s technical support by:
- Calling support hotlines for troubleshooting assistance.
- Using online tech support chat to troubleshoot interactively.
- Submitting a support ticket online to document the issue.
The SSD maker’s experts can help pinpoint the cause and recommend advanced solutions like firmware reflashing or RMA. Provide detailed information to support fast resolution.
Replace the SSD
As a last resort when all else fails, you may need to replace the SSD entirely:
- Return or exchange the SSD if still under warranty.
- Buy a new comparable SSD from a different brand.
- Thoroughly test replacement before reinstalling OS and data.
While expensive and inconvenient, purchasing a fresh SSD can rule out any issues being inherent to the original drive. Change brands to avoid repeat problems.
Conclusion
Getting your computer to detect a new SSD properly involves systematically narrowing down connectivity, configuration and hardware faults. Moving step-by-step through software settings, cables, ports and physical installation will identify the underlying cause.
With SSDs becoming ubiquitous for primary storage, OS optimization and BIOS settings are tuned for compatibility. Seek help from the SSD maker if drive flaws are suspected. A functioning SSD will provide a speed boost immediately noticeable during boot, loading and multitasking.
| Troubleshooting Step | Details |
|---|---|
| Check physical installation | Inspect SATA connections, power, mounting |
| Update SSD firmware | Install latest firmware from manufacturer |
| Enable AHCI in BIOS | Switch SATA mode from IDE to AHCI |
| Disconnect other disks | Boot system with only target SSD attached |
| Wipe disk partitions | Use diskpart or Disk Management to clean disk |
| Update storage drivers | Upgrade motherboard Chipset, RAID drivers |
| Change SATA port | Test SSD on different motherboard SATA ports |
| Enable hot-plugging | Set hot-plug support in BIOS to detect on insert |
| Initialize in installer | Use Windows installer diskpart to prep SSD |
| Reseat cables, power cycle | Disconnect/reconnect data and power cables |