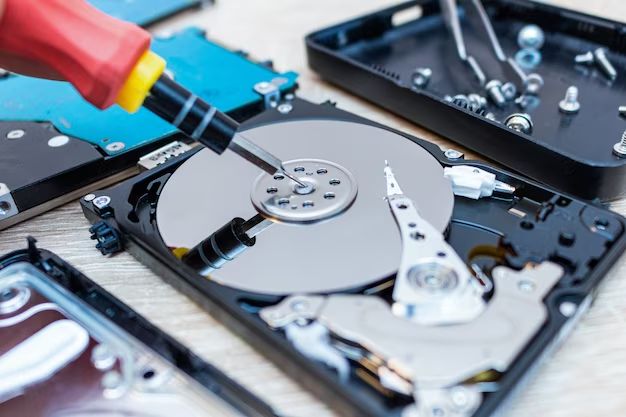
Diagnosing a broken hard drive can be a challenging task. Hard drives can fail for a variety of reasons, and pinpointing exactly what is wrong is the first step in determining if the drive can be repaired or needs to be replaced. In this 5000 word guide, we will walk through the steps for diagnosing common hard drive issues and determining the best course of action.
What are the common symptoms of a failing hard drive?
There are several symptoms that may indicate hard drive failure:
- The computer fails to boot up properly or boots to a black screen
- Files cannot be accessed or seem to be corrupted/missing
- Unusual noises come from the hard drive such as clicking, grinding or squealing
- The hard drive is slow to open programs and files
- Frequent computer freezes, crashes and error messages
- External hard drives or USB devices are not recognized when plugged in
If you are experiencing any of these issues, it’s quite possible you have a failing or broken hard drive. The next step is to run some diagnostic tests to confirm the cause of the problem.
Step 1: Run CHKDSK in Windows
The first thing you should do when troubleshooting hard drive errors in Windows is to run the CHKDSK utility. CHKDSK scans the drive for file system errors and bad sectors, and attempts to repair them. Here are the steps to run CHKDSK:
- Open the Command Prompt as an administrator.
- Type “chkdsk C: /f” (without quotes) and hit Enter. Replace C: with the letter of the drive you want to scan if not C: drive.
- Allow the CHKDSK scan to run. This may take some time depending on the size of the drive. When it’s finished, you’ll see a report.
- Reboot the computer and see if the problem persists.
If CHKDSK finds errors and is able to repair them, the issues may be resolved after a reboot. Sometimes, however, the drive damage may be beyond repair. If the errors persist, move on to testing the drive using diagnostics software.
Step 2: Test the drive using diagnostics software
Most hard drive manufacturers provide their own drive diagnostic tools, such as SeaTools for Seagate drives. Other universal options include:
- WD Data Lifeguard Diagnostic – Diagnostic tool from Western Digital for testing WD brand hard drives.
- Victoria for Windows – Free HDD and SSD diagnostics tool for Windows.
- HwInfo – Provides comprehensive system information including S.M.A.R.T. status of drives.
- Ultimate Boot CD – Bootable CD with many diagnostics including HDD tools.
To use these tools, you’ll boot into them from either a CD/DVD, USB drive, or use them within Windows. They perform a series of read/write tests on the drive and give a status report or SMART data to indicate drive health and bad sectors. Use the tools to scan any drive showing symptoms of failure.
Interpreting test results
Ideally the diagnostics will complete with no errors detected on the drive. But what if it detects problems? Some key things to look for:
- Read/write errors – The drive is having trouble reading or writing data, indicating physical problems.
- Bad sectors – Clusters of storage space that are damaged and unusable.
- Overheating – Drive is running hotter than normal operating temps.
- Slow response – Very slow read/write speeds compared to normal performance.
The results will help you determine if the drive is repairable or needs to be replaced. Even a small number of bad sectors may warrant replacement of the drive.
Step 3: Review S.M.A.R.T. status
S.M.A.R.T. (Self-Monitoring, Analysis and Reporting Technology) is a monitoring system built into hard drives that acts as an early warning for pending drive issues. S.M.A.R.T. monitors factors like drive temperature, read/write errors, bad sectors, head fly height and more.
Many drive diagnostic tools provide the S.M.A.R.T. data in their reports. You want to see a S.M.A.R.T. status of “OK” or “Pass”. Any attributes reporting as “Fail” mean the drive has already exceeded the threshold for that particular test.
Some utilities like HwInfo provide a simple visual representation of S.M.A.R.T. data with red indicating a failed test. This makes it quick and easy to identify potential warning signs of drive failure.
Using S.M.A.R.T. monitoring tools
In addition to S.M.A.R.T. reports from diagnostic tools, dedicated S.M.A.R.T. monitoring tools can give you an ongoing view of drive health. Some options include:
- CrystalDiskInfo – Free app that visualizes S.M.A.R.T. data and drive health.
- Hard Disk Sentinel – Provides in-depth drive health ratings and diagnostics.
- Macs Fan Control – Monitors S.M.A.R.T. data on Mac computers.
Use these utilities to periodically check up on your drive’s S.M.A.R.T. results. Trending negative results over time can warn you of a potential drive failure before it happens.
Step 4: Check connections and cables
Before condemning a misbehaving hard drive as failed, it’s worth checking all physical connections to rule out loose cables or interface issues:
- Power cable – Remove and reseat the drive power cable on both ends.
- Data cable – Reconnect the data cable securely and try a different cable if possible.
- Ports – Try connecting the drive to a different SATA or USB port if applicable.
Also check for any signs of damage to the connection ports or cables themselves. A faulty cable can exhibit similar symptoms to a broken drive. If connection issues are ruled out, the drive itself is likely causing the problems.
Step 5: Check for drive overheating
Overheating is a common cause of hard drive failure. Excessive heat causes physical breakdown of drive components including head reader failure and seizure of moving parts. Thermal monitoring is part of S.M.A.R.T. data, but you can also manually check drive temperature in several ways:
- Use the diagnostics tools mentioned above to report drive temperature.
- Feel along the drive casing and listen for fan noise indicating an overheated drive.
- Use SpeedFan or other hardware monitoring software to check reported temperatures.
If your drive is running hotter than the optimal range (up to 60°C for HDDs and up to 70°C for SSDs), take steps to improve cooling:
- Make sure the computer case and drive bay have adequate airflow and fans.
- Try repositioning or remounting the drive to improve airflow.
- rule out thermal issues like a failing fan or blocked vents.
This may resolve temperature-related failures, but the drive should be closely monitored going forward.
Step 6: Attempt data recovery
If the drive has failed, attempt to recover any critical data before removal if possible. Recovering data from a drive with hardware failure requires specialized tools designed not to further damage the drive. Some options include:
- SpinRite – Repairs damaged sectors and extracts data from problematic drives.
- ddrescue – Powerful open source data recovery tool for Linux/Unix.
- Data Rescue – Data recovery platform for Mac and Windows.
- Ontrack EasyRecovery – Advanced commercial recovery tool for lost and deleted files.
These tools can copy data from inaccessible areas of a failing drive provided there is no catastrophic physical damage. This allows you to back up important files before the drive completely dies.
Send drive to recovery service
For drives with major mechanical failure or other physical damage, you may need to turn to a professional data recovery service. Companies like DriveSavers and Gillware possess specialized tools and cleanroom facilities to repair and recover data from drives with significant damage. This route is expensive but may be your last resort for recovering business or personal data from a dead drive.
Step 7: Replace the hard drive if necessary
Once you have exhausted all options for repairing or recovering data from the faulty hard drive, replacement is the only option if you want to continue using the computer system. Here are some best practices when swapping out a dead drive:
- Buy a compatible replacement – Match the drive interface (SATA, IDE, etc), storage capacity, and physical size as closely as possible.
- Clone old drive first – Use drive cloning software to copy data or create an image backup before removing old drive.
- Securely erase old drive – If not cloning, use software like DBAN to fully erase data before disposal.
- Physically install new drive – Follow manufacturer instructions for drive removal and replacement.
- Partition and format new drive – Configure the blank replacement drive to be usable by the operating system.
- Restore data backups – If drive was not cloned, restore data backups to complete the recovery.
Choosing a replacement from the same manufacturer and product line provides the closest match and highest chance of compatibility with your computer. Follow best practices for safe drive disposal once the data has been migrated to the new hardware.
Conclusion
Diagnosing hard drive failure can be a complex process requiring multiple steps. Typical problems like bad sectors, physical damage, and overheating can often be detected through S.M.A.R.T. monitoring tools and disk diagnostics suites. If the drive is still accessible, recovering valuable data should be prioritized before replacing damaged hardware. With the right diagnostic approach, you can quickly identify, verify and respond to signs of hard drive failure.