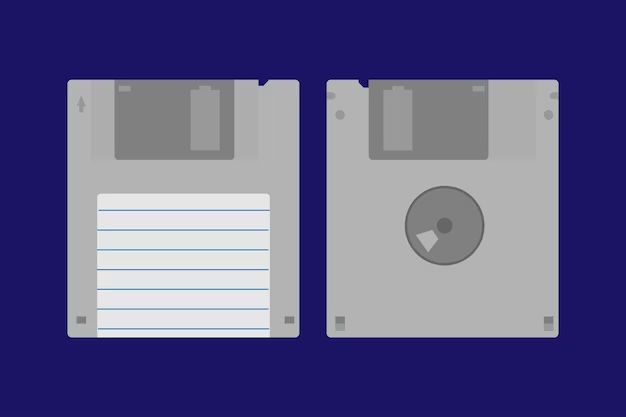
Floppy disks have an interesting history in computing. First introduced in the early 1970s, floppy disks were the primary portable storage medium for personal computers throughout the 1980s and 1990s. The floppy disk was nicknamed for its flexibility and originally designed to be portable and reusable. The first floppy disks were 8-inches in diameter, with smaller 5.25-inch and 3.5-inch versions becoming popular later on.
DOS, which stands for Disk Operating System, was the operating system used on most IBM compatible personal computers in the 1980s and early 1990s. To prepare a new floppy disk for use on a DOS-based computer, the disk needs to be formatted. Formatting sets up the disk with the file system DOS requires and prepares it to store files. The formatting process can be done quickly, or more thoroughly by checking for bad sectors. This guide will walk through the steps for formatting floppy disks using DOS.
Materials Needed
The materials needed to format a floppy disk in DOS are relatively simple. You will need the following:
- Floppy disk – The most common floppy disk sizes used with DOS are the 51⁄4-inch and 31⁄2-inch formats. The 51⁄4-inch disks typically have a 360 KB storage capacity, while the 31⁄2-inch disks store up to 1.44 MB of data. Ensure you have an unused, blank floppy disk.
- Computer capable of running DOS – DOS requires an x86-compatible processor like the Intel 8086 through 80486 or compatible CPUs from AMD and others. You’ll also need a floppy disk drive, 16 MB of RAM minimum, and VGA graphics or better.
As long as you have a blank floppy disk and a PC that can run DOS, you should have everything you need to get started with formatting the disk. It’s also a good idea to back up any data you want to save before formatting since the process will erase all data on the disk.
Back Up Important Data
Before formatting a floppy disk, it is crucial to back up any important data stored on the disk. The formatting process will erase all existing files and make them unrecoverable. According to this source, you’ll need a one-to-one duplicate of the disk. Don’t just copy the files; make an exact duplicate that stands an equal chance of failing as the original.
To back up the data on a floppy disk:
- Insert the floppy disk you want to back up into the floppy drive.
- Open File Explorer and navigate to the floppy drive.
- Select all files and folders on the floppy disk.
- Copy them to another storage device, such as your computer’s hard drive or an external drive.
- Use disk imaging software to make an exact duplicate of the entire floppy disk.
Only once you have safely backed up all data should you proceed with formatting the floppy disk. Formatting will wipe out all existing files, so this backup step is essential.
Open the DOS Command Prompt
To access the DOS command prompt in early versions of Windows like Windows 95/98/ME, click Start and go to Programs -> MS-DOS Prompt. This will open the command prompt window.
In later versions of Windows like XP, Vista, 7, 8, and 10, you can access the command prompt by clicking Start and typing “cmd” in the search box. Select the “Command Prompt” desktop app to open it.
You can also use the Windows + R keyboard shortcut to open the Run dialog box, type “cmd”, and click OK or press Enter. This provides a quick way to launch the command prompt on any version of Windows.
Additionally, Windows 10 provides multiple ways to access the command prompt, such as right-clicking the Start button or pressing Windows+X and selecting “Command Prompt” or “Command Prompt (Admin)” (Source).
Regardless of the Windows version, running the command prompt as administrator provides full access to the system. Right-click Command Prompt and select “Run as administrator” if elevated privileges are needed.
Verify the Floppy Drive
Before formatting the floppy disk, you’ll want to verify which drive letter is assigned to the floppy drive. This can be done using the DIR command in DOS.
Type “DIR A:” (without quotes) and hit Enter. If you see the contents of the floppy disk listed, then A: is the correct drive letter. If not, try “DIR B:” and so on until you find the correct drive letter.
For example:
C:\>DIR A:
Volume in drive A has no label
Directory of A:\
HELLO TXT Peter 411 2019-03-14
2 File(s) 411 bytes
This confirms that the floppy disk is drive A:.
Knowing the correct floppy drive letter is crucial before formatting to avoid accidentally formatting the wrong drive.
Format Command
The FORMAT command in DOS is used to format floppy disks. The basic syntax is:
FORMAT drive: [/FS:filesystem] [/V:label] [/Q] [/U] [/C]
Where:
- drive: is the floppy drive letter you want to format (typically A: or B:)
- /FS:filesystem specifies the file system type like FAT12 or FAT16
- /V:label sets the volume label for the disk
- /Q performs a quick format that just writes a new file system without scanning for bad sectors
- /U performs an unconditional format and erases all previous data
- /C verifies write operations during format to find bad sectors
For example, to do a full format of the A: floppy drive with FAT16 and the volume label ‘MYDISK’ you would use:
FORMAT A: /FS:FAT16 /V:MYDISK
To do a quick format of B: with FAT12 and no label:
FORMAT B: /FS:FAT12 /Q
The FORMAT command overwrites all existing data on a floppy disk. So make sure to back up any files you want to keep before formatting a disk.
Perform Quick Format
Quick formatting a floppy disk will erase any data currently on the disk by removing the file allocation table and directory structure. However, it does not fully scan and verify each sector. This makes quick formatting faster, but less secure in erasing previous data. Here are the steps to quick format a floppy disk in DOS:
1. At the DOS command prompt, type “format A: /Q” without the quotes and press Enter. Replace A: with the drive letter of your floppy drive if different.
2. You will be prompted to confirm formatting the disk. Type “Y” and press Enter to begin quick formatting.
3. The formatting will only take a few seconds. When complete, DOS will report “Format complete” and return to the command prompt.
The /Q parameter tells the FORMAT command to perform a quick format. This skips the full sector-by-sector scan and simply writes a new file table and directory. It provides no security in erasing previous data, but completes much faster.
Source: How to Format a Floppy Diskette
Perform Full Format
A full format will completely erase all data and sectors on the floppy disk. Here are the steps to perform a full format in DOS:
- Open the DOS command prompt.
- Type the following command and press Enter:
format a: /full - DOS will prompt you to insert a disk into drive A. Insert the floppy disk you want to format.
- DOS will warn you that all data on the disk will be lost. Type Y and press Enter to confirm.
- The full format will now start. This may take several minutes to complete.
- When done, DOS will display “Format complete.” The disk is now fully formatted.
A full format scans the entire disk for bad sectors and marks them to prevent future use. This results in a thoroughly formatted floppy disk, but the process takes longer than a quick format. Use this when you want to completely erase and reformat a floppy disk.
For more details, refer to the following sources:
[1] How to Format a Floppy Disk
[2] How to Format a Floppy Diskette
Format Bad Sectors
Bad sectors are areas on a floppy disk that can no longer reliably store data due to damage or manufacturing defects. They can cause read/write errors and data loss. To detect bad sectors on a floppy disk in DOS:
1. Open the DOS command prompt and navigate to the drive containing the floppy disk.
2. Type “CHKDSK /F” and press Enter. This will scan the disk and detect any bad sectors.
To format out the bad sectors:
1. Use the “FORMAT” command with the /U parameter. For example: “FORMAT A: /U” will perform an unconditional format on drive A:, marking all sectors as available.
2. The /U parameter will erase any bad sector markings and allow them to be reused. However, this doesn’t repair the physical damage on the disk. The bad sectors could still cause errors when writing new data.
3. Consider low-level formatting the disk if the bad sectors persist. But this still may not fix physical defects. It’s best to discard floppy disks with multiple bad sectors.
References:
http://www.dosdays.co.uk/topics/format_floppy.php
Closing Thoughts
In summary, formatting a floppy disk in DOS requires a few simple steps. First, back up any important data and open the DOS command prompt. Verify the floppy drive letter, and use the FORMAT command along with the drive letter to start the formatting process. You can choose between a quick format and a full format, with the full format being better for removing any bad sectors.
When formatting a floppy disk, keep in mind that the process erases all existing data, so be sure to save your files elsewhere first. Performing a full format versus a quick format takes longer but helps ensure the disk is completely blank and any errors are mapped out. Formatting floppy disks was common in the DOS days and remains a useful skill for maintaining these disks today.