Having a system repair disk can be invaluable if you ever need to troubleshoot or recover your computer. System repair disks allow you to boot your computer, access system recovery tools, and repair or restore Windows if something goes wrong. While system repair disks have traditionally been created on CDs or DVDs, it is possible to create one on a USB drive, which offers greater convenience and flexibility. In this article, we’ll look at what system repair disks are, why you may want to create one, and how to make a system repair disk on a USB drive in Windows 10.
What is a System Repair Disk?
A system repair disk, sometimes called a recovery disk or rescue disk, is a bootable disk that contains Windows system recovery tools. It allows you to start up your computer from the disk rather than the hard drive. This enables you to access system recovery options to diagnose and fix problems like startup issues or system file corruption. The system repair disk contains a number of built-in diagnostics and repair utilities from Windows.
Some key capabilities provided by a system repair disk include:
- Boot into the Windows Recovery Environment – This provides advanced startup options to troubleshoot or fix boot issues.
- Restore system files – The disk can be used to restore original system files that may be damaged or missing.
- Access useful diagnostic tools – Such as System File Checker, memory diagnostics, Command Prompt for advanced troubleshooting.
- Refresh or reset Windows – Options to refresh your PC and reinstall Windows while retaining files.
- Backup files – The Windows backup utility provides a way to backup personal files.
Having a system repair disk allows you to access these tools from outside your main Windows installation to diagnose and recover from serious system problems. It offers an invaluable resource if you ever need to troubleshoot or fix a computer that won’t start correctly.
Why Create a System Repair Disk?
There are a few key reasons why it can be useful to create a system repair disk:
- Recovery option when Windows won’t start – If Windows becomes corrupted or damaged and won’t start properly, a system repair disk allows you to boot into the recovery environment to troubleshoot and fix startup problems.
- Access recovery tools easily – All the system recovery utilities are consolidated on one disk, allowing easy access to them.
- Diagnosing system files or hard drive issues – Tools like System File Checker allow you to diagnose and restore damaged system files.
- Backup personal files – The backup utility provides a way to backup and recover personal files.
- Fresh start for Windows – You can reset Windows to a clean state in case of software corruption or conflicts.
Having a repair disk created in advance eliminates the need to find installation media or make recovery drives later when you’re under pressure with a non-working PC. Overall, it serves as an insurance policy against future problems by giving you the tools to diagnose and fix issues on your own.
Creating a System Repair Disk in Windows 10
Fortunately, Windows 10 makes it easy to create a system repair disk. Here are the steps to make one:
- Insert a USB flash drive with at least 16GB of space into your computer.
- Type “Create a recovery drive” in the Windows search box and select the result.
- In the Recovery Drive window, make sure Back up system files to the recovery drive is checked.
- Select your plugged-in USB drive, then click Next.
- Review the disclaimer, then click Create.
- Allow the creation process to complete. This may take 10-20 minutes.
Once complete, you now have a bootable system repair disk on your USB drive that provides access to Windows recovery tools.
Using Advanced Options
When creating your recovery drive, you can utilize advanced options for additional capabilities:
- Backup System Image – This option backs up your full system image to the disk, allowing complete restore.
- Include manufacturer files – Includes any custom recovery partitions from your PC manufacturer.
- Copy network drivers – Adds network drivers to allow internet access from recovery environment.
Using these options provides for more comprehensive recovery capabilities from your disk. Just be aware, utilizing these will take up more space on your USB drive.
Booting from the System Repair Disk
When you have system problems, you’ll need to boot your computer from the repair disk to access the recovery tools:
- Insert your system repair disk USB drive into the computer.
- Restart your computer. A “Press any key to boot from external device” message may appear.
- Select your USB drive as the boot device if prompted. This may require changing the boot order or selecting a boot menu option to choose the USB drive.
- The Windows Recovery Environment will load, providing access to system recovery tools.
If Windows is failing to start properly, booting from your repair disk is often the first step in diagnosing and fixing the underlying problem.
Using System Recovery Tools
Once you’ve booted from the recovery disk, some of the useful system tools at your disposal include:
- Startup Repair – Automatically fixes common startup issues.
- System Restore – Reverts system files and settings to an earlier restore point.
- Windows Memory Diagnostic – Checks for memory hardware errors.
- Command Prompt – Advanced troubleshooting and repair using command line tools.
- System File Checker – Scans system files and replaces corrupted files.
- Reset/Refresh Windows – Options to reinstall Windows and retain or remove apps and files.
These utilities all provide ways to help identify, diagnose and repair different problems.
Tips for Using System Repair Disks
Here are some useful tips for getting the most out of system repair disks:
- Create the disk as soon as you setup a new computer for easy access when needed.
- Store the disk in a safe place separate from your computer.
- Use a high quality USB drive – Avoid cheap low storage USB drives.
- Create an updated repair disk every 6-12 months or after major Windows updates.
- Familiarize yourself with the recovery tools when computer is healthy.
- Use Advanced startup options if the disk won’t boot at first.
- Backup important data regularly in addition to system images.
Following these tips will help ensure you have a reliable system repair disk available and know how to effectively use it when needed.
Frequently Asked Questions
Is a system repair disk the same as a Windows installation USB?
No, a system repair disk is not the same as installation media. Installation USBs are used for installing Windows from scratch on a blank PC or hard drive. A system repair disk contains utilities for recovering an existing Windows installation by providing access to diagnostic and recovery tools.
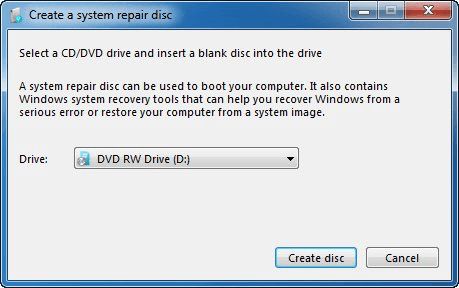
Can I create a system repair disk on other devices like an external hard disk or DVD?
Yes, you can create a system repair disk on DVDs or external USB hard drives. However, using a USB flash drive offers greater portability, convenience and flexibility compared to optical discs. USB drives also provide faster data transfer speeds.
What should I do if the system repair disk won’t boot?
If your computer doesn’t boot from the USB disk, you can try changing the boot order in BIOS. Also, use the Advanced Startup Options in Windows 10 which provide more troubleshooting options to boot from the drive. Checking for UEFI vs. Legacy boot mode mismatches can also help get the disk to boot properly.
Is a system repair disk enough to fully reinstall Windows?
No, a system repair disk does not contain full Windows installation files. It is not designed as a replacement for Windows installation media. It includes recovery utilities to help fix Windows issues and repair an existing corrupt installation but cannot install Windows from scratch.
How is a system image backup different from a system repair disk?
A system image is a complete backup copy of everything on your hard drive including Windows and your programs and files. A system repair disk contains just recovery utilities and is much smaller. Having both a repair disk and system image backup provides both recovery tools and a full backup option.
Conclusion
Having a system repair disk provides an invaluable resource to fix problems when Windows won’t startup properly. Creating one on a USB drive offers added convenience and portability over optical discs. While the process is straightforward in Windows 10, getting familiar with the various recovery tools included on the disk allows you to fully utilize its capabilities. Combined with comprehensive backups, a repair disk should be part of any computer maintenance plan to minimize downtime and give you confidence you can recover should problems arise.