Yes, you can delete VHD files. VHD stands for Virtual Hard Disk and it is a file format used to represent a virtual hard disk drive (HDD). VHD files are commonly used with virtualization platforms like Microsoft Hyper-V and VMware to create virtual machines.
When you create a virtual machine, a VHD file is generated to represent the virtual hard drive for that VM. The VHD file contains the operating system, applications, and data associated with that virtual machine. Just like a physical hard drive, a VHD file takes up space on the physical storage of the hypervisor server or cloud platform.
There are a few reasons you may want or need to delete a VHD file:
- You no longer need the virtual machine – If you delete the VM itself, the VHD file will remain behind taking up space. You need to manually delete the VHD file as well.
- You are troubleshooting VM issues – Sometimes deleting the VHD and recreating the VM can resolve corruption or other issues.
- You need to free up space on the storage volume – Deleting unused or unneeded VHDs can recover significant storage capacity.
- Regulatory compliance or data privacy requirements – You may need to permanently delete VHDs containing sensitive data.
The process for deleting a VHD file will vary depending on the virtualization platform. But in general, it just involves locating the VHD file and deleting it like any other file.
However, there are some important caveats to be aware of when deleting VHD files:
Caveats When Deleting VHD Files
- Make sure the VM is fully shut down first – Deleting an attached or mounted VHD can lead to data corruption.
- Watch out for differencing disks – Some VM setups use multiple VHDs linked together, so deleting the parent disk may orphan others.
- Verify backups – Accidentally deleting the wrong VHD can be disastrous without good backups.
- Detach from hypervisor first – Storage spaces like Hyper-V often lock VHD files until the VM is detached or deleted.
- Empty vs. quick delete – Make sure the VHD is fully erased if it contained sensitive data.
As long as you power down the VM, properly disconnect the VHD file, and double check you are deleting the correct one, deleting VHDs is straightforward. The rest of this article provides more details on safely deleting VHDs on common virtualization platforms.
Deleting VHDs on Hyper-V
Hyper-V is Microsoft’s native virtualization technology included for free in Windows. Here is how to properly delete VHD and VHDX files in Hyper-V:
- Shut down the VM associated with the VHD file completely
- In the Hyper-V Manager, right-click the VM and select Remove. This will disconnect the VHD file(s).
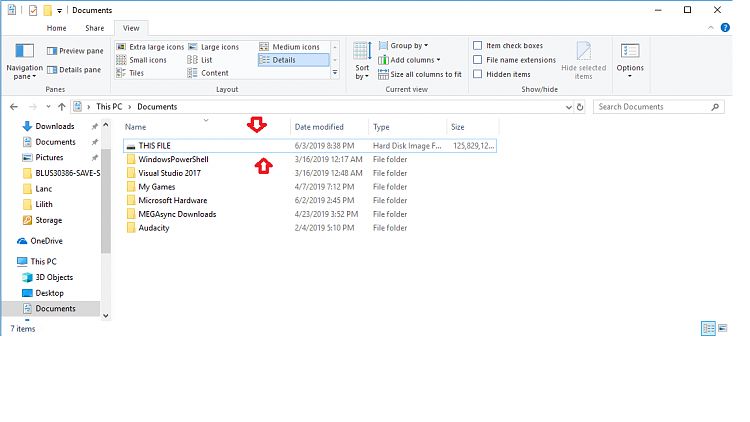
- Navigate to the folder containing the VHD file and delete it like any normal file.
The VHD file will be located in the directory designated for that VM’s hard disks under Hyper-V’s settings. This is often something like:
C:\Users\Public\Documents\Hyper-V\Virtual Hard Disks
Be careful not to delete the wrong VHD if a VM has multiple virtual disks. Also keep in mind the differencing disk caveat above.
Once disconnected from the VM, the VHD file can be deleted like any normal file. But make sure data is fully erased if the VHD contained sensitive information.
Force Delete VHDs Locked by Hyper-V
Sometimes Hyper-V will lock or refuse to release a VHD file even after the VM is deleted. In that case, you can force delete the VHD with these steps:
- Open Command Prompt as Administrator
- Run diskpart to open DiskPart
- Type “list volume” to see volumes
- Select the volume with the locked VHD using “select volume #”
- Type “detach vdisk” to force detach any locked VHDs
- Exit DiskPart
- Navigate to VHD location and delete normally
This will override any locks Hyper-V has on the VHD so it can be deleted.
Deleting VHDs on VMware vSphere
Here is how to properly delete VHD and VMDK virtual disk files on VMware vSphere hypervisors:
- Power down the VM completely in vCenter or ESXi
- Right-click VM and select Delete from Disk option
- If VM has multiple virtual disks, select the checkbox for each VMDK to delete
- Confirm deletion in popup
This will disconnect the VMDK files from the VM configuration. Then to fully delete the VMDK files:
- Browse to the VMDK file location, usually a datastore folder
- Right-click the VMDK file and select Delete
- Confirm deletion in popup
The VMDK file location will depend on where the VM’s storage was provisioned from. vSphere allows datastore browsing to easily find deleted VMDK files.
Again be very careful to only delete the intended VMDK disk files. Accidentally deleting the wrong ones can make recovering that VM difficult.
Deleting VMDKs from the CLI
Deleting virtual disks from the ESXi shell or vSphere CLI provides more options for secure deletion.
To delete a VMDK from the ESXi shell:
- Shut down the VM
- Log into the ESXi host directly
- Navigate to the VMDK folder
- Run: esxcli storage vmfs datastore rm -f diskname.vmdk
This will perform a standard delete. To do a secure delete:
- Run: esxcli storage vmfs datastoresrm -f diskname.vmdk
The esxcli vsphere storage core adapter commands also provide advanced deletion options.
Deleting VHDs on Azure
Azure provides several methods to delete VHD files from managed disks and storage accounts:
Delete Managed Disks
- Delete the VM but keep disks
- Go to Managed Disks service
- Select the disk and click Delete
- Confirm deletion
This detaches and deletes the managed disk VHD file.
Delete Unmanaged Disks
- Delete the VM but keep disks
- Go to old Storage Accounts service
- Find the storage container holding the VHD
- Select the VHD and click Delete
- Confirm deletion
This deletes VHDs uploaded or created as unmanaged disks.
Delete Using Azure CLI
You can also use the Azure CLI to delete managed or unmanaged disks:
- az disk delete -g RESOURCEGROUP –name DISKNAME
- az storage blob delete -c CONTAINER -n VHDNAME
The Azure CLI provides the most flexibility for advanced deletion of VHDs.
Deleting VHDs on Google Cloud Platform
Google Cloud VMs use persistent disks represented by boot and data disk images. To delete these VHD equivalents:
- Delete the VM instance
- Go to Compute Engine Disks section
- Select the disk and click Delete
- Confirm deletion in popup
This will delete any persistent boot and data disks no longer attached to a VM.
You can also use the gcloud CLI:
- gcloud compute disks delete DISKNAME –zone ZONE
Overall the process is very similar across platforms – shut down the VM, detach the VHD, then delete it like any normal file.
Securely Deleting VHD Files
When deleting VHD files that contained sensitive data, you want to make sure the data is fully erased and unrecoverable.
Simply deleting the file normally will not actually overwrite the data. The area on disk is just marked as deleted and available for reuse. Data recovery software could restore deleted VHD files.
To prevent this, use a secure delete tool or option that overwrites the VHD space before de-allocating it. On Windows, this might look like:
- Use SDelete tool with -s option
- Run cipher /w command on the VHD file
On Linux, use shred, srm or wipe tools. Storage arrays and cloud platforms may also provide disk scrubbing or erasure options.
Secure deletion takes longer but is essential for containing sensitive data. Make sure any wiped VHD space is fully overwritten at least once with random data.
Recovering Deleted VHD Files
If you accidentally deleted the wrong VHD file or need to recover it, act quickly. The longer you wait the lower the chances of recovery.
First, avoid writing any new data to the storage volume that could overwrite the VHD contents. Then try one of these recovery methods:
- Recover from backup – Use VM backups or snapshots to restore deleted VHDs.
- Undelete tools – Software like Recuva can restore recently deleted files.
- Scan disk – Scan the volume for recoverable files.
- Volume shadow copy – Restore previous versions on Windows.
- File carving – Forensic tools can scan disk and reconstruct files.
If the VHD was securely overwritten, however, forensic file recovery becomes difficult or impossible. This is a good reason to always have solid VM backups before deleting VHDs.
Conclusion
Here are some key tips for properly deleting VHD files:
- Always power down the associated VM first
- Double check you are deleting the correct VHD
- Use drive unlocking tools if the file is locked
- Leverage CLI tools for advanced delete options
- Make sure data is fully overwritten if confidential
- Have backups available to recover deleted VHDs
With proper care taken, deleting VHDs is straightforward. Just be cautious, plan ahead, and leverage the right tools for permanent secure deletion when required.
Frequently Asked Questions
Can I delete VHDX files the same as VHD?
Yes, VHDX is a newer version of VHD disk format but deleting them works the same way. The steps above apply equally to VHDX. Just be sure to delete the correct VHDX file if the VM has multiple virtual disks.
Is deleting VHDs permanent?
Deleting a VHD file normally is not permanent – the data still exists on disk until overwritten by new data. To permanently delete a VHD, you need to use a secure delete tool to overwrite the data. Otherwise, deleted VHD files could still be recovered.
Can I recover a deleted VHD file?
If a VHD was recently deleted and has not been overwritten, recovery is often possible using undelete tools. But the chances decrease significantly over time. To ensure you can recover deleted VHDs, maintain regular backups.
Is it better to leave orphaned VHDs?
In general no, orphaned VHD files that are no longer needed take up valuable storage space. It’s better to identify and properly delete them. However, orphan VHDs can be useful for troubleshooting and data recovery if properly labeled.
How do I free up space from VHDs?
Deleting unnecessary or orphaned VHD and VHDX files is the most direct way to recover storage capacity on VM hosts and cloud storage. Securely wiping the VHD contents before deletion provides the most space reclamation.
VHD File Deletion Checklist
Here is a checklist covering the key steps to properly delete a VHD or VHDX file:
| – [ ] Shut down associated VM |
| – [ ] Disconnect VHD within hypervisor |
| – [ ] Verify correct VHD before deletion |
| – [ ] Check for differencing disks |
| – [ ] Use force detach if VHD locked |
| – [ ] Securely wipe data before deletion |
| – [ ] Have backups in case of accidental deletion |
| – [ ] Optionally scan volume to ensure deletion |
Following this checklist carefully will prevent issues and ensure safe, permanent deletion of VHD files when required.