iTunes can be a useful tool for troubleshooting and fixing certain issues with your iPhone. Connecting your iPhone to iTunes and restoring or updating it can resolve many common software-related problems. However, there are limitations to what iTunes can fix, and some issues will require taking your device to an Apple store or repair shop. Keep reading for quick answers on using iTunes to fix iPhone problems.
Quick Answers
Can I fix my iPhone if it won’t turn on?
If your iPhone won’t power on, there are a few fixes you can try through iTunes:
– Connect your iPhone to your computer and open iTunes. Force restart your iPhone by pressing and quickly releasing the Volume Up button, then pressing and quickly releasing the Volume Down button, then press and hold the side button until you see the Apple logo. This may allow your iPhone to turn on so iTunes can communicate with it.
– In iTunes, try restoring your iPhone by going to the Summary page, clicking Restore iPhone, and following the on-screen instructions. This will reinstall the latest iOS software, which may resolve software-related power issues.
– If neither method works, the issue likely requires hardware repair. Visit an Apple store or authorized service provider.
Can I fix an iPhone that’s stuck in a reboot loop?
If your iPhone keeps restarting over and over, try restoring it through iTunes:
– Connect your iPhone to your computer and open iTunes. Force restart your iPhone. When the Apple logo appears, hold down the Volume Up button to prevent it from restarting again.
– In iTunes, restore your iPhone by going to the Summary page, clicking Restore iPhone, and following the on-screen instructions. This will reinstall the latest iOS version and overwrite any corrupted software causing the reboot loop.
– If the reboot loop persists, there may be a hardware issue requiring you to visit an Apple store or repair shop. Restoring will likely not fix a hardware problem.
How do I fix an iPhone with a black screen?
If your iPhone screen is black but it still turns on, try these iTunes fixes:
– Connect your iPhone and perform a force restart. This may resolve temporary software glitches causing the black screen.
– In iTunes, restore your iPhone to reinstall iOS. This will overwrite any corrupted software that could be causing screen issues.
– If neither fixes the problem, the black screen is likely due to a hardware problem that will need professional repair. iTunes cannot resolve physical display issues.
Can I fix an iPhone that’s stuck on the Apple logo screen?
If your iPhone gets stuck on the Apple logo during start up:
– Force restart your iPhone, then hold down the Volume Up button after restarting to prevent it getting stuck again.
– Restore your iPhone through iTunes to reinstall the operating system. This should resolve any software bugs causing the glitch.
– If the Apple logo still appears frozen, there is likely a hardware issue. You will need to take it to the Apple store or an authorized repair center. iTunes cannot fix hardware failures causing this problem.
Restoring your iPhone through iTunes
The most common fix you can attempt using iTunes is called a restore. Restoring erases your iPhone and reinstalls the latest iOS version. This can resolve many software-related issues and should be one of your first troubleshooting steps.
Here are the steps to restore your iPhone through iTunes:
1. Connect your iPhone to your computer using the charging cable. Open iTunes.
2. Click on your iPhone icon in the top left corner of the iTunes window.
3. On the Summary page for your device, click Restore iPhone. This should be near the Check for Update button.
4. A window will pop up asking you to confirm the restore. Click Restore again to confirm.
5. iTunes will download the latest iOS software version and reinstall it on your device. This process can take 10-15 minutes or longer. Don’t unplug your iPhone.
6. After the restore completes, you can set up and use your iPhone as new or restore a backup to reinstall apps and data.
Restoring your iPhone through iTunes will wipe all contents and settings. Be sure to back up your device beforehand using either iTunes or iCloud so you don’t lose data.
When to Restore Your iPhone
Try restoring your iPhone through iTunes if you experience these common software-related issues:
– Random crashes, freezes, or restarts
– iPhone stuck on Apple logo, reboot loop
– Black screen, display problems
– Errors updating or syncing iPhone
– Laggy performance, bugs, glitches
– Continued pop-up messages
– Problems connecting iPhone to WiFi, Bluetooth
Restoring can resolve these problems by completely reinstalling iOS. It’s one of the best software troubleshooting steps before seeking hardware repairs.
Limitations of Restoring iPhone
While restoring your iPhone through iTunes can fix many issues, it has some limitations:
– Physical damage – Any problem caused by actual hardware failure cannot be resolved through restoring. This includes issues like cracked screens, speaker damage, battery failure, etc. These must be repaired physically.
– Third-party app issues – If problems are caused by a buggy third-party app, restoring may not fix it. The app may continue to cause conflicts after being reinstalled from a backup. Try deleting problematic apps before restoring.
– Some settings reset – Restoring will return all settings back to default, so you’ll lose any customized settings like wallpaper, Control Center configuration, etc. You can reconfigure these after restoring.
– Data loss if no backup – All content and data will be erased unless you have a current backup through iTunes or iCloud. Back up beforehand.
Keep these limitations in mind. For physical damage or hardware failure, visit an Apple Store or repair shop instead of attempting to resolve through iTunes restoring.
Updating an iPhone through iTunes
In addition to restoring, you can also update your iPhone software through iTunes. Updating installs the latest iOS version while keeping your data and settings intact.
Here are the steps to update an iPhone through iTunes:
1. Connect your iPhone to computer and open iTunes.
2. Click your iPhone icon in the top left of the iTunes window.
3. On the Summary page, click Check for Update.
4. iTunes will search for the newest iOS version compatible with your device. Click Download and Update if prompted.
5. Agree to the Terms and Conditions. The update will download and install automatically. Do not unplug the device.
6. The update usually takes around 15-20 minutes. Your iPhone may restart a few times during the process.
7. When complete, iOS will be updated to the latest version and you can use your iPhone.
When to Update an iPhone
Updating your iPhone through iTunes is recommended in these situations:
– Minor bugs or performance issues
– Lockups, freezes, or mild software problems
– New iOS update available notification
– Preparing to sell or give away your iPhone
– Resolve small glitches before they become big problems
Updating is a more mild fix than restoring. It’s good for minor issues, while major problems typically require a full restore.
Limitations of Updating iPhone
While updating your iPhone can improve stability, there are some limitations to consider:
– Won’t resolve major software problems – Severe crashes, bugs, or glitches usually require a full restore rather than just updating.
– No change to physical damage – Updating iOS does not fix any existing hardware issues like a cracked screen.
– Potential app incompatibility – Very old apps may not work properly on the new iOS version. Check for app updates after updating.
– Some settings reset – Updating can revert some customized settings back to default. You’ll need to reconfigure them.
– Requires latest iTunes – Make sure you have the most up-to-date iTunes version installed to update properly.
Keep these limits in mind. For any major iPhone problems, a full restore is typically more effective than an update alone.
Backing Up and Restoring from a Backup
Before attempting any major fixes through iTunes, back up your iPhone. This preserves your data, settings, and content.
You can back up your iPhone through either iTunes or iCloud.
To backup through iTunes:
1. Connect your iPhone to computer and open iTunes.
2. Click your iPhone icon in iTunes.
3. On the Summary page, click Back Up Now under Manually Back Up and Restore.
4. Choose Encrypted or Unencrypted backup and click Back Up.
5. Wait for the backup to complete before restoring iPhone or updating iOS.
To restore from a backup after fixing your iPhone:
1. In iTunes after restoring your iPhone, select your device.
2. On the Summary page, click Restore Backup under Automatically Back Up.
3. Select the desired backup and click Restore to reinstall apps, data, and settings.
iCloud Backups
You can also use iCloud to back up and restore your iPhone through the cloud instead of iTunes. Enable iCloud Backup in your iPhone Settings app. It will automatically backup daily when connected to WiFi and power.
To restore from an iCloud backup, simply erase your iPhone and choose Restore from iCloud Backup when setting up the device again. Sign in with your Apple ID and password and choose the desired backup.
Encryption
For optimal security, use encrypted backups through iTunes or enable encryption for iCloud backups. This protects sensitive information like passwords, health data, and more by scrambling the information so it can only be accessed with your passcode.
To enable encrypted iTunes backups, check the Encrypt iPhone backup box when backing up your device through iTunes on a computer. Use a memorable password to access encrypted backup data.
Fixing iPhone Update and Restore Errors
Sometimes updating and restoring your iPhone through iTunes can result in errors. Here are some common errors and fixes.
iPhone software update failed
– Cause: Network connection issue, Apple server issue, date/time incorrect
– Fixes:
1. Check network connection and try again
2. Update computer/iTunes to latest version
3. Adjust date/time settings if incorrect
4. Wait and retry later if Apple server issue
“iPhone could not be restored. An unknown error occurred (4013)”
– Cause: Hardware issue, damaged ports/cables, iTunes version too old
– Fixes:
1. Inspect Lightning cable and ports for damage, remove debris
2. Force restart iPhone and reconnect to computer
3. Update to newest iTunes version
4. Try a different USB port/cable if available
5. Restore iPhone in recovery mode or DFU mode
“iPhone disabled. Connect to iTunes”
– Cause: Entering wrong passcode too many times
– Fixes:
1. Connect iPhone to iTunes
2. Restore iPhone to factory settings. This will erase all contents.
3. Set up iPhone as new or restore from backup
iPhone stuck on Apple logo
– Cause: Serious software failure
– Fixes:
1. Force restart iPhone
2. Put iPhone into recovery mode and restore
3. Update computer/iTunes if necessary
4. Restore iPhone to factory settings to fix software
Preventing Update and Restore Issues
You can prevent many update and restore issues by taking proactive steps:
– Maintain a reliably fast internet connection
– Keep iTunes updated to the latest version
– Use the correct charging/syncing cable and keep ports clear of debris
– Backup iPhone before any major update or restore
– Disable passcodes before updating or restoring
– Ensure correct date/time set on iPhone and computer
– Restart devices and retry if initial update/restore fails
Following best practices can prevent most iTunes update and restore errors. But some issues may still require professional repair if hardware-related.
Fixing iPhone Sync Issues with iTunes
If you’re having trouble syncing data between your iPhone and computer using iTunes, here are some troubleshooting tips.
iPhone not showing up in iTunes at all
– Try different USB cable, port, and computer if available
– On iPhone, go to Settings > General > Restrictions and check if USB syncing is disabled
– Force restart iPhone and computer
– Update to newest iTunes version
Error syncing music/photos/other content
– Check preferences and sync settings in iTunes to choose correct content to sync
– Consolidate iTunes library to reorganize any missing media files
– Try checking and unchecking “Sync Music” and “Sync Photos” a few times
– Restore iPhone and set up as new device to erase any corrupted sync data
Apps not syncing or transferring to iPhone
– Authorize computer if not already done
– Update iTunes and iOS to latest versions
– On iPhone, offload large apps, restart, then reinstall apps
– In iTunes, review app sync settings under Apps prefs
– Restore iPhone to factory and re-sync apps
iPhone stuck on “Syncing” screen
– Force restart computer and iPhone
– Disable all antivirus or security software temporarily during sync
– Connect iPhone to different USB port directly on computer
– Eject and reconnect iPhone in iTunes
Preventing iPhone Sync Problems
To avoid sync issues in the future:
– Keep iTunes up to date on computer
– Use Apple-certified Lightning cable and USB port
– Back up iPhone before major syncs
– Review iTunes sync settings for desired music, apps, etc
– Sync one type of content at a time, e.g. just photos
– Disable VPN or firewall temporarily during sync
Following best practices helps prevent buggy or incomplete iPhone syncs using iTunes. Contact Apple support if issues persist.
Fixing iPhone Recovery Mode Loop
If your iPhone is stuck in recovery mode and continuously loops back to the recovery screen when you restart it, try these troubleshooting tips:
– First, force restart your iPhone – hold Power + Volume Down for 10+ seconds until Apple logo appears.
– Open iTunes and connect iPhone. Ignore any prompts to restore.
– Put the iPhone into DFU (device firmware update) mode:
1. Hold Power button for 3 seconds
2. Hold Power + Volume Down together for 10 seconds
3. Release Power but keep holding Volume Down for 5 more seconds
4. Device screen should be black – this means it entered DFU mode
– In iTunes, click Restore to install latest iOS version without erasing data.
– iPhone should exit recovery mode as iOS installs. Reboot device after completing.
– If still looping recovery mode, may need hardware repair. Restore iPhone fully through iTunes first.
Avoid forcing iPhone to restart again if stuck in a reboot loop as this makes recovery mode worse. Use DFU mode restore in iTunes to reinstall iOS without data loss.
Causes of Recovery Mode Loop
Common reasons an iPhone gets stuck endlessly restarting into recovery include:
– Serious system file corruption
– Interrupted iOS update or restore
– Buggy jailbreak gone wrong
– Hardware failure like faulty logic board
Recovery loops often require fully restoring iOS in iTunes DFU mode or visiting Apple for hardware service. Avoid force restarting looped devices.
Fixing Other Common iPhone Issues
Here are some additional quick tips for fixing common iPhone problems using iTunes on your computer.
Fix iPhone stuck on Apple logo screen
– Force restart iPhone then hold Volume Up to prevent looping
– Restore iPhone through iTunes to reinstall iOS
– Hardware issue if persists – will need repair
Resolve laggy/slow iPhone performance
– Update iOS to latest optimized version
– Reset all settings (Settings > General > Reset > Reset All Settings)
– Restore iPhone to factory defaults if still slow after above steps
– Check battery health and performance – may need battery replacement
Fix ghost touching and screen not responding
– Soft reset by holding Power + Home for 10+ seconds
– Make sure screen is clean and undamaged
– Back up data and restore iPhone through iTunes
– May be hardware issue requiring screen repair
Resolve iPhone overheating issues
– Close all apps and let iPhone cool down
– Update iOS if outdated – newer versions fix heating bugs
– Check battery health in Settings
– Add cooling case or avoid extensive direct sun exposure
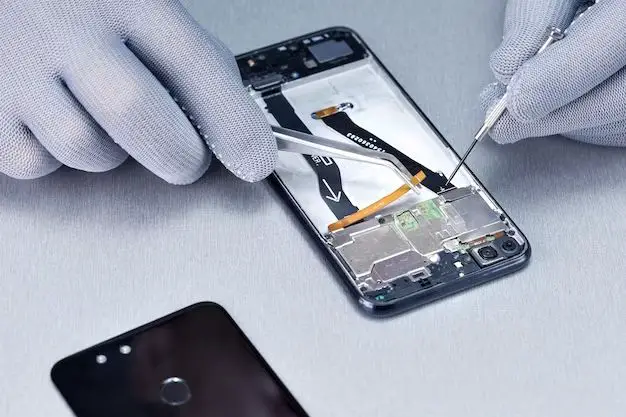
When to Visit Apple Store for Hardware Repairs
If you’ve exhausted iTunes troubleshooting without success, you likely have an underlying hardware problem requiring professional service.
Visit an Apple Store or authorized repair shop for issues like:
– Cracked screen, damaged buttons
– Liquid damage inside device
– Camera/speaker failure
– Not charging/holding battery
Hardware issues cannot be resolved through iTunes. Seek professional iPhone repair service to properly diagnose and fix physical device damage.
Conclusion
iTunes provides useful software-based troubleshooting options for many common iPhone issues. Restoring, updating, and syncing your iPhone through iTunes can fix problems like system crashes, freezing, recovery mode loops, and more without losing your data.
However, iTunes has limited ability to resolve physical damage or hardware component failures. Additionally, very serious software bugs may require professional service rather than iTunes troubleshooting. If you’ve thoroughly tried appropriate iTunes fixes but problems persist, seek professional help to determine if hardware repair is necessary.
With a good understanding of its capabilities, you can effectively use iTunes to attempt fixing many iPhone software issues before considering more expensive hardware repairs. But also recognize its limitations for hardware, water damage, component-level failures, and severe corruption requiring advanced diagnostic and repair skills.
