Removing the hard drive from a computer is a process that involves disconnecting the drive from the motherboard and power supply, and then physically removing it from the computer case. There are a few reasons why someone may want to remove their hard drive:
- To upgrade to a larger or faster hard drive
- To retrieve data from the drive to transfer to a new computer
- To securely erase data before disposing of an old computer
- To troubleshoot hardware issues and test components
Removing a hard drive is generally straightforward, but care needs to be taken to avoid damaging components or losing data. This article provides step-by-step instructions to safely remove a hard drive from a desktop computer.
Reasons to Remove a Hard Drive
There are several common reasons you may need to remove the hard drive from a computer:
Upgrading to a larger or faster hard drive – As your storage needs grow or new technologies emerge, you may want to upgrade to a hard drive with more capacity or better performance. Removing the old drive is necessary to install the new one.
Recovering data – If a computer won’t boot properly, removing the hard drive and connecting it to another computer lets you access the data to back it up. This helps recover important files from a failing drive.
Donating or selling the computer – Before getting rid of an old computer, you’ll want to remove and keep the hard drive which contains your personal data. Donating or selling the computer without the drive protects your privacy.
Diagnostic testing – If you suspect a problem with the hard drive itself, removing it allows you to connect it to a different computer or drive dock for diagnostic software to scan and test the drive.
According to this Quora discussion, removing the hard drive before recycling or reselling a computer protects your personal data and media.
Safety Precautions
When removing a hard drive from a computer, it is important to take safety precautions to avoid damaging the drive. One major concern is electrostatic discharge (ESD). Hard drives contain sensitive electronics that can be damaged by static electricity from your body. To avoid this, make sure to ground yourself before handling the hard drive by touching a grounded metal object like the computer case. You can also wear an ESD wrist strap while working on the computer. Avoid touching the circuit board and connectors directly, and try not to drop or bump the drive.
Additionally, be very gentle when disconnecting cables from the hard drive. Don’t yank connectors out forcefully. Grip them close to the drive when removing. Also be careful when handling mounting screws. Tightening them too much or using the wrong size screwdriver can strip the threads. Overall, handle the hard drive delicately like you would any other sensitive electronic component.
By grounding yourself, disconnecting cables carefully, avoiding drops, and handling mounting hardware gently, you can remove a hard drive from a computer safely without causing any damage.
Preparation
Before removing the hard drive, it is crucial to back up all important data and files to external drives or cloud storage. This ensures no data is lost when the hard drive is taken out. Useful tips on backing up data can be found at [https://www.quora.com/What-do-I-need-to-do-before-I-remove-my-hard-drive-from-my-computer](https://www.quora.com/What-do-I-need-to-do-before-I-remove-my-hard-drive-from-my-computer).
It is also recommended to uninstall any programs you have on the computer, as they can get corrupted if the drive containing them is removed. You should also gather any necessary tools like screwdrivers before starting.
Locating the Hard Drive
The hard drive is usually located inside the computer case, mounted in a drive bay. To access it, you’ll need to open up the case. The location can vary depending on the computer model, but hard drives are often found in the front lower section of tower cases or on the side panel in desktop cases.
Once you open the case, look for drive bays that have 3.5″ or 2.5″ hard drives installed. Hard drives will have SATA power and data cables connecting them to the motherboard. Some key things to look for:
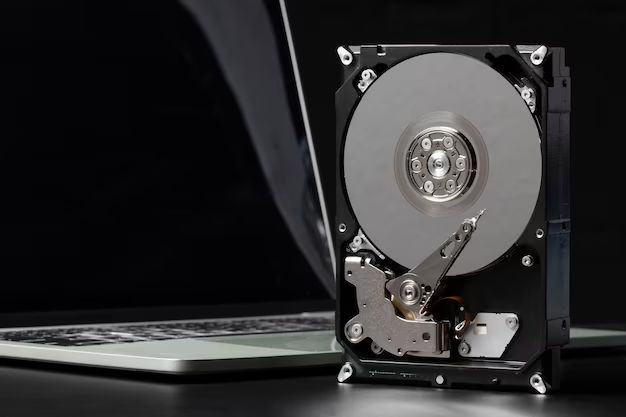
- 3.5″ hard drives are larger in size, roughly 4 inches x 6 inches.
- 2.5″ hard drives are smaller, roughly 3 inches x 5 inches.
- Cables will run from the hard drive to the motherboard, often with a SATA connector.
- The hard drive will be screwed into place or slid into a drive bay.
Identifying the proper hard drive to remove is crucial. Looking for drive labels, checking cable connections, and matching size can help ensure you locate the correct drive. Refer to your computer/case manual if unsure.
Here are some photos to help identify a 3.5″ desktop hard drive:

Photo Credit: https://softkeys.uk/blogs/blog/how-to-find-hard-drive-on-windows-10

Photo Credit: https://www.computerhope.com/issues/ch000854.htm
Disconnecting Cables
Before removing the hard drive from the computer, you need to disconnect the power and data cables attached to it. SATA cables are typically used to connect hard drives in modern computers.
To unplug the SATA data cable, press down on the plastic locking clip on the cable connector while gently pulling the cable straight out from the drive. Be careful not to bend or twist the cable. According to experts, holding down the clip is important for easily releasing the cable without damage (1).
Unplugging the SATA power cable requires simply pulling it straight out from the hard drive, as these cables do not have locking clips. Gently wiggle the cable if needed to loosen the connection before pulling (2). Avoid excessive force when disconnecting cables to prevent damaging the hard drive’s SATA ports.
Once both the SATA data and power cables have been unplugged, the hard drive will be fully disconnected and ready for removal from the computer.
(1) https://forums.bit-tech.net/index.php?threads/how-to-remove-unclip-a-sata-cable.187127/
(2) https://www.quora.com/How-do-I-unplug-my-SATA-hard-drive
Removing Mounting Hardware
Depending on your computer case and hard drive configuration, the hard drive may be secured in the drive bay with mounting screws or a mounting bracket. Most commonly, the hard drive will be mounted to the drive bay with 4 screws, one in each corner of the drive. Use a Phillips head screwdriver to remove each screw and detach the drive from the bay.
In some cases, especially with external hard drives or pre-built computers, the drive may be installed in a plastic mounting bracket that clips into the drive bay. This bracket needs to be detached before the drive can slide out. There are usually small clips or tabs on the sides of the bracket that need to be pressed to release it. For example, as described in the Netgear community forum, the RN316 NAS mounting brackets have clips on the side that need to be squeezed to detach the bracket from the bay [1]. Press these clips and pull the bracket out with the drive still attached.
In rare cases, the mounting bracket may get stuck and refuse to detach from the bay. Don’t force it, as this can damage the pins and bracket. Carefully pry the bracket loose with a flathead screwdriver if needed. Some users recommend tapping the screwdriver gently with a hammer to help loosen a stubborn bracket, as discussed in this Tom’s Hardware thread [2].
Sliding Out the Hard Drive
Once all the cables and mounting hardware have been removed, you can now carefully slide the hard drive out of its bay. For desktop computers, grip the hard drive on both sides and gently pull it straight out from the drive bay, being careful not to bend or twist it. The hard drive will slide out on its rails.
For laptop hard drives, locate the small tab or lever next to the hard drive bay. Gently pull this tab to release the hard drive, then slide it straight out of the bay. Take care not to use excessive force as you extract the drive. Work slowly and gently to avoid damaging the drive or connectors. Refer to the manufacturer’s instructions if you’re unsure of how to remove the hard drive from its bay.
Replacing the Drive
If you need to install a new drive after removing the old one, follow these steps:
- Insert the new hard drive into the empty bay, making sure it slides in all the way.
- Reconnect the power cable and data cable to the back of the hard drive.
- Replace any screws or mounting brackets to secure the drive in place.
- Boot up the computer and access the BIOS menu. The key to press varies between manufacturers, but is often F2, F10 or Delete.
- In the BIOS, find the boot order settings and move the newly installed hard drive to the top of the list.
- Save changes and exit BIOS.
- Insert your Windows installation media, like a DVD or USB flash drive. Boot from this media.
- Follow the on-screen prompts to install Windows on your new hard drive. Be sure to select the correct drive.
- Once Windows is installed, you can begin transferring files and settings from backups.
If the old drive contained your OS and programs, you’ll need to reinstall them on the new drive. Backup any personal files first. For detailed guidance, refer to this guide.
Conclusion
In summary, removing a hard drive from your computer involves several key steps. First, make sure to back up any important data and turn off and unplug the computer. Then, open up the computer case and locate the hard drive. Disconnect all cables attached to the hard drive, including the power cable and data cable. Use a screwdriver to remove any screws or mounting hardware securing the drive in place. Finally, carefully slide the hard drive out of its bay. Replacing the hard drive follows these same steps in reverse.
When removing a hard drive, be sure to take proper safety precautions against electrostatic discharge, and only handle the drive by its edges. Also remember that removing the drive will delete all data stored on it, so backups are essential. With some simple preparation and care, an average user can successfully remove a hard drive from their desktop computer.
