SATA HDD stands for Serial Advanced Technology Attachment Hard Disk Drive, while SATA SSD stands for Serial Advanced Technology Attachment Solid State Drive. Both are types of storage drives that connect to a computer’s motherboard via a SATA interface.
The key difference between them is that a HDD uses spinning platters and a mechanical arm to read/write data, while a SSD has no moving parts and instead stores data on flash memory chips. This means SSDs are much faster at accessing data, more durable with no risk of mechanical failure, and run silently with very low power consumption. However, HDDs have a lower cost per gigabyte compared to SSDs.
Overall, replacing a SATA HDD with a SATA SSD will provide huge performance benefits like faster boot times, quicker application/file loading, and smoother gameplay thanks to the SSD’s higher speeds. But it comes at a higher price point.
Benefits of Replacing HDD with SSD
Replacing a traditional hard disk drive (HDD) with a solid state drive (SSD) can provide significant performance improvements. SSDs have faster read/write speeds compared to HDDs which can dramatically improve boot times and application launch times. According to Kingston, SSDs can boot up in just 10-13 seconds compared to 30-40 seconds for HDDs. https://www.kingston.com/en/blog/pc-performance/benefits-of-ssd
SSDs also consume much less power allowing for improved battery life on laptops. TechTarget notes that SSDs use less power and generate less heat than HDDs which makes them better suited for mobile devices. https://www.techtarget.com/searchstorage/definition/SSD-solid-state-drive
Because there are no moving mechanical parts, SSDs are more durable and resistant to shock/vibration damage. Avast points out that SSDs can better withstand accidental drops or impacts. https://www.avast.com/c-ssd-vs-hdd
Overall, the speed, performance, durability, and power efficiency benefits make SSD an appealing upgrade over traditional HDDs.
Compatibility Factors to Consider
The main compatibility factors to consider when replacing a HDD with a SSD are the drive’s physical size (2.5 vs 3.5 inch) and SATA revision supported.
Most laptops use 2.5 inch drives while desktops typically use 3.5 inch drives. 2.5 inch SSDs come in various form factors like M.2 and mSATA that are designed for ultrabooks and other small devices where space is limited. 3.5 inch SSDs maximize capacity but are less common as they are bulkier and more expensive to produce [1].
In terms of SATA revision, most modern SSDs support the latest SATA III standard that provides 6 Gb/s throughput. Older SATA II drives are limited to 3 Gb/s. Always verify the SATA revision supported by your SSD and motherboard/laptop to achieve maximum performance [2].
Cloning the HDD Contents to the SSD
One of the easiest ways to migrate your HDD contents to the new SSD is to clone the HDD. Cloning copies everything on the HDD – the operating system, installed software, settings, files and folders – to the SSD.
Popular free cloning software options include:
– Macrium Reflect Free
– EaseUS Disk Copy
– Clonezilla
The general steps to clone your HDD to SSD are:
- Install the cloning software on your computer.
- Connect the new SSD to your computer along with the existing HDD.
- Run the cloning software and select the source drive (HDD) and target drive (SSD).
- Click clone/copy. The software will copy all contents from the HDD to fill up the SSD.
- Once completed, shut down your computer.
- Physically replace the HDD with the SSD in your computer.
- Boot up your computer. Your system should load normally from the SSD.
Cloning replicates your full HDD contents seamlessly to the SSD so you can continue using your system without reinstalling the OS or apps.
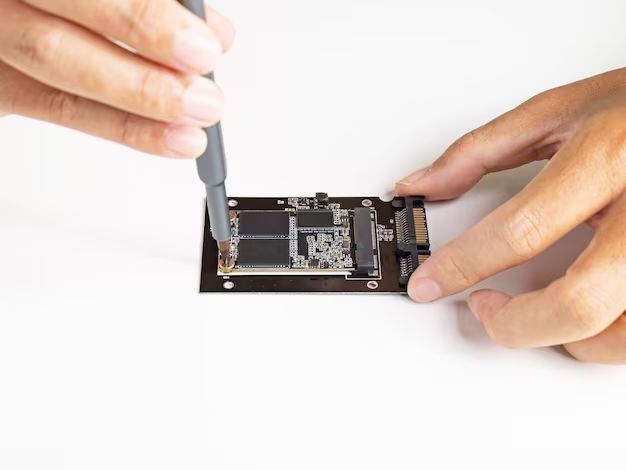
Physically Installing the SSD
The method for physically installing the SSD depends on whether it is a 2.5-inch or 3.5-inch form factor.
For a 2.5-inch SSD:
- Mount the 2.5-inch SSD into an adapter bracket or sled to fit in a 3.5-inch hard drive bay. Many SSDs come with an adapter bracket.
- Slide the SSD into an open 3.5-inch hard drive bay and secure it with screws.
For a 3.5-inch SSD:
- Slide the 3.5-inch SSD directly into an open 3.5-inch hard drive bay and secure it with screws.
In both cases, connect the SATA data cable and the SATA power cable to the SSD. Consult your computer manual for details on accessing the hard drive bays and connecting the cables. Handle the SSD carefully and avoid touching the circuit board to prevent ESD damage. Ensure the SSD is securely mounted before closing up the computer case.
For more detailed physical installation instructions, refer to the Crucial guide here: How to Install an SSD in your Desktop PC.
Configuring the SSD as the Boot Drive
The most important step in setting the SSD as the primary boot drive is to configure it in the BIOS. Here are the basic steps:
-
Restart your computer and enter the BIOS setup utility, usually by pressing the F2, F10 or Del key during bootup. The key varies by motherboard manufacturer.
-
Navigate to the boot options section, often called “Boot Sequence” or something similar.
-
Find the connected storage drives listed here. Identify the newly installed SSD and use the arrow keys to move it to the top of the boot order.
-
Save changes and exit BIOS. The computer should now boot from the SSD first.
Setting the SSD as primary in BIOS ensures that the operating system boots from it instead of the old HDD. Some motherboards have a direct “Boot Priority” or similar setting that lets you configure a drive as #1. Refer to your motherboard manual for details.
You may need to enable CSM/legacy boot modes or adjust UEFI settings for the SSD to be recognized. But once set as first in the boot order, the system will start booting from the SSD automatically.
Transferring Applications and Files
Once the SSD is configured as the boot drive and Windows is running from it, the next step is to transfer over your applications, files, and settings. Here are some tips for moving everything from your old HDD to the new SSD:
For applications, you have a couple options. You can uninstall and re-install apps to the SSD, which ensures they are fully optimized for the faster drive. According to EaseUS, “The last way to transfer programs from HDD to SSD is by uninstalling and reinstalling them” (source). Alternatively, you can use a third party app mover like AOMEI Partition Assistant to seamlessly move installed programs from one drive to another without re-installation (source).
For documents, media, and other personal files, it’s simple to drag and drop or copy and paste them over to the new SSD. You may need to re-direct some default save locations and libraries to point to the SSD rather than old HDD. Finally, transferring program settings is smooth if you use the built-in Windows Easy Transfer tool.
Optimizing the SSD
Once the SSD is installed and configured as the boot drive, there are some additional steps you can take to optimize performance. Enabling TRIM, running disk cleanup, and disabling hibernation can help the SSD operate at peak speeds.
TRIM is a critical feature for SSDs that helps maintain performance over time. When data is deleted on an SSD, the drive needs to be notified to actually erase those cells and make them available again. TRIM handles this communication between the operating system and SSD. You can confirm TRIM is active by opening Command Prompt as Administrator and running the command “fsutil behavior query DisableDeleteNotify”. If TRIM is enabled, it will return a 0. If not, you can enable it by changing the value to 0 (Tom’s Hardware, 2023).
Running the disk cleanup utility helps clear any unnecessary files taking up space on the SSD. You can search for “Disk Cleanup” in the Start menu to find the tool. Make sure to select “Clean up system files” to clear even more data. The disk defragmenter tool should also be disabled, as defragmenting is not necessary for SSDs and can actually reduce lifespan (PCHardwareHelp, 2023).
Finally, disabling hibernation will free up valuable SSD space otherwise reserved for saving a hibernation file. You can disable hibernation by opening Command Prompt as Administrator and running “powercfg -h off” (Auslogics, 2023). With TRIM enabled, regular cleanups performed, and hibernation disabled, your SSD will run optimally.
Using the Old HDD for Storage
After upgrading to an SSD, the old HDD can still be utilized for extra storage instead of being discarded. Many people choose to repurpose the old HDD as storage after an SSD upgrade to preserve the extra capacity (Source).
To configure the old HDD as storage, first ensure the SSD is set up as the primary boot drive in the BIOS. Then reconnect the old HDD to the motherboard. The HDD will show up in Windows File Explorer as an extra drive.
Before using the old HDD for storage, it’s recommended to format it to wipe any previous OS files. This can be done by right-clicking the drive in File Explorer, selecting Format, choosing a file system (e.g. NTFS), and clicking Start. The HDD can then be used to store files, media, backups, etc.
An advantage of repurposing the old HDD is that it allows you to retain the extra storage capacity. SSDs often have less storage than traditional HDDs, so reusing the old HDD avoids having to purchase an external drive for additional storage (Source). Overall, reusing the old HDD as a storage drive is a great way to get continued value out of the hardware after an SSD upgrade.
Conclusion
Upgrading from a traditional hard disk drive (HDD) to a solid state drive (SSD) can provide significant performance improvements to your computer. The key steps are checking compatibility, cloning the HDD contents, installing the SSD, configuring it as the boot drive, transferring files and applications, and optimizing the SSD. The benefits include much faster boot times, quicker application launches, and overall snappier system performance. With SSD prices dropping steadily, this inexpensive upgrade can breathe new life into an aging computer.
When replacing your HDD with an SSD, be sure to reuse the old HDD for additional storage if needed. With the operating system and most used programs running on the SSD, and media files and other data stored on the HDD, you get the best of both worlds – speed and capacity.
Following the steps outlined above allows you to upgrade to a fast SSD boot drive while still leveraging your existing HDD storage. With this performance boost, you can get more life out of your computer and delay the need to purchase a brand new system.