macOS Big Sur is a major release of Apple’s macOS operating system for Macintosh computers. First announced at Apple’s Worldwide Developers Conference on June 22, 2020, Big Sur represents the first major redesign to macOS since 2013’s OS X Mavericks. Big Sur introduces a redesigned user interface, as well as improvements to core apps like Safari, Messages, and Maps. It also transitions Macs from the legacy Intel chips to Apple’s own custom designed M1 processors.
In this article, we’ll provide an overview of Big Sur and walk through the process of updating to it from a previous version of macOS. We’ll cover compatibility requirements, steps for backing up your Mac, updating apps, clearing storage space, downloading the installer, installation options, the upgrade process, and highlight some of the key new features in Big Sur. Our goal is to provide Mac users with a comprehensive guide to upgrading to macOS Big Sur.
Compatibility
macOS Big Sur can be installed on Macs from 2013 onwards, with some specific model requirements. According to Apple support, Big Sur is compatible with the following Mac models:
MacBook (2015 and later)
MacBook Air (2013 and later)
MacBook Pro (Late 2013 and later)
Mac mini (2014 and later)
iMac (2014 and later)
iMac Pro (2017 and later)
Mac Pro (2013 and later)
For full system requirements, check the Apple support page on Big Sur compatibility here. At a minimum, your Mac will need:
- 4GB of memory
- 12.5GB of available storage space
- OS X 10.9 or later installed
So as long as your Mac matches one of the supported models and meets the system requirements above, you should be able to upgrade to Big Sur.
Back Up Your Mac
Before installing a major operating system update like macOS Big Sur, it is crucial to back up your Mac. This provides a safety net in case anything goes wrong during the upgrade process. Time Machine is the built-in backup utility in macOS that makes it easy to regularly back up your entire Mac.
Time Machine works by creating periodic backups of your Mac to an external storage device like an external hard drive or NAS (“network-attached storage”). It will automatically back up changed files hourly, daily, and weekly. This provides multiple options to restore your system from in case of problems.
According to Apple’s support documentation, Time Machine backs up everything on your Mac including system files, apps, accounts, preferences, music, photos, and other personal data. With a Time Machine backup, you can completely restore your entire Mac system if needed.
Before installing macOS Big Sur, it is highly recommended to connect your Time Machine backup drive and run a manual backup to ensure it is up to date. This will give you the peace of mind of knowing your data is safely backed up before a major OS upgrade.
Check for App Compatibility
Before updating to macOS Big Sur, it’s important to check that your apps are compatible with the new operating system. Many apps need to be updated by their developers to work properly on Big Sur (https://support.apple.com/en-us/106338).
To check your app compatibility, go to System Preferences > Software Update. Click “More info” under macOS Big Sur. This will open the Mac App Store where you can view your purchased apps. Apps that are not yet optimized for Big Sur will be listed as “Update Recommended.” You can also check the developer’s website to see if a Big Sur compatible update is available.
Incompatible or 32-bit apps simply won’t launch in Big Sur. So before updating, it’s best to check which apps have updates available or confirm compatibility. This will ensure a smooth transition to the new OS.
Update Your Apps
Before updating to macOS Big Sur, it’s important to ensure your apps are up to date and compatible with the latest operating system. Outdated or incompatible apps may not function properly or could cause issues after upgrading. The best practice is to update all of your apps to the latest versions through the App Store.
To update your apps on a Mac, open the App Store application and click on the Updates tab. This will show you any available updates for your installed apps. Click the Update button next to each app to download the latest compatible version. You can also choose to update all apps at once by clicking the “Update All” button. Refer to this Apple support article for detailed instructions on updating apps via the App Store.
After updating, check if any of your essential apps are noted by the developer as being incompatible with Big Sur. You may want to wait to upgrade until those apps release a compatible Big Sur version. Avoid upgrading while outdated incompatible apps are still installed, as they may negatively impact system stability or performance after moving to the new OS.
Clear Up Storage Space
Before installing macOS Big Sur, it’s important to make sure you have enough free storage space. According to Apple’s technical specifications, upgrading from macOS Sierra or later requires at least 35.5GB of free storage space (Apple Support). If you’re upgrading from an earlier OS release, even more free space is required.
Compared to previous versions of macOS, Big Sur needs quite a bit more available storage due to its increased size. So even if you had enough space for a previous OS update, you may need to free up additional space for Big Sur.
Here are some tips to clear storage before upgrading:
- Empty the Trash bin
- Delete old apps you no longer use
- Offload unused files to external storage
- Delete language packs for any languages you don’t need
- Remove duplicate files
You can use Apple’s Optimized Storage settings to help automatically free up space by storing rarely used files in iCloud. Deleting apps and files you no longer need is one of the fastest ways to clear a large amount of space.
Download the Big Sur Installer
The easiest way to download the macOS Big Sur installer is directly from the App Store. Open the App Store app on your Mac and search for “macOS Big Sur”. Click the Get button to begin the download (https://apps.apple.com/gr/app/macos-big-sur/id1526878132?mt=12). The installer will download to your Applications folder.
The entire installation process takes some time and requires a few steps. First the installer will download, which can take a while depending on your internet speed. Next you’ll be prompted to agree to the terms and conditions before the actual installation begins. Your Mac will restart and continue installing Big Sur, which can take 15-30 minutes. You’ll need to stay logged out of your user account during this part. Finally your Mac will reboot into macOS Big Sur and you’ll be guided through some setup steps. The entire process can easily take over an hour.
Installation Options
You have two main options for installing macOS Big Sur: upgrade in place or a clean install.
Upgrade in Place
An in-place upgrade installs Big Sur right over your existing macOS installation, preserving all your apps, data, and settings. This is the easiest option.
The main advantage of upgrading in place is convenience – everything stays put and works the same after the upgrade. This method is less disruptive and avoids the hassle of a clean install.
The downside is that outdated files or settings may carry over and cause conflicts with the new OS. An in-place upgrade can potentially introduce bugs or performance issues over time.
Clean Install
A clean install erases your drive and installs Big Sur fresh. This requires backing up your data first.
The benefit of a clean install is that you get a “fresh start” with Big Sur. This clears out any outdated files or settings and ensures optimal performance.
However, a clean install takes more time and effort. You’ll need to reinstall apps, transfer data back, and reconfigure settings after installation. It’s more disruptive than an in-place upgrade.
As noted in this Reddit thread, a clean install may not be necessary if upgrading from Catalina, since Big Sur is an incremental update.
The Upgrade Process
Upgrading to macOS Big Sur is a straightforward process, but there are some things you should know to ensure it goes smoothly. Follow these steps for a seamless upgrade experience:
1. Back up your Mac before installing. Use Time Machine or create a bootable backup so you have a safety net in case anything goes wrong.
2. Make sure your Mac is plugged into a power source and connected to a strong WiFi network. The upgrade may take up to an hour.
3. Download the macOS Big Sur installer from the App Store. It will automatically launch when the download completes.
4. Click “Continue” and follow the onscreen prompts to begin the installation. Your Mac will reboot to complete the upgrade.
5. After your Mac reboots, you’ll be greeted by the macOS Big Sur setup assistant. Follow the instructions to transfer data and customize your settings.
6. Once the setup is complete, you’ll land on your desktop. Installation is now finished! Take some time to explore the new features in Big Sur.
The entire process usually takes 1-2 hours. Your Mac may be slower than normal during and after installation as it optimizes for the new OS. Make sure to plug it in so the upgrade isn’t interrupted.
New Features in Big Sur
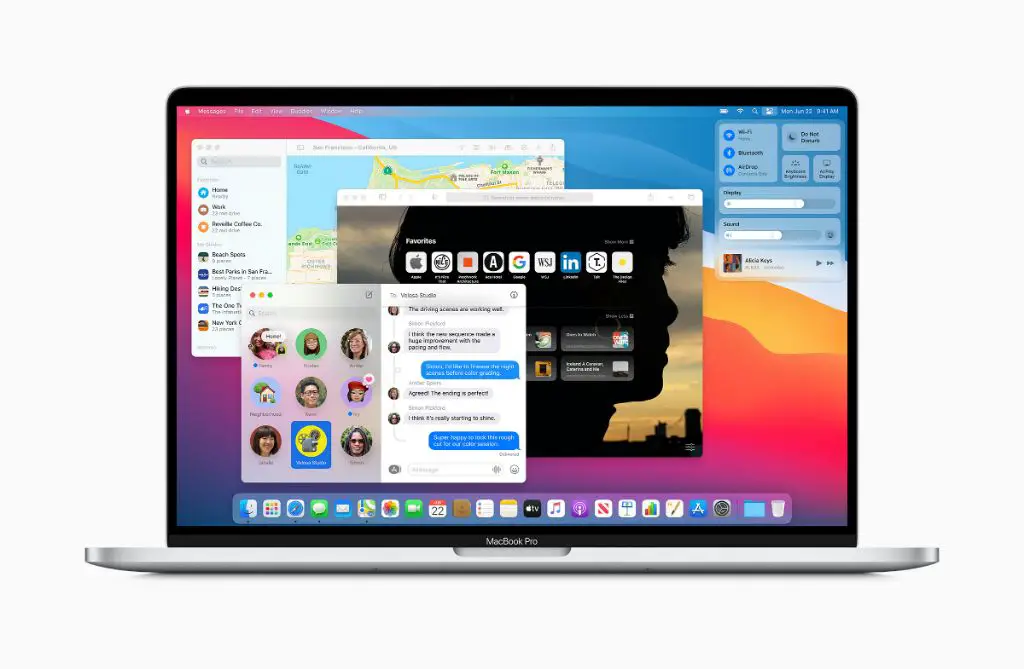
macOS Big Sur brings a whole host of new and exciting features for users to explore. Some of the major updates in Big Sur include a redesigned user interface, improved performance, new privacy protections, and upgrades to key apps like Safari and Messages.
One of the most visible changes in Big Sur is the updated design. Icons have been redesigned to be more consistent and aesthetically pleasing. Rounded corners and transparency effects give the interface a more modern look, reminiscent of iOS devices. The dock and menu bars also have a more refined appearance.
In addition to visual changes, Big Sur promises major performance improvements. Apple says apps will launch up to 50% faster, while the entire OS will be more responsive and efficient. This boost comes from optimizations to the underlying architecture of the OS.
On the privacy front, Big Sur introduces new protections like displaying when an app accesses your camera or microphone. Safari has also been updated with more transparency around privacy-invasive trackers. These changes help users better understand how apps use their data.
Some of the most exciting updates are coming to Apple’s own apps. For example, Messages is getting features like pinned conversations and Memoji customization. Safari will now support extensions and offer speed improvements. Maps has been completely redesigned with features like Look Around, indoor maps, and guides.
Overall, Big Sur represents one of the most significant updates for macOS in years. The combination of visual changes, performance boosts, enhanced privacy, and updated apps make this an exciting upgrade for Apple users. To learn more, check out this overview of top new features in Big Sur.
