Adding a drive to a RAID 5 array without losing data is possible, but requires careful planning and execution. RAID 5 is a popular redundant array that uses distributed parity to protect against single disk failures. The tradeoff is reduced overall capacity compared to a basic disk array.
When properly configured, RAID 5 allows you to add drives without downtime or data loss. However, the process is not as simple as just sliding in a new disk. You need to verify compatibility, ensure sufficient capacity, and perform the expansion carefully.
Quick Answers
Here are quick answers to common questions about expanding RAID 5:
- Is expansion possible? Yes, RAID 5 can be expanded by adding disks.
- Can it be done live? Yes, live expansion is possible in some cases.
- Will I lose data? No, data loss can be avoided with proper procedures.
- Do new drives have to match? Yes, new drives should match size and type.
- How is parity recalculated? The RAID controller recalculates parity when expanding.
Overview of RAID 5
Before looking at the expansion process, let’s briefly overview how RAID 5 works. RAID 5 requires at least three disks to start with. It spreads data evenly across all drives. Unlike RAID 0, it also reserves space equivalent to 1 disk for parity information.
The parity is distributed, not stored on a single dedicated drive. RAID 5 rotates parity across all the disks. This allows the array to withstand a single disk failure without losing data. If a disk fails, the missing data can be recreated from the parity information.
This gives RAID 5 fault tolerance while still providing increased capacity over mirroring. The usable space equals the total capacity minus one disk. So three 1 TB drives would provide 2 TB total capacity in RAID 5.
Options for Expanding Capacity
Now let’s look at the options for expanding RAID 5 storage capacity:
- Add drives – Additional drives can be added to increase total capacity. This also expands the parity distribution.
- Replace with larger drives – Drives can be swapped for higher capacity models. This requires rebuilding the array.
- Convert to RAID 6 – Add a dedicated parity drive to allow two disk failures.
Adding drives is the simplest method. It allows scaling up capacity without lengthy rebuilds. But replacement and conversion are options if you need more redundancy or your array is already maxed out on drive bays.
Requirements for Live Expansion
Adding a drive without downtime or data loss depends on meeting some important requirements:
- Controller support – The RAID controller must support live capacity expansion.
- Matching drives – New drives must match the existing model, speed, and interface.
- Available bays – An empty bay must be available to add the new physical disk.
- Sufficient capacity – The new drive should match or exceed the existing disk sizes.
The first requirement is controller support. Most modern RAID controllers support online capacity expansion. This allows reshaping the array while staying live. But legacy and some budget controllers may not have this capability.
The next requirement is matching drives. In order to maintain performance, new drives must match the speed, model number, and interface of existing drives. Mixing drive types can negatively impact performance.
You also need an available drive bay or slot in the server or enclosure. If no empty bays remain, you may need to upgrade the chassis to expand. External enclosures can also provide additional capacity.
Lastly, the new drive should match or exceed the capacity of the smallest existing drive. Having a higher capacity drive is actually ideal, as we’ll discuss later.
Step 1: Verify Controller Support
The first step is verifying your RAID controller supports live expansion. Consult the documentation or specifications for your controller model. Key terms to look for are “Capacity Expansion”, “RAID Level Migration”, and “Online RAID Level Migration”.
Major server OEMs like Dell, HPE, and Lenovo typically support online expansion in their RAID controllers. But less expensive or older controllers may not. The ability will depend on the RAID chipset used.
If your current controller only supports offline expansion, you may need to upgrade to a more capable model or add a supplementary controller. The HighPoint RocketRAID 2700SGL, for example, adds hot swap support to older SATA ports.
Step 2: Check Drive Compatibility
Next make sure your new drive is fully compatible with the existing array. As mentioned earlier, the ideal scenario is matching the:
- Disk interface (SATA, SAS, NVMe)
- Drive rotational speed (for HDDs)
- Drive capacity
- Vendor, model number, and firmware version
Ideally, purchase the exact same make and model drive. For example, if you had a 400GB Seagate ST340050SS SAS drive, replace with another identical 400GB model. This ensures maximum compatibility.
If the original model is no longer available, choose a drive with the same interface, speed, and highest available capacity. Always check compatibility lists from your server and drive vendor when mixing and matching components.
Step 3: Select Drive Capacity
When selecting the capacity for the new drive, you have two main options:
- Match existing capacity
- Larger capacity
Matching the existing capacity is the simplest approach. This lets you directly replace a failed drive or fulfill an empty bay. However, there are benefits to using a higher capacity drive:
- Improves usable capacity by more than a straight addition.
- Allows future expansions with smaller drives.
- Offsets capacity loss when replacing smaller drives.
For example, let’s say you have three 1TB drives currently. By adding a 2TB drive, the array can now use 3TB total raw capacity. After parity, this provides 2TB usable rather than just 1.5TB.
Bigger drives also let you incrementally expand by reusing smaller drives later on. And when you eventually replace the 1TB drives, the larger drive will help minimize loss of total capacity.
Step 4: Hot Spare Considerations
If your RAID 5 array has a designated hot spare drive, you will need to integrate that as well. The hot spare replaces failed drives automatically using the rebuild process. There are two approaches to handling hot spares during expansion:
- Add both new drive and hot spare at once.
- Add new drive first, then hot spare.
Adding both simultaneously is simpler and keeps the hot spare role active. However, this does require two open bays and purchasing both drives up front.
Alternatively, you can first expand capacity with the new drive. Then add the hot spare afterward. This lets you upgrade capacity using your existing bays and budget. But it leaves you unprotected during the interim between upgrades.
Step 5: Check Pre-Requisites
Prior to starting the expansion, double check the following:
- Drives are compatible and capacity meets needs.
- Bays are available with required connectors.
- Cables are able to reach new drive location.
- RAID controller is flashed to latest firmware.
Take time to physically inspect the server and expansion drives. Ensure connectors, ports, and bays all align with your plan. Modern connectors are generally backwards compatible, but verify cable reaches if drive is far from controller.
Lastly, update the RAID controller firmware. Old firmware versions may lack support for newer drives or proper expansion logic. Check the vendor’s site for the latest firmware and release notes.
Step 6: Perform Drive Integration
With all pre-requisites met, we’re now ready to physically integrate the drive:
- Power down the server safely using standard procedures.
- Install the new drive into the empty bay.
- Connect power and data cables to the new drive.
- Power the server back on and watch for drive detection.
Install the drive properly into the bay, ensuring it is fully seated in the enclosure. Attach cables securely. Pay close attention to proper SATA orientation or SAS locking.
Power up the server and check that the controller detects the new drive through BIOS or utility. The drive should show as Foreign or Unconfigured within the management interface.
Step 7: Initiate Capacity Expansion
With the drive now physically installed, we can proceed with the capacity expansion process:
- Open the RAID configuration utility.
- Select the option to expand the RAID 5 array.
- Follow the prompts to add the new drive.
- Confirm the array rebuild and re-synch.
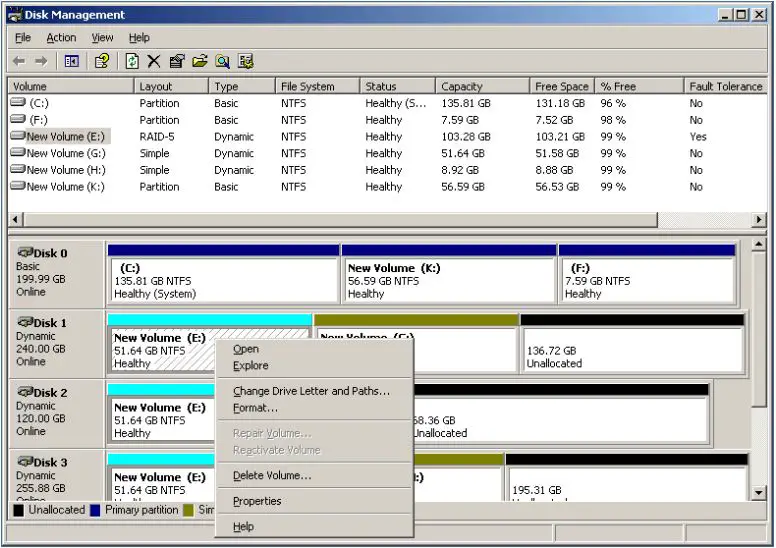
Locate the RAID management utility in the controller BIOS, OS tools, or vendor application. Look for an option like “Expand capacity” or “Add drive to array”. This initiates the expansion wizard.
The process will add the new drive into the array, redistribute parity, then rebuild. The time to complete will depend on drive size and system load. Monitor rebuild progress through the management tool.
Step 8: Verify Expanded Capacity
With the expansion complete, the last step is verifying the new total capacity:
- Check array status shows as normal/optimal.
- Review logical drive capacity and availability.
- Initialize and format added capacity as needed.
The logical drive representing the RAID 5 should now reflect the larger capacity. Initialize and format this extra space to make available for use. Test read/write performance to validate expansion success.
You can now utilize the expanded capacity and improved performance. Monitor the array closely during initial weeks for signs of instability. Schedule regular backups in case issues emerge down the road.
Key Tips for Success
Follow these tips to help ensure a smooth RAID 5 expansion process:
- Use matching drives from approved vendor lists for compatibility.
- Add higher capacity drives to increase usable space.
- Update controller firmware before and after expanding.
- Back up critical data in case issues occur.
- Monitor system performance and stability post-expansion.
With proper planning and care, expanding RAID 5 can boost capacity without downtime or data loss. But be sure to follow best practices for availability and performance.
Conclusion
Expanding RAID 5 storage capacity by adding drives is possible without losing data. However, simple precautions must be taken:
- Verify controller supports live expansion.
- Use compatible replacement drives.
- Follow the management utility prompts.
- Monitor the parity rebuild process.
When done properly, expanding RAID 5 is an efficient way to scale storage. Drives can be added without lengthy rebuild times or buying entirely new arrays.
With the right controller and preparation, RAID 5 provides a versatile option for growing capacity. It balances performance, redundancy, and scalability for a wide range of environments and workloads.