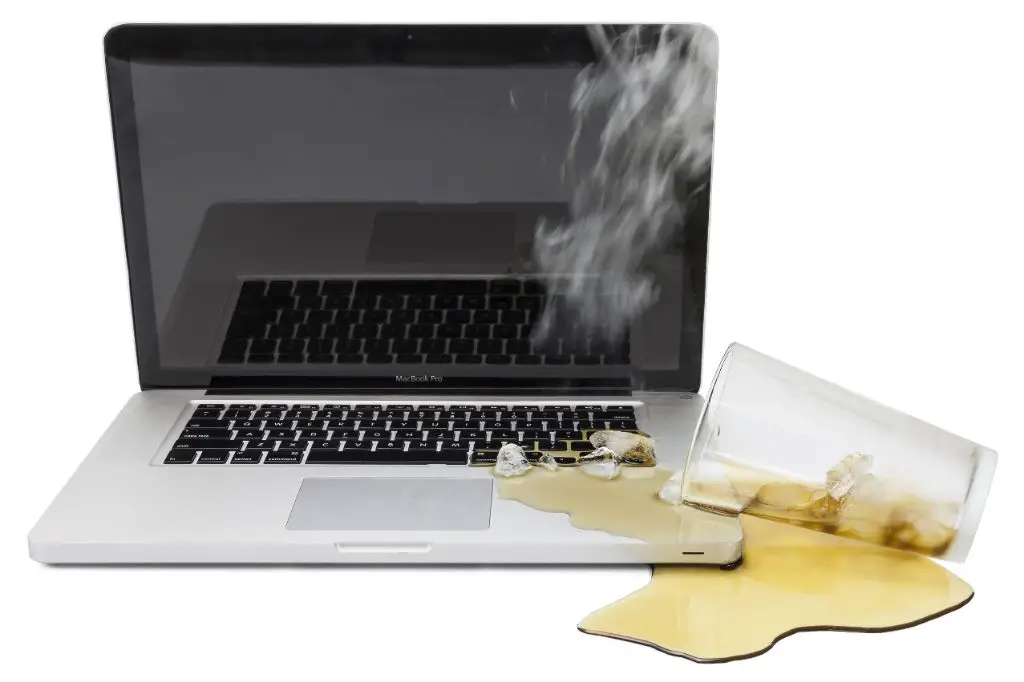
Liquid damage is one of the most common causes of damage to MacBooks and other laptops. Spilling water, coffee, juice, or other liquids onto your MacBook can cause serious issues like screen glitches, random reboots, and full computer failure. The good news is that liquid damaged MacBooks can often be repaired, depending on the extent of the damage. With some DIY techniques and professional repair services, there is hope for bringing your MacBook back to life.
What causes liquid damage in a MacBook?
When liquid is spilled onto a MacBook, it can seep down into the internal components and cause short circuits, corrosion, fried circuits, and other problems. Here are some of the most vulnerable parts of a MacBook that liquid can damage:
- Logic board – This is the MacBook’s main circuit board and is very susceptible to liquid damage. Short circuits and corrosion on the logic board can lead to random crashes and complete failure.
- Battery – Liquid can short circuit the battery terminals, causing the battery to fail or not hold a charge.
- Trackpad – The trackpad has exposed contacts underneath that can be damaged by liquid, causing a glitchy/unresponsive trackpad.
- Speakers – Speakers have vulnerable electromagnets and contacts that can easily short circuit if liquid seeps into them.
- Fan/vents – Liquid can reach the fan and ventilation system, which can cause overheating issues.
- Screen – LCD screens can get water damaged lines across the display, or completely fail to display an image.
In general, any area where liquid comes into contact with electronic circuits or components is vulnerable to short circuiting, corrosion, fried circuits, and more. The longer the liquid sits inside the MacBook untreated, the more damage it can cause over time.
How to check for liquid damage on a MacBook
If you’ve spilled liquid on your MacBook, or suspect it has gotten wet in the past, here are some signs to check for that indicate liquid damage:
- Visible moisture or stains – Look for visible dripping, wet spots, or dried stains around vents, keys, trackpad, ports, etc.
- Display issues – Check for glitching, flickering, lines, dead pixels, or parts of the display not working properly.
- Keyboard problems – Sticky/unresponsive keys can indicate liquid under the keyboard.
- Trackpad problems – A glitchy, unresponsive, or intermittent trackpad often points to liquid damage.
- Powering issues – Failure to power on, random shutdowns, and battery issues can indicate liquid damage.
- Fan/temperature issues – Loud/constant fan, overheating, and freezing can point to liquid reaching components.
- Corrosion signs – Look for light or dark corrosion around ports, vents, and other openings.
- Burning/chemical smell – A burnt or chemical odor coming from the MacBook can indicate liquid damage.
The more of these symptoms you notice on your MacBook, the more likely serious liquid damage is present. Catching it early and quickly taking action gives you the best chance of saving your MacBook.
How to dry out and fix a liquid damaged MacBook
If your MacBook gets doused with liquid, quick action is essential to give it the best chance of survival. Here are some steps to rescue a liquid damaged MacBook:
- Immediately power off the MacBook – Don’t let it run with liquid inside, this can short circuit components.
- Disconnect power adapter – Unplug the MagSafe/USB-C power adapter to prevent short circuits.
- Drain excess liquid – Tilt to drain out as much liquid as possible from openings.
- Dry the exterior – Use a microfiber cloth to dry the outside of the MacBook.
- Do NOT rinse with water – This can push liquid further into components.
- Disassemble if needed – Take off back cover to access battery and logic board.
- Dry internal components – Carefully dry boards, connectors, fans with microfiber.
- Use compressed air – Blast fans/vents with air to expel stray moisture.
- Absorb moisture – Bury MacBook in uncooked rice or silica packs for at least 24-48 hours.
- Check for corrosion – Inspect for any battery or logic board corrosion that needs cleaning.
- Clean corrosion – Use isopropyl alcohol and a toothbrush to gently clean corroded parts.
- Test functionality – Reassemble MacBook and test it – ideally let it dry 1-2 weeks before powering on.
- Replace damaged parts – If certain components like the logic board are too damaged, they may need replacement.
With quick action, you can help dry out internal moisture before it has time to cause irreparable damage. Taking the MacBook apart provides access to clean and dry components directly. Give it plenty of time to dry out before attempting to turn it on again.
How long to dry a liquid damaged MacBook before turning it on
It’s important not to rush turning your MacBook back on after liquid damage. Powering it on while moisture is still inside can short circuit components and make the damage much worse. Here are some guidelines for drying time before attempting to use your liquid damaged MacBook:
- At least 24-48 hours buried in uncooked rice – This helps absorb a lot of moisture from inside the MacBook.
- 1-2 weeks minimal drying time – Let it air dry after the rice treatment for at least 1-2 weeks if possible.
- Up to 30 days for water submersion – For more extensive water damage, allow 30 days before powering back on.
- No visible moisture – Check all openings and vents for any remaining drops or dampness before powering up.
- Test intermittently at first – Try turning it on for brief tests, then power back down to keep drying.
- Extended drying if issues emerge – If you notice new glitches or problems when testing, more drying time may be needed.
Be patient and keep the MacBook powered down until you’re confident no moisture remains inside. This helps prevent short circuiting components when power is applied. Test briefly at first, then allow increasingly longer runtimes once it seems stable.
Can you fix liquid damaged MacBook yourself?
It is possible to fix some liquid damaged MacBooks yourself using the drying techniques mentioned above. Here are some factors that influence whether DIY repairs will be successful:
- Level of damage – Minor spills and leaks can often be fixed DIY if dried properly. Extensive submersion/water damage is harder.
- Mechanical comfort – You’ll need to be comfortable taking the MacBook apart to access and clean internal components.
- Part replacements – Damaged parts like the logic board may need microsoldering skills beyond DIY abilities.
- Special tools/supplies – Items like compressed air, isopropyl alcohol, ESD mat, and pry tools are required.
- Time investment – Drying and troubleshooting intermittent issues takes trial and error.
- Cost of replacements – Factor in the cost of replacement parts if certain components are damaged.
For minor spills dried promptly, DIY can be a cost-effective route to get your MacBook running again. But for major liquid damage or complex component-level repairs, professional assistance may be needed.
Best DIY methods to fix a liquid damaged MacBook
If you want to attempt DIY repairs on a liquid damaged MacBook, here are some effective methods to try:
- Disassemble to directly dry/clean internal components
- Absorb moisture with uncooked rice or silica gel packs
- Use isopropyl alcohol and a toothbrush to clean corrosion
- Blast fans, vents, and openings with compressed air
- Inspect for damaged parts like the logic board or screen
- Replace any damaged batteries, cables, or peripherals
- Carefully reassemble once fully dry and test functionality
- Research reputable online suppliers for MacBook replacement parts
- Watch MacBook disassembly/repair videos for guidance
Don’t attempt to power on your MacBook until completely dry internally. Be slow and gentle when disassembling MacBooks – the cables and connectors are delicate.
Liquid damage repair cost for MacBooks
If DIY attempts are unsuccessful at fixing your liquid damaged MacBook, professional repair may be necessary. Here’s an overview of typical costs:
- Level 1 – Minor cleanup – $60-$150. Drying, cleaning minor corrosion, cleaning fans/vents.
- Level 2 – Component level – $150-$350. Logic board inspection and cleaning, key repairs, trackpad fixes.
- Level 3 – Replacement parts – $300-$800+. Fixing/replacing damaged components like screens, logic boards, batteries.
- Level 4 – Extensive water damage – $800+. Major disassembly for drying, multiple components replaced.
Costs vary widely based on the parts needing repair/replacement. Factors like MacBook model, year, and local repair rates also impact price. Diagnostic fees may apply first to inspect and quote repairs.
Average Cost to Repair Common Liquid Damages:
| Repair Type | Average Cost |
|---|---|
| Logic Board Cleaning/Repair | $150-$300 |
| Trackpad Replacement | $120-$200 |
| Keyboard Replacement | $150-$250 |
| Screen Replacement | $350-$600 |
| Battery Replacement | $130-$200 |
| Speakers Replacement | $50-$100 |
For cost-effective repair, focus on fixing only the damaged components instead of a full replacement. Component-level board repair is often cheaper than full board replacement.
Tips to prevent liquid damage on a MacBook
While accidents happen, you can take proactive steps to minimize the risk of liquid damage to your MacBook. Here are some useful precautions to prevent liquid damage:
- Never eat or drink over or next to your MacBook.
- Close lid when not in use to protect keyboard and screen.
- Avoid setting MacBook on surfaces that could get splashed.
- Keep away from bodies of water like pools or tubs.
- Carry MacBook in a protective case or bag when traveling.
- Keep your MacBook on an elevated, stable surface.
- Ensure liquids are sealed when nearby your MacBook.
- Place a waterproof cover over your MacBook when outdoors.
- Keep young children and pets away from MacBook area.
- Immediately dry hands before using MacBook if they are wet.
Making these safeguards part of your regular routine helps shield your MacBook from dangerous spills. But accidents still happen occasionally, so being prepared to take rapid action at the first sign of liquid damage helps minimize costly repairs.
Conclusion
Liquid damage doesn’t necessarily have to spell the end for your MacBook. By quickly powering off, opening up the machine to dry out internal components, and allowing ample drying time, many liquid damaged MacBooks can be revived. For minor spills, DIY repairs may do the trick. But for extensive water damage or shorted components, professional repair assistance may be your best bet for getting your MacBook operational again.
With some knowledge of what causes liquid damage, smart prevention tips, and being ready to take immediate action when spills occur, you can avoid expensive liquid damage repairs and get more life out of your MacBook.