Quick Answers
Yes, you can easily connect an external hard drive to a desktop or laptop PC. All you need is an external hard drive and the right cable to connect it. Modern external hard drives use USB connections, so you just need a USB cable to hook it up. External hard drives are plug and play, so Windows should automatically detect the drive when connected and install any necessary drivers. After connecting, the external drive will appear as a new storage location that you can access just like your internal hard drives.
What is an External Hard Drive?
An external hard drive is a portable data storage device that can be attached to a computer via a USB or FireWire connection. An external hard drive provides expanded storage capacity for a PC, allowing you to store more files such as photos, videos, music, and documents.
External hard drives are encased in an external enclosure and connected to the computer externally, unlike internal hard drives which are installed inside the computer case. They derive power from the USB or FireWire cable connection to the PC. Common capacities for external hard drives range from around 320GB to 4TB or more for desktop models. Portable external hard drives can offer 500GB to 4TB as well.
The benefits of using an external hard drive include:
- Extra storage space – External HDDs allow you to drastically increase the storage space of your computer.
- Portability – External hard drives are portable and can be moved between computers.
- Data backup – Provide a backup destination for important files.
- Data security – Sensitive files can be stored securely on an external hard drive.
- Convenience – Easy plug and play connection.
Popular uses for external hard drives include:
- Storing an expanding media library of movies, photos, and music
- Backing up vital documents, photos, videos and other data
- Expanding limited storage space on a laptop
- Storing sensitive financial records or other important files
- Saving project files from programs that take up a lot of storage
Overall, an external hard drive is a great accessory for anyone that needs some extra storage space and the ability to take important files with them on the go.
Connecting an External Hard Drive to a Desktop PC
Connecting an external hard drive to a Windows desktop computer is very simple. Follow these steps:
- First, ensure your computer has an available USB port to connect the hard drive. Modern desktop PCs have multiple USB ports.
- Power off the computer and external hard drive before connecting.
- Plug the power cable from the external hard drive into a wall outlet or power strip.
- Connect the included USB cable from the external hard drive to an open USB port on the back or front of the desktop PC case.
- Power the external hard drive on if it has a separate power button.
- Power your computer back on. Windows should automatically detect the new external drive.
- Open File Explorer. The new external hard drive will appear as a new drive letter entry such as “E:”.
- The external hard drive is now ready to use! You can drag and drop files to it or save new files directly to it.
The process takes just a few minutes. The external hard drive will provide plug-and-play functionality on most modern Windows PCs thanks to built-in USB support.
Tips for Connecting an External Hard Drive to a Desktop PC
Follow these tips for smoothly connecting and utilizing your new external storage:
- Always safely eject the external hard drive before unplugging it.
- Avoid disconnecting while files are being accessed to prevent data corruption.
- Use the same drive letter each time for easier recognition if you regularly unplug the drive.
- Organize your files in folders on the external drive for quick access.
- Back up your external drive in case it is lost or the files become corrupted.
Connecting an external hard drive to a desktop PC using USB is fast and easy. In just minutes you can significantly expand your storage capacity. Always eject the drive safely before disconnecting to avoid potential issues.
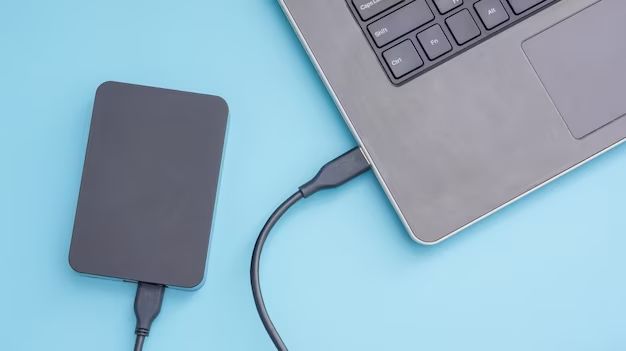
Connecting an External Hard Drive to a Laptop
Users can also add external storage to most laptop PCs. Here is how to connect an external hard drive to a laptop:
- Check your laptop for an available USB Type-A or USB-C port to plug the hard drive into.
- Power off the laptop and external hard drive before connecting.
- For desktop external drives, plug the power cable from the hard drive into a wall outlet or surge protector.
- Connect the USB cable from the external hard drive to an open USB port on your laptop.
- Power on the external hard drive if it has its own power button.
- Turn your laptop back on. Windows should detect the new drive and install any required drivers.
- Open File Explorer to verify the external drive appears as a new drive letter entry.
The process works the same on a laptop as on a desktop. Most laptops have at least one USB-A port that can be used to connect a typical external desktop hard drive. Some also support the newer USB-C interface.
Tips for Using an External Hard Drive with a Laptop
Here are some additional tips when using external storage with a laptop:
- Use a powered external hard drive to ensure adequate power from your laptop’s battery.
- Eject and disconnect the external drive when not in use to save battery life.
- Consider a portable external SSD for added speed and durability.
- Always eject the external drive before unplugging to prevent data issues.
- Store your drive in a case or bag when travelling to protect it.
With large media libraries and sensitive documents to store, external hard drives are a laptop accessory you don’t want to forget. Just connect the drive as needed whenever extra storage space is required.
External Hard Drive Not Showing Up
If your external hard drive is not showing up or being detected by Windows, try the following troubleshooting steps:
- Check USB cable connections – Unplug and reinsert connections at the drive and PC to ensure a proper connection.
- Try a different USB port or cable if possible.
- Reboot your computer to reset the USB subsystem.
- Ensure the external hard drive has power – If powered via wall outlet, plug it directly into the wall.
- Verify the drive shows up in Disk Management – Open Windows Disk Management to see if the drive appears here even if not in File Explorer.
- Assign a drive letter if needed in Disk Management.
- Check if the drive shows up in Device Manager – Here you can check for hardware errors or driver issues.
- Update USB and chipset drivers if available.
- Disable USB selective suspend in Power Options if the drive keeps disconnecting.
- Enable USB debugging in Developer Options if using Android.
If the external drive still won’t show up, it may be physically damaged and need replaced. But try the above steps first to resolve most detection issues.
Formatting an External Hard Drive
When you first connect an external hard drive to Windows, you may be prompted to format it. Formatting erases any prior data and partitions on the drive and prepares it for use with your PC.
Follow these steps to format your new external hard drive in Windows:
- Open Windows File Explorer and right-click on the new external drive listing.
- Select “Format” from the menu.
- Choose your desired file system – This will be NTFS for most users. Leave allocation size default.
- Give the drive a descriptive name if desired, such as “External USB”.
- Check “Quick Format” to skip scanning for bad sectors.
- Click “Start” to begin formatting.
The formatting process may take several minutes to complete depending on the drive size. Once done, the drive will be ready for use.
Optionally, you can format an external hard drive using these advanced options:
- Partition drive before formatting to create separate logical drives.
- Run a full format scan rather than quick format for full error checking.
- Choose exFAT instead of NTFS for macOS compatibility.
- Perform a full wipe of the drive before formatting for security purposes.
But for most users, doing a quick NTFS format will sufficiently prepare a new external drive for use.
What File System to Use for External Hard Drive
You’ll need to choose a file system when formatting your external hard drive. The most common options are:
- NTFS – The most modern file system used by Windows. Offers the best performance and supports files over 4GB.
- exFAT – Compatible with macOS and Windows. No file size limit but less efficient than NTFS.
- FAT32 – Legacy file system compatible with all devices. Limits files to 4GB.
For use solely with Windows, NTFS is recommended. It’s the fastest and most feature-rich choice.
exFAT can be used for external drives that may also connect to a Mac. It has wider compatibility but some efficiency drawbacks.
FAT32 only should be used if you require compatibility with really old devices. It lacks most modern features.
Stick with NTFS for PC-only external drives. Consider exFAT if cross-platform support is needed.
How to Use External Hard Drives
Once formatted and connected to your PC, using an external hard drive is simple:
- File Transfers – Copy/paste or drag and drop files to move them on and off the external drive.
- File Location – Save new files directly to the external drive. Designate it as a storage location.
- Applications – Install apps directly to the external drive. Games, programs, and the OS can run from it.
- Backup – Use backup software to schedule regular backups to your external drive.
- Extra Space – Store large files like photos, videos, ISO files and other media on the drive.
Basically, you can treat your external hard drive as additional internal storage space. Move files between your local drive and external drive. Install programs and store all types of files. It expands the overall storage capacity of your PC.
Just remember to safely eject the external drive before removing it!
External Hard Drive Care Tips
To maximize the lifespan of your external hard drive:
- Safely eject before disconnecting to avoid potential drive errors.
- Be sure to disconnect if the drive won’t be used for a while.
- Always use the USB or power cable when using for best performance.
- Don’t expose to moisture or extremely high or low temperatures.
- Keep the drive in a bag or case if travelling to avoid damage.
- Periodically scan for viruses if connected to multiple PCs.
- Avoid forcefully disconnecting when files are being accessed.
Following these basic care principles will keep your drive working as long as possible!
External Hard Drive vs Cloud Storage
So should you use an external hard drive or cloud storage? Each have pros and cons:
External hard drives:
- Provides expansive local storage
- No recurring subscription fees
- Allows full control and ownership of data
- Files can be accessed without an internet connection
- Provides data transfer speeds limited only by the drive interface and PC capabilities
- Possibility of drive failure or physical damage
- Requires physical space to store and cables to connect
Cloud storage:
- Access your files from anywhere with an internet connection
- Data synchronization across devices
- Cloud data is secured, monitored and often backed up
- Scalable storage available for reasonable monthly rates
- Uploading/downloading files can be slow depending on internet speeds
- Recurring subscription costs
- Cloud outages can disrupt access
- Third party controls security of your data
For most home users, a combination of both solutions is beneficial. Use an external drive for local backups and storage. Maintain vital files in the cloud for omnipresent access and redundancy.
Conclusion
Connecting an external hard drive to desktop or laptop PCs using USB connections is straightforward. After safely ejecting any connected drives, simply plug the USB cable from the external drive into your computer. Most external hard drives are plug and play, with driver software automatically installed by Windows.
Double check that the new external drive appears within File Explorer to confirm the detection was successful. At that point you can move files back and forth, saving data and installing applications externally. Just remember to properly eject before disconnecting.
Maintaining your drive according to manufacturer recommendations will maximize longevity. Choosing the right interface and formatting the drive properly is key as well. For widespread use and backup, it’s hard to beat the flexibility and portability of an external HDD. With terabytes of affordable storage space, they are a wise investment for any PC user needing more capacity.