Mac computers are designed to allow users to upgrade certain components, like the hard drive. Upgrading to a new internal hard drive offers several benefits over the standard hard drive that comes with a Mac. Some key advantages include improved speed, reliability, durability, and efficiency.
SSD drives in particular provide faster access speeds, with average response times around 100x faster than traditional hard drives. The lack of moving parts also makes SSD drives more resistant to shock, vibration, and temperature changes compared to mechanical drives. Upgrading to a new SSD can dramatically boost system performance and responsiveness.
This article will provide a step-by-step guide to replacing the internal hard drive on a Mac, from compatibility considerations to configuring the new drive after installation. By the end, you’ll have the knowledge to perform this upgrade yourself and enjoy the many benefits of your Mac’s new high speed storage.
Compatibility Considerations
Not all Macs support hard drive upgrades. Apple has made it increasingly difficult to swap out internal storage on newer Mac models. However, older Macs generally allow you to replace the hard drive.
According to OWC, MacBook, MacBook Pro, MacBook Air, and iMac models from 2012 and earlier feature easily accessible storage bays that allow you to remove and replace the internal hard drive. Mac mini models from 2014 and earlier also support drive upgrades.
On the other hand, newer ultra-thin MacBook Pro and MacBook Air models from 2016 onward have the SSD soldered to the logic board, making upgrades nearly impossible. Recent iMac models also make storage upgrades very challenging without completely disassembling the system.
For supported Macs, OWC offers a variety of compatible hard drive upgrade options to boost your storage capacity and performance.
Preparing for the Upgrade
Before beginning the upgrade process, it is critical to back up all important files and data. Services like Time Machine or an external hard drive make backing up the existing hard drive quick and easy. Having a full system backup will allow for easy restoration if any issues arise during the upgrade.
Gathering the necessary tools ahead of time will ensure the upgrade goes smoothly. The basics needed are a Philips head screwdriver, anti-static wrist strap, and external hard drive enclosure or cable to connect the new hard drive. Refer to Apple’s service manual for your specific Mac model for full instructions and any specialty tools needed.
Proper anti-static precautions should be taken when working inside any computer. Use an anti-static mat or work on a non-conductive surface. An anti-static wrist strap should be worn and attached to a metal part of the computer case to equalize electrical potential and avoid damaging sensitive components with static discharge.
Removing the Old Hard Drive
Before removing the old hard drive from your Mac, it’s crucial to properly shut down and power off the computer to avoid any data loss or corruption. According to iFixit’s MacBook Pro Hard Drive Removal guide, the first step is to “Power off MacBook Pro” before proceeding.
Once powered down, you’ll need to open up the case to access the hard drive. For an iMac, you’ll need to lay the computer face down on a soft surface and remove the back cover (Apple Discussions). For MacBooks, you’ll need to remove the bottom case cover. Refer to teardown guides for your specific model.
With the case open, locate the hard drive within the computer. In many Macs, the hard drive is held in place with screws and a mounting bracket. Use a Phillips screwdriver to remove any brackets and screws holding the drive in place (iFixit). Be sure to keep track of each screw and bracket for reassembly.
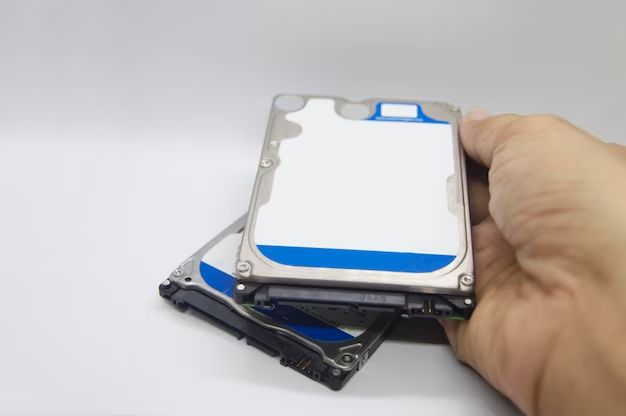
You’ll also need to disconnect the SATA and power cables from the hard drive itself. Gently pull the cables out to detach them from the drive. With the drive fully detached, you can then carefully lift it out of the computer.
Installing the New Hard Drive
Once you have removed the old hard drive, you can install the new drive. First, you may need to attach mounting brackets to secure the new drive in the Mac’s drive bay. The brackets slide into channels on the sides of the drive and allow you to screw the drive into place.
Next, connect the necessary data and power cables. SATA data cables connect the drive to the Mac’s logic board, while the power cable connects to the power supply. Make sure the cables are connected snugly.
Then, slide the new drive into place and use the mounting screws to secure it firmly in the drive bay. Double check that the SATA and power connectors are fully seated.
According to Apple’s support article, when installing a new drive, be sure to “…push the drive all the way in so that the ports on the back of the drive are accessible.” Properly seating the drive ensures reliable connections (https://support.apple.com/guide/disk-utility/add-a-disk-to-a-disk-set-dsku669685e4/mac).
Configuring the New Drive
After physically installing the new hard drive, you’ll need to configure it so that it can be used as the startup disk for your Mac. This involves formatting or initializing the drive and then restoring your data from a backup.
The first step is to boot to macOS Recovery mode by holding down Command + R while restarting your Mac. This will bring up the macOS Utilities window.
Next, launch Disk Utility from the utilities window. Here you can select your new hard drive and click “Erase” to format it for use with macOS. Make sure to select the correct scheme (GUID Partition Map for Intel-based Macs).
Once the drive is formatted, you can exit Disk Utility. The next step is to restore your data from a backup, either Time Machine or another full system backup. Follow the prompts to select your backup drive and restore the data to your newly formatted hard drive.
After the restore is complete, you can restart your Mac, which should now boot from the new hard drive. You may need to reconfigure some settings, but your Mac will be running on the new, larger hard drive.
For step-by-step details, see Apple’s guide on adding a disk using Disk Utility.
Completing the Upgrade
After installing the new hard drive and configuring it, the final steps are to verify your data was restored properly and reassemble the Mac. When turning the Mac back on after the upgrade, it’s important to immediately check that all data from your backup was transferred correctly. Navigate through the file system and open key files to verify the content was restored. If any data seems corrupted or missing, you may need to redo the data migration process.
Next, reassemble the Mac by replacing all the components in reverse order of how they were removed. Replace the bottom cover, battery, and any other parts that were taken out to access the hard drive bay. Reconnect any cables that were disconnected during disassembly. Verify that no screws or clips are missing – this ensures the Mac will function properly after being put back together. With care and patience, you can complete the upgrade while keeping your Mac intact.
As a final step, run diagnostics to validate the new hard drive is detected accurately and runs as expected. Check Disk Utility First Aid and Apple Hardware Test. If any issues arise, recheck connections and follow troubleshooting steps. With the new drive fully functioning, you can start enjoying the performance boost and extra capacity.
Performance and Usage
Upgrading to a new hard drive, especially switching from a traditional hard disk drive (HDD) to a solid state drive (SSD), can significantly improve your Mac’s performance in several ways:
Faster boot and application launch times – SSDs have much faster read/write speeds compared to HDDs, allowing your Mac to boot up and launch apps much quicker. According to Experimax, upgrading to an SSD can make your Mac boot up 3-4x faster.
More storage capacity – Newer hard drives offer much higher maximum capacities than older drives. Going from a 500GB HDD to a 1TB or 2TB SSD will provide ample storage space for photos, videos, games, and media files.
SSDs are more reliable and energy efficient than HDDs due to having no moving parts. HDDs with spinning disks are more prone to failure over time. And SSDs consume less power, resulting in longer battery life for laptops.
Overall, upgrading to a new SSD will make your Mac feel much snappier and responsive across all usage, while booting and launching apps in a fraction of the time. The speed boost can rejuvenate an aging Mac and extend its useful lifespan.
Additional Upgrades
Beyond upgrading the hard drive, there are other ways to enhance the performance and capabilities of your Mac. Two popular options are adding more RAM and upgrading the processor.
Adding more RAM allows your Mac to run more applications and browser tabs smoothly. On older Mac models, you may be able to upgrade the RAM yourself by opening up the computer and installing new memory modules. Refer to this RAM upgrade guide to find compatible RAM and instructions for your specific Mac.
Upgrading the processor is a more complex endeavor but can provide a significant boost in speed. Processor upgrades involve replacing the CPU chip on the logic board. Retailers like OWC offer custom upgraded logic boards for various Mac models. Be sure to get a compatible logic board for your exact Mac model and operating system version.
For additional in-depth guides on fully upgrading different Mac models, check out sites like iFixit. With some technical skill and the right parts, you can dramatically improve your Mac’s performance and extend its usable lifespan.
Conclusion
Upgrading to a new hard drive can breathe new life into an aging Mac. We walked through the key steps of replacing the old drive with a fresh, higher capacity model. While the process involves opening up the computer and doing some hands-on work, it is very doable for most users.
The benefits of a new hard drive are clear. You instantly get more storage space for files, photos, videos and applications. Your Mac will feel much faster thanks to the improved performance of a new drive. And you can reuse or properly recycle the old drive.
With some careful work and by following the steps outlined, you can upgrade your Mac’s hard drive on your own. This allows you to customize your computer to precisely meet your storage needs now and into the future. While there are always risks working inside electronics, with sensible precautions, you can likely complete this upgrade successfully. Your Mac will thank you for the refreshed components.