Quick Answer
Yes, you can use SD cards with Mac computers. Macs have built-in SD card readers that allow you to access files stored on SD cards. You can insert the SD card directly into the SD card slot on your Mac. Once inserted, the SD card will mount on the desktop like any other disk drive. You can then access, copy, move or delete files on the SD card.
Ways to Use SD Cards on Mac
Here are some of the main ways you can use SD cards with a Mac:
Transfer Photos
One of the most common uses for SD cards with Macs is to transfer photos and videos from cameras. The SD card acts as removable storage that lets you free up space on your camera to take more pictures. Simply insert the SD card into your Mac’s card reader to import the files into apps like Photos or Preview.
Expand Storage
SD cards provide additional storage space for your Mac. This allows you to store more files directly on the SD card when the internal drive fills up. Use the SD card to hold documents, photos, videos, music and other media files.
Back Up Files
You can manually back up important files from your Mac onto an SD card. This provides an external backup of your data that you can store safely away from your computer. It also allows you to transfer files between multiple Macs using the SD card.
Run MacOS From SD Card
With some extra steps, you can actually run MacOS directly from an SD card on certain Mac computers. This allows older Macs to utilize faster flash storage through the SD card reader. It also lets you quickly boot different versions of MacOS for troubleshooting.
Share Files
SD cards make it easy to share files between Macs and other devices like DSLR cameras, drones,GoPros and more. Simply move files onto the removable SD card, eject it safely from your Mac and insert it into the other device. This provides a fast way to transfer photos, videos, music and other data.
Requirements for Using SD Cards on Mac
To use SD cards with your Mac computer, here’s what you need:
SD Card Reader
Your Mac must have a built-in SD card reader or an external USB card reader connected. Most modern Macs have SD card slots that support standard size SD cards. Make sure your Mac has an SD slot before purchasing a card.
Compatible SD Card
Macs can use SD, SDHC and SDXC type cards. Make sure to get a compatible card with enough storage and the right speed rating for your needs. UHS-I and UHS-II type SD cards offer faster data transfer speeds.
Proper Insertion
SD cards have a front and back side. The metal contacts must face down when inserting into your Mac’s card slot. Inserting incorrectly can damage the card. Push the card gently until it clicks into place.
Proper Ejection
Always properly eject the SD card before removing it from your Mac. This ensures all data is safely written to the card first. In MacOS, right-click the card icon on the desktop and select “Eject.”
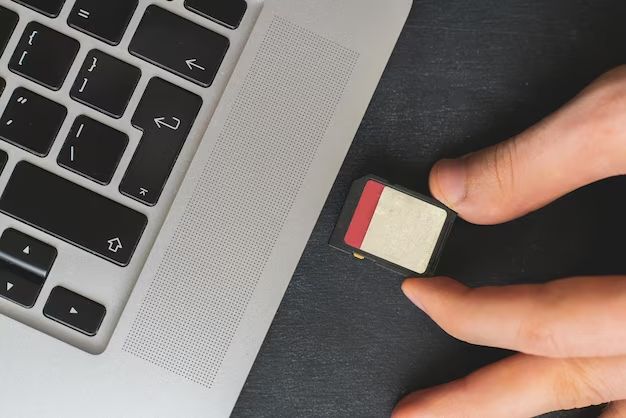
How to Insert an SD Card on a Mac
Follow these steps to correctly insert an SD card into your Mac:
1. Locate the SD card slot on your Mac. It is typically located on the side or back of laptops. On desktop Macs, it is on the rear panel or on top. Older Macs may require an adapter.
2. Hold the SD card with the metal contacts facing down and pointed toward the computer. The angled corner should face the card slot.
3. Gently slide the card into the SD slot until it clicks softly into place. Push firmly but carefully until completely inserted.
4. If your Mac is on, the SD card will immediately mount on the desktop. This may take a few moments on older Macs.
5. The SD card will appear as a removable disk icon labeled with the capacity, such as “32 GB” or “256 GB SD Card.”
6. You can now access the SD card contents just like any other disk drive connected to your Mac.
How to Eject an SD Card on a Mac
It is important to properly eject the SD card before removing it from your Mac. Here are the steps:
1. Locate the SD card icon on your desktop or in the Finder sidebar under Devices.
2. Right-click or control-click on the icon. Select the “Eject” option from the menu.
3. If a window is open accessing files on the SD card, close it first before ejecting. The Finder may warn you to close open windows.
4. An eject icon will appear over the SD card icon after starting the eject process. Wait for the process to complete.
5. The SD card icon will disappear from the desktop once fully unmounted. It is now safe to remove the card from the Mac’s slot.
6. Gently pull the SD card straight outward to remove it. Do not force it out if resistance is felt.
7. Safely store the SD card away from your Mac when not in use.
Following proper ejection steps prevents data loss or corruption of files stored on the SD card. Never force an SD card out without ejecting first.
Max SD Card Size for Mac
Macs can generally support SD cards up to 2TB in capacity. This includes SDXC cards at 256GB, 512GB, 1TB and 2TB sizes. However, there are some caveats:
– Older Macs may have limits around 128GB
– Maximum capacity depends on the SD card standard
– Speed limitations on very large SD card sizes
– Need compatible card reader and MacOS version
To use a 2TB card, you need an SDXC compatible reader and MacOS 10.6.5 or later. Very large cards may slow down transfer speeds due to older bus limitations. But modern Macs can utilize the fastest UHS-II SD cards at 1TB and 2TB capacities.
Check your specific Mac model’s technical specs to determine the maximum tested SD card size. Also confirm your SD card reader and MacOS version for compatibility. Most current Macs can utilize 512GB+ SD cards without issue for extra storage space.
How to Format an SD Card on Mac
SD cards may require formatting before you can fully use them with your Mac. Here are the steps to format an SD card:
1. Insert the SD card into your Mac’s card reader.
2. Open Disk Utility (located in Applications > Utilities).
3. Select the SD card volume in the left panel.
4. Click Erase in the top toolbar.
5. Enter a name for the card.
6. Select a compatible format like MS-DOS (FAT32) or Mac OS Extended.
7. Click Erase to begin formatting the SD card (this will erase any data currently on the card).
8. Wait for the process to complete. The card will be formatted and ready for use.
9. Close Disk Utility when finished. You can now store files on the freshly formatted SD card.
Formatting removes all existing data from the SD card. Be sure to backup any needed files before formatting. This process sets up the card to work optimally with your Mac.
How to Run MacOS on an SD Card
It is possible to run MacOS directly from an SD card on certain Macs. Here is an overview of the steps:
1. Insert the SD card into your Mac’s reader. Use at least 16GB capacity.
2. Download the MacOS installer from the App Store onto your normal startup drive. Quit all apps first.
3. Launch Disk Utility and format the SD card as GUID Partition Map and Mac OS Extended (Journaled).
4. Run the MacOS installer and select the SD card as the destination. Follow the steps to install.
5. Adjust boot order in Startup Disk preferences to select the SD card.
6. Restart your Mac and hold Option to select the SD card drive. MacOS will boot up directly from the SD card.
Running MacOS on an SD card lets you quickly test different operating system versions. It also provides a handy emergency troubleshooting disk for recovery options. Keep in mind SD cards are slower than internal SSDs, so system performance may lag.
SD Card Speed Recommendations for Mac
For best performance on a Mac, use the fastest SD card types:
– UHS-I U3 cards provide minimum 30MB/s write speeds
– UHS-II U3 SD cards offer up to 300MB/s read/write
– Avoid older standard SD cards rated Class 2, 4 or 6
– Get Class 10 or U1 speed ratings at a minimum
Faster cards greatly improve transfer time when working with high resolution photos, 4K video, gaming content and other large files. Check your device’s SD card documentation to confirm which speeds are supported.
SD cards also come in different physical sizes. Common capacities like 64GB or 128GB are available in standard, micro and mini sizes. Make sure to get the right size card for your device’s SD slot. Going with name brands like SanDisk, Sony or Samsung is recommended for reliability.
Troubleshooting SD Card Issues on Mac
Here are some troubleshooting tips if you have problems using SD cards on your Mac:
– Reinsert the SD card to remount
– Try different SD card slots if available
– Check for bent or damaged SD card pins
– Inspect card for physical damage or leakage
– Try different brands and capacities of SD cards
– Install latest MacOS updates
– Reset NVRAM if SD cards randomly unmount
– Use SD card recovery software if card is corrupted
– Format SD card to Mac OS Extended if unreadable
SD card issues can often be fixed by reseating the card or trying different SD cards. If problems persist, you may need to have your Mac’s SD card reader serviced. Ensure your MacOS and apps are up-to-date. Check if the issue replicates on a different Mac or operating system to isolate the problem source.
Conclusion
In summary, Macs have built-in SD card readers that allow you to use SD, SDHC and SDXC cards. SD cards provide extra storage, allow media file transfers, function as backup disks and more for your Mac. Make sure to properly insert, eject and format SD cards to avoid data loss. Use fast, brand name SD cards in compatible sizes for optimal performance. Following these guidelines will ensure your SD cards work seamlessly with any Mac computer system.
