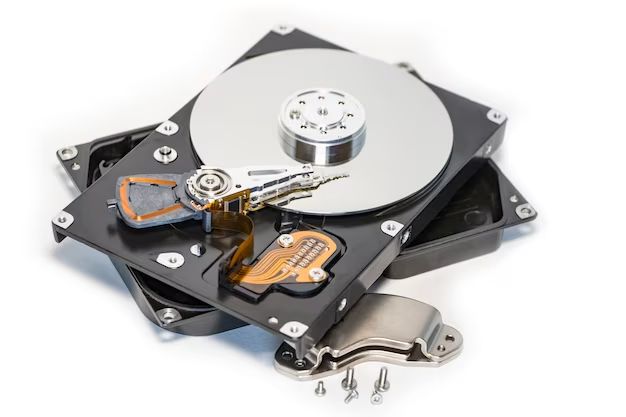
A laptop hard drive is the primary internal storage device that contains the operating system, software programs, and files on a laptop computer. There are two main types of laptop hard drives – traditional hard disk drives (HDDs) that use spinning magnetic disks, and solid state drives (SSDs) that use flash memory chips. Over time, a laptop’s original hard drive can start to run slowly or fail due to age, heavy usage, or physical damage. Replacing an old hard drive with a new one can provide a number of potential benefits.
Reasons to Replace a Laptop Hard Drive
There are several compelling reasons why you may want to replace your laptop’s hard drive with a new one. The most common reasons are to gain faster performance, more storage space, and prevent data loss from drive failure.
Upgrading to a solid state drive (SSD) from a traditional hard disk drive (HDD) can dramatically speed up your laptop. SSDs have faster read/write speeds compared to HDDs because they contain no moving parts. According to Pits Data Recovery, booting speeds can be up to 4 times faster with an SSD versus an HDD. This improved performance makes everything on your laptop feel snappier.
Replacing your old hard drive with a new one also allows you to increase your storage capacity. As your needs grow over time, the storage space on your original hard drive may no longer be sufficient. Upgrading to a drive with a larger capacity gives you more room for files, photos, videos, games, and applications.
Finally, over time hard disk drives can fail due to mechanical issues or errors. An SSD has no moving parts so it is less susceptible to physical failure. Upgrading to an SSD reduces the risk of losing your important data due to drive crashes.
Precautions Before Removing
Before removing the hard drive from your laptop, it’s important to take some precautions to avoid damaging your data or hardware:
Back up your data – Make sure you have a full backup of all your files, either on an external drive or cloud storage. This will allow you to restore your data if anything goes wrong during the hard drive replacement process. See [this Quora answer](https://www.quora.com/Are-there-any-precautions-I-should-take-when-taking-the-internal-hard-drive-out-of-my-laptop) for more on the importance of backing up data before removing a laptop hard drive.
Discharge static electricity – Static electricity can damage computer components. Before removing the hard drive, make sure you discharge any built-up static by touching a grounded metal object. Some experts recommend using an anti-static wrist strap as well.
Have the right tools – You’ll need the right screwdrivers and prying tools to open up your laptop case and access the hard drive bay. Refer to a disassembly guide for your specific laptop model to see which tools you’ll need. Don’t try to force anything open.
Work on a clean, well-lit surface – Choose a large, open workspace that will allow you to keep track of the small screws and components involved. Proper lighting and organization will help avoid losing any pieces.
Consult your laptop manual – Review the manufacturer’s documentation so you understand how to properly open your laptop case and locate the hard drive. Following specific procedures will reduce the risk of damage.
Removing the Old Hard Drive
Removing the hard drive from a laptop is a straightforward process that usually just requires a few tools and following some key steps. Here is a step-by-step guide for removing an old hard drive from a laptop:
- Turn off the laptop and disconnect any connected peripherals like the charger.
- Place the laptop upside down and remove the battery by sliding the battery locks and lifting it out.
- Use a Phillips screwdriver to remove all screws from the bottom panel of the laptop.
- Carefully pry open the bottom panel starting from the sides. Be gentle as there may be plastic clips.
- Locate the hard drive, which is usually on the side or between the battery compartment and motherboard.
- Remove any screws or brackets securing the hard drive in place.
- Gently pull the hard drive to disconnect it from the SATA and power connectors inside the laptop.
- Place the removed hard drive aside and close up the laptop for now.
Be sure to handle the hard drive carefully without dropping it or allowing any static buildup. The hard drive contains sensitive components. Now it can be replaced with a new hard drive for enhanced performance.
For a visual guide, see this step-by-step tutorial: https://recoverit.wondershare.com/harddrive-tips/remove-hard-drive-from-laptop.html
Choosing a Replacement Hard Drive
When choosing a replacement hard drive for your laptop, there are several key factors to consider:
Compatibility – The new hard drive must be physically compatible with the mounting and connection inside your laptop chassis. Most laptop drives use a 2.5″ form factor and SATA interface, but double check your laptop’s service manual to confirm.
Size – Consider both the physical size of the drive bay in your laptop as well as the capacity (storage amount) you need. Common 2.5″ laptop drives include 500GB, 1TB, and 2TB. Measure the drive bay to ensure the replacement drive will fit.
RPM – The rotation speed (5400 RPM or 7200 RPM) affects performance. Faster 7200 RPM drives are better for power users, while slower 5400 RPM may generate less heat.
Cache – More cache (16MB or more) can improve read/write speeds and performance. Make sure the replacement drive has at least the same cache as the original.
See this guide for help choosing the right hard drive for your laptop.
Installing the New Hard Drive
Once you have selected a compatible replacement hard drive, you are ready to install it into your laptop. Here are the step-by-step instructions for properly installing your new hard drive:
1. Place your laptop upside down on a flat, clean surface. Locate the hard drive bay cover on the bottom and remove the screws holding it in place using a Phillips head screwdriver.
2. Carefully lift off the access panel and set it aside. This will expose the hard drive bay.
3. Unplug the ribbon cable connected to the old hard drive and gently slide it out of the bay.
4. Align the contacts of the new hard drive to match the bay. Gently but firmly slide the new hard drive into place.
5. Reconnect the ribbon cable to the motherboard connector.
6. Replace the access panel and screw it back into place.
With the new hard drive physically installed, you can proceed to transferring data or installing a fresh operating system.
For a visual step-by-step guide, refer to this excellent video tutorial from Seagate.
Transferring Data
Once the new hard drive is installed, you’ll need to transfer your data and programs from the old drive. There are a few methods for doing this:
Using disk cloning software like Acronis True Image is the easiest option. This copies the entire contents of the old drive onto the new one. Just connect both drives to the laptop, run the software, and clone the old drive to the new one. This preserves everything including the OS, programs, files, and settings.
Doing a fresh OS installation on the new drive is another option. After installing Windows or your preferred OS, you can connect the old drive via USB and manually copy over any files and folders you need. This may require reinstalling programs and reconfiguring settings.
Migrating user profiles and transferring installed programs can be tricky with a fresh OS install. You may need to research specific software tools to assist with carrying over application installations and configuration settings.
Verifying Functionality
After installing the new hard drive and transferring data, it’s important to verify that the operating system, drivers, and files are working properly. Here are some steps to take:
Boot into Windows and verify the operating system loads correctly. Install any necessary drivers for components like the touchpad, wifi, etc. You can find these on the laptop manufacturer’s website if they did not transfer over.
Open device manager and scan for any warning signs of missing drivers. The unknown device icon will appear if any drivers are missing.
Browse through your folders and verify files have transferred over properly. Check documents, photos, downloads, and other personal data.
Run diagnostics software if available for your hard drive model. Tools like SeaTools or the manufacturer’s disk check program can scan for errors.
Monitor the hard drive performance and temperature using a system utility. Look for abnormal activity that could indicate a faulty drive.
Test critical software to ensure programs, games, creative apps, etc. launch and run without crashing. Reinstall software if necessary.
If any issues are found with drivers, software, or files, troubleshoot as needed. Refer to the laptop manufacturer’s guides for help.
Performance Benefits
Upgrading from a traditional hard disk drive (HDD) to a solid-state drive (SSD) can provide significant performance improvements for a laptop. According to benchmarks from PCWorld, replacing an old HDD with a 500GB Samsung SSD increased a laptop’s performance score by 56%.
SSDs provide much faster read/write speeds compared to HDDs. This translates into dramatic reductions in boot times and app launch speeds. Where an HDD-based laptop may take over a minute to boot into Windows, an SSD-equipped system can often boot in under 30 seconds. Launching applications is also near instantaneous with SSDs.
The performance gains with SSDs lead to a much snappier overall user experience. Multitasking is smoother, files open faster, and games often benefit from reduced load times. For a laptop that feels slow or sluggish, upgrading to an SSD provides one of the biggest performance improvements possible.
Conclusion
In summary, replacing a laptop hard drive can provide several benefits but does require following some key steps. First, you’ll need to back up any important data and uninstall the old hard drive. Next, choose a compatible replacement hard drive with adequate storage capacity and speed. Carefully install the new hard drive, reconnect all cables, and reinstall the operating system and applications. Once completed, you can transfer your data back and verify full functionality. The end result is a laptop with more storage space, faster performance, and extended device lifespan. With some planning and care, upgrading your laptop’s hard drive can breathe new life into an aging machine.