iCloud backups provide a way to securely store copies of your iPhone, iPad, or other iOS device data in Apple’s cloud storage. Introduced in 2011 along with iCloud itself, iCloud backups run automatically when your device is charging and connected to WiFi, saving a snapshot of your settings, apps, photos, messages and more (Introduction to iCloud). Restoring from a backup allows you to easily recover your data if you ever lose, break, or upgrade your device.
However, iCloud backups are limited in storage capacity, so older backups may be deleted over time to make space for newer ones. In some cases, you may need to access data or settings that were captured in an older backup which has since been removed from iCloud. Fortunately, there are methods to recover and restore from those older iCloud backups as well.
Viewing Available Backups
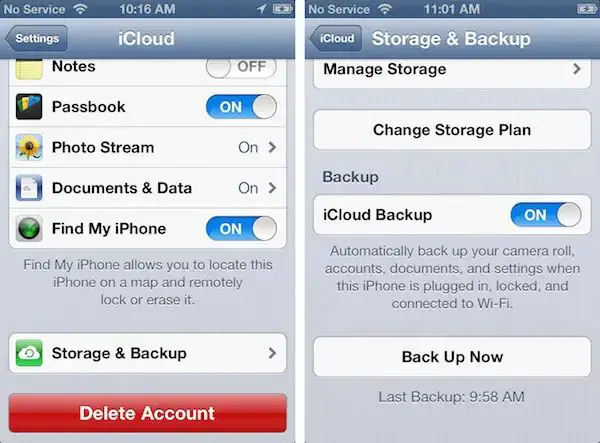
To see your available iCloud backups, you first need to access your iCloud settings. This can be done on your iPhone/iPad by going to Settings > [your name] > iCloud > Manage Storage. There you will see a list of devices associated with your Apple ID that have been backed up to iCloud (1).
You can also view your iCloud backups on a Mac or PC by going to iCloud.com and signing in with your Apple ID. Click on Settings > Account Settings > Manage Storage > Backups to see a list of available device backups (2). The most recent backup will be at the top.
Additionally, Windows users can open the iCloud for Windows app, click on Storage > Backups to view backups. Here you’ll see storage used for each backup and the date it was created (3).
So in summary, your iCloud backups can be accessed through the iCloud settings on iOS devices, by going to iCloud.com on the web, or via the iCloud for Windows app.
Restoring from a Backup
Apple allows users to restore their iPhone, iPad or iPod touch from a previous iCloud backup in order to revert to a previous state, roll back software updates, or transfer data to a new device. The steps to restore from an iCloud backup are as follows:
- On the new or reset device, proceed through the initial setup process until you reach the Apps & Data screen.
- Tap “Restore from iCloud Backup” and sign in with your Apple ID if prompted.
- Select the desired backup you wish to restore from. The most recent backup will be listed first.
- Tap “Restore” and wait for the restore process to complete. Your device will reboot and be restored to the state captured in the backup.
The restore process will download the backup from iCloud and overwrite any existing content or settings on your device, reverting it back to the selected backup state. All data, settings, and content from that backup will be transferred to your device [1]. Keep in mind restore times can vary based on factors like internet connection speed.
Backup Limitations
iCloud has limits on how many device backups can be stored and for how long. According to Apple’s support page (source), iCloud stores the most recent backup of each device. For example, if you have an iPhone, iPad, and Mac, it will store the latest backup for each device.
These backups do not count against your overall iCloud storage limit. However, Apple only maintains the latest backup for each device. If you get a new device or erase one and set it up as new, the previous backup is deleted after 30 days.
So while iCloud keeps your latest backup available indefinitely, older backups or backups of previous devices are automatically deleted after 30 days unless you download them elsewhere for long-term storage (source). This backup limitation is important to understand if you need to retrieve or restore from an older backup.
Recovering Older Backups
Apple only stores a limited number of your most recent iCloud backups by default. This is to conserve storage space on your iCloud account. However, Apple keeps all of your iCloud backups for longer periods before permanently deleting them.
While older iCloud backups are not visible or accessible through the Settings app on your iPhone, they are still stored in iCloud for up to 180 days after being replaced by a newer backup. So even if a backup does not appear as an option to restore from, it may still be possible to recover it within this 180 day period.
You can contact Apple Support within 180 days of a backup being replaced, and request that they temporarily make that backup available for you to restore from. Apple refers to this as “unorphaning” a backup. So if you need to access an older backup that is no longer listed in Settings, Apple can potentially help recover it if it’s within that 180 day retention window.
It’s important to note that after 180 days, Apple permanently deletes old iCloud backups and they can no longer be recovered. So make sure to retrieve any irreplaceable information from backups within this timeframe.
Using Third-Party Tools
While Apple provides iCloud and iTunes for backing up and restoring iOS devices, there are also third-party tools that can help retrieve and restore older iCloud backups that may no longer be available through Apple’s interfaces.
One popular third-party iCloud backup tool is iMazing (https://www.ubackup.com/phone-backup/iphone-backup-software.html). This software allows you to browse and extract data from iCloud backups that may no longer be accessible through iCloud itself. iMazing can retrieve older backups as long as they still exist on Apple’s servers.
Another option is iExplorer (https://geekflare.com/iphone-ipad-backup/), which provides access to iCloud backups for data extraction and restoration. Like iMazing, iExplorer lets you recover backups even after they are deleted from normal iCloud storage.
For Windows users, iMyFone D-Back (https://www.ubackup.com/phone-backup/iphone-backup-software.html) offers an easy way to browse and restore iCloud backups. D-Back can retrieve and extract data from iCloud backups without needing to restore the entire backup.
Overall, these third-party tools provide more flexibility in accessing and restoring from iCloud backups, including older backups that are no longer available through Apple’s standard interfaces. They give users an additional option for recovering lost iPhone or iPad data from the cloud.
Retrieving From a Backup
You can search through your iCloud backup data to retrieve specific files or information without having to restore your entire device. Here are the steps:
1. Go to iCloud.com and log in with your Apple ID.
2. Click on Settings and select Restore Files from the options.
3. You will see a list of your available iCloud backups. Select the backup you want to retrieve data from.
4. A Finder window will open showing your backup content organized into folders like Apps, Camera Roll, Messages etc. Navigate to locate the specific file or data you need.
5. Select the file or folder and click Restore to download it to your computer. You can also click Restore All to download everything.
6. Locate the restored files on your computer. You can now transfer them back to your device if needed.
This allows you to selectively restore data from your iCloud backup without having to wipe and restore your entire device. It is useful for retrieving accidentally deleted files or finding an older version of a document from your backup.
Restoring Select Data
When restoring from an iCloud backup, you typically have to restore the entire backup to your device, overwriting all of your current data. However, there are a couple ways to selectively restore only certain data from a backup without erasing your entire iPhone:
You can use Apple’s Restore feature in iTunes to selectively restore information like contacts, calendars, bookmarks, text messages, and health data from your latest iCloud backup. Connect your iPhone to iTunes on your computer, then go to File > Devices > Restore from iCloud Backup. Select the backup you want to restore from, then click Restore. On the next screen, uncheck everything except the data types you want to restore [1].
Third-party apps like iMazing also let you browse the contents of an iCloud backup and select individual apps’ data or files to restore. You can restore your messages, photos, call history, voicemails, and other app data without touching the rest of your iPhone. Just connect to iMazing, tap Manage Backups, select your device, and choose what to restore [2].
So with some specialized tools, you can selectively restore backups rather than all-or-nothing. This lets you retrieve important data from old iCloud backups without having to wipe your iPhone.
Backing Up Your Backups
Even though iCloud provides a built-in backup solution, it’s always wise to have multiple backups of your important data. As the saying goes, don’t put all your eggs in one basket. While iCloud is generally reliable, backups can fail or get corrupted. Natural disasters, account hacks, or even simple user error could potentially cause you to lose access to your iCloud backups.
To prevent data loss, it’s recommended to maintain additional backups of your iCloud data. You can use third party apps like iMazing or PhoneView to download and restore your iCloud backups to a computer. Services like Google Drive or Dropbox can also be used to store backups of your critical iCloud data. Just make sure to encrypt any cloud backups that contain sensitive information.
The key is having multiple redundant copies of important backups, so you have alternatives available if issues arise. As the sole backup option, iCloud leaves you vulnerable. Taking a few minutes to create secondary backups of your iCloud data provides peace of mind that your memories and information will be safe even in worst case scenarios.
Conclusion
In summary, while iCloud does not provide a built-in way to access older device backups, there are a few options to try to recover and restore from an older iCloud backup:
– You can use third-party apps like iMazing or iPhone Backup Extractor to view and retrieve data from iCloud backups, including older backups that may no longer be available directly through iCloud.
– If you previously downloaded a backup to your computer through iTunes, you may be able to restore from that local backup file even if the iCloud copy expired.
– Check if you have Time Machine backups on a Mac – these may contain snapshots of iOS backups that you can restore from.
To avoid losing backups, it’s recommended to regularly export and save copies of your iCloud backup files locally. You can also upgrade your iCloud storage plan to retain more backups online for a longer period.