Swapping out hard drives between PCs essentially means physically removing an existing hard drive from one computer and installing it into another computer. This allows you to transfer data, settings, and installed software over to the new PC. There are several factors to consider before swapping hard drives between computers.
The main considerations are hardware compatibility, transferring data and settings, installing the drive, and restoring the operating system. The hard drives need to be physically compatible with the new PC in terms of size, connectors, and disk interface. Migrating data and settings can be complex depending on the OS. Drivers may need to be reinstalled and configured for the new system. There also may be steps needed to get the OS working properly after the swap.
Compatibility Factors
When swapping hard drives between PCs, there are several key compatibility factors to consider:
Form Factors
The physical size and shape of the hard drive is referred to as the form factor. Common form factors for desktop PCs include 3.5″ and 2.5″ drives. For laptops, 2.5″ drives are standard. It’s important to match the correct form factor to your PC’s drive bays or ports (What is an HDD form factor?).
Interfaces
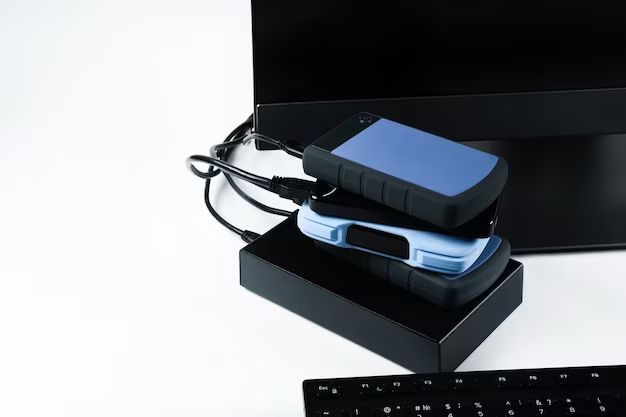
The interface is how the drive connects to the computer. Common interfaces include SATA, SAS, and NVMe for internal drives and USB and Thunderbolt for external drives. Make sure your PC has the required ports or adapters for the drive’s interface (Hard Drive Buyer’s Guide).
Capacity
Larger capacity drives can store more data but may be limited by your PC’s BIOS or OS capabilities. It’s usually best to match the new drive’s capacity to the old one or larger.
Spindle Speed
Spindle speed (RPM) affects performance in HDDs. Matching the RPM rating usually provides optimal compatibility.
Data Migration
When swapping hard drives, you have two main options for transferring your data and programs to the new drive: cloning the old drive or doing a clean install.
Cloning involves making an exact copy of your old hard drive and transferring it to the new drive. This allows you to migrate everything over at once without having to reinstall programs and transfer files manually. Popular cloning tools include Macrium Reflect and Acronis True Image.
Doing a clean install involves installing a fresh OS on the new drive and migrating only your personal files and settings over afterwards. This takes more work but provides a clean slate if you want to start fresh. You’ll need to reinstall all your programs on the new drive.
Before swapping drives, be sure to back up your important files as a precaution. Backups give you a safety net in case anything goes wrong during the migration process. You can back up to an external drive, cloud storage, or a NAS device on your network.
Hardware Installation
Installing a new hard drive into a desktop PC involves opening up the case and connecting the drive to the motherboard and power supply. Here are the key steps for installing a new hard drive:
First, you’ll need to open up the PC case. Most cases have removable side panels that are secured with screws. Remove the screws and take off the side panel to access the internal components.
Once inside, locate any empty drive bays. Most desktop cases have multiple bays where hard drives can be mounted and connected. Often, these bays will have rails or trays to easily slide in a new drive.
Connect the hard drive to the motherboard using a SATA data cable. This flat cable plugs into the back of the drive on one end, and into an open SATA port on the motherboard on the other end. Consult your motherboard manual if needed to locate an available SATA port.
You’ll also need to connect a SATA power cable from the power supply to the hard drive. The power supply in the case will have extra SATA power connectors specifically for hard drives. Plug this into the back of the new drive.
With the SATA data and power cables connected securely, you can slide the hard drive into an open bay and secure it using screws. Then replace the case side panel and power your system back on. The new drive should now be detected by the PC.
BIOS Configuration
The BIOS is the system firmware used to perform hardware initialization during boot up and provides runtime services for the operating system. When swapping hard drives, the BIOS may need to be configured to recognize the new drive and set the proper boot order. Some key BIOS settings for hard drive configuration include:
Boot Order – The boot order determines the order in which the BIOS will scan for bootable devices like hard drives. When installing a new hard drive, make sure to select that drive in the boot order menu so that the BIOS will attempt to boot from it. Some systems may also have options for selecting the hard drive mode, such as IDE, AHCI, or RAID (https://docs.oracle.com/cd/E19127-01/ultra27.ws/820-6773/giakd/index.html).
Drive Initialization – Many BIOS systems also allow initializing or formatting hard drives directly through a menu option. This can be used to quickly format and prepare new hard drives before the OS installation. Options like file system type and allocation unit size may need to be set (https://recoverit.wondershare.com/format-harddrive/format-hard-drive-bios.html).
Properly configuring the BIOS settings ensures the system recognizes the new hard drive and attempts to boot from it before legacy devices. Consult your system’s BIOS documentation for the exact menu options available.
OS Installation
After installing the new hard drive, you will need to install the operating system before you can use it. Here are the steps for a clean install of the OS:
1. Boot from the installation media – This can be a USB drive or DVD. You will need to enter the BIOS to select the boot device on startup. Choose the drive containing your OS installation files.
2. Follow the on-screen prompts to install the OS. Depending on the OS, you may need to enter a product key or login to your account.
3. Select custom installation. This will allow you to format the new drive and do a clean OS install.
4. The installation program will guide you through the rest of the process, including setting up partitions on the new drive and copying OS files.
5. After installation, install drivers and other software as needed. You may need to reactivate some software using license keys.
6. Once the OS is set up, you can restore data from your old drive if needed. The clean install ensures maximum performance on the new drive.
For more details, refer to this guide.
Restoring Data
After installing the old hard drive in the new computer, you will likely need to restore data and applications. There are two main approaches for restoring data: from a backup or by reinstalling applications.
If you had the foresight to regularly back up your data, you can simply restore files and folders from your backup. This is the fastest and easiest way to get your data back up and running. Make sure your backup drive is connected and the backup software is installed before starting the restoration process. The backup software will guide you through locating the backup archive and restoring it to the new hard drive.
If you don’t have a backup, you’ll have to reinstall all of your applications from scratch. Begin by making a list of all software, apps, and programs you were using on the old computer. Check the website or account for each application and look for options to download or install it on a new computer. Be prepared to locate license keys or re-enter serial numbers. For apps purchased through app stores like Steam or Origin, you can access and install your purchased software from your account. Reinstalling everything cleanly is time consuming but allows you to start fresh.
Recovering data without a backup requires special data recovery software designed for retrieving deleted or lost files. Options like CleverFiles and Stellar can dig deep to recover original files. However, this does not restore applications or system configurations.
Performance Optimization
After installing the hard drive and migrating your data, it’s important to optimize the drive’s performance. This involves benchmarking, defragmentation, and installing the latest firmware.
Run benchmarks to establish a performance baseline for the hard drive. Popular benchmarking tools include CrystalDiskMark and HD Tune. Compare results against the manufacturer’s specifications to verify the drive is performing as expected.
Defragmenting the hard drive can significantly improve performance by consolidating fragmented files. On Windows 10, use the built-in Optimize Drives utility. Set it to run on a schedule for ongoing optimization.
Always install the latest firmware from the manufacturer. Firmware updates fix bugs, improve compatibility, and boost performance. Check the manufacturer’s website periodically for new firmware releases. Some SSDs even allow firmware updates while the drive is still mounted and running.
Data Security
When swapping hard drives between computers, it’s important to consider data security. According to Encrypted hard drives, full disk encryption like BitLocker can help protect data if a drive is lost, stolen or improperly repurposed. Encrypting the hard drive ensures that data cannot be accessed without the proper cryptographic key.
Before installing an old drive into a new computer, it’s also a good idea to securely erase the drive according to Hard Drive and Full Disk Encryption. This overwrites the existing data to prevent unauthorized access. Tools like dBan can securely wipe an entire hard drive.
Conclusion
In summary, swapping hard drives between PCs is possible but requires careful consideration of compatibility factors. The key steps are checking that the hardware physically fits, updating the BIOS if needed, reinstalling the operating system, and restoring data. With proper planning, hard drive swapping can provide benefits like increased storage, improved performance and reliability. SSDs in particular offer huge speed boosts over traditional HDDs. While there are some hurdles to overcome, with the right technical know-how, swapping hard drives can breathe new life into an older system.
The main benefits of drive swapping include increased capacity, faster speeds, improved reliability and durability. SSDs vastly outperform HDDs thanks to faster read/write times, quicker boot ups and app launches. Replacing an old mechanical drive with a new SSD can make an older system feel brand new. Backing up data and performing a clean OS installation also provides a fresh start. With proper backups, data migration is straightforward. While it takes effort, drive swapping enables hardware reuse, saves money compared to buying a new PC, and extends the usable lifespan of existing systems.