Yes, it is possible to transfer music from iCloud to your iPhone. There are a few different ways you can go about doing this depending on your specific needs.
Quick Ways to Transfer Music from iCloud to iPhone
Here are some quick answers to common questions about transferring music from iCloud to iPhone:
- Use the Apple Music app – Open the Apple Music app on your iPhone and tap on Library. Here you can access all the music you have stored in iCloud. Simply tap on a song to download it to your device.
- Use iTunes on a computer – Connect your iPhone to your computer using a USB cable. Open iTunes, go to the Music section, and check the Sync Music box. This will transfer all iCloud music to your iPhone.
- Turn on iCloud Music Library – Go to Settings > Music on your iPhone and toggle on iCloud Music Library. This will make your entire iCloud music collection available on your device.
- Download songs individually – Open the Music app on your iPhone, tap on a song, and tap on the iCloud download icon to save that song to your device.
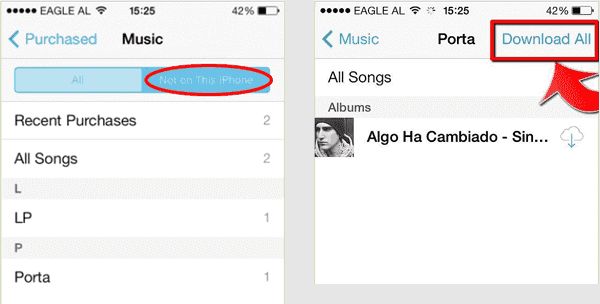
Using the Apple Music App to Transfer from iCloud
The easiest way to get music from your iCloud over to your iPhone is through the Apple Music app. Here’s a step-by-step guide:
- Make sure you have an active internet connection on your iPhone.
- Open the Apple Music app. Tap on the Library tab at the bottom.
- Under Library, choose Songs to view all your music synced from iCloud. You can also view playlists, artists, albums etc.
- Browse through your synced iCloud music and when you find a song or album you want, tap on it.
- For individual songs, tap on the iCloud download icon next to each track to download it. For albums, tap the iCloud download icon next to the album name to download all the songs.
- Downloaded songs will now be available offline on your iPhone whenever you want to listen!
This method downloads your iCloud music straight to your iPhone so you can listen offline. As long as the Apple Music app is up to date, it’s incredibly simple to use it to transfer music from iCloud.
Using iTunes to Sync iCloud Music to Your iPhone
If you rely on iTunes for managing music on your devices, you can also use it to sync music from your iCloud over to an iPhone. Here are the steps involved:
- Connect your iPhone to your computer using the included USB to Lightning cable.
- Open iTunes on your computer. Make sure you have the latest version.
- In iTunes, click on your connected iPhone icon. Go to the Music section.
- Check the box for “Sync Music.” Then select “Selected playlists, artists, albums and genres” below it.
- Under Library, choose the specific playlists, artists, albums or genres you want to transfer from iCloud to your device.
- Click Apply to sync the selected iCloud music onto your iPhone. The chosen music will copy over.
- Syncing may take awhile depending on your internet speed and amount of content. Let the process complete.
- After syncing, the music will now be available on your iPhone for offline playback even without an internet connection!
Syncing through iTunes gives you more selective control over exactly which playlists or albums get transferred from iCloud. Just connect your device, choose your content, sync, and iTunes does the work.
Enabling iCloud Music Library
You can also set your iPhone to directly access your entire iCloud music library for streaming or offline use. Here’s how to turn on this feature:
- On your iPhone, open the Settings app and tap on Music.
- Under Media Library, tap on “iCloud Music Library” to toggle it on.
- Read the on-screen details and tap “Enable” to confirm.
- Your full iCloud music collection will now be available in the Apple Music app.
- To save music for offline listening, tap the iCloud download button next to an album or song.
- Downloaded iCloud music will appear under Downloaded Music in the Library tab. It can now be played offline.
With iCloud Music Library enabled, any new music you add to your iCloud will automatically appear in the Music app. Just remember to download songs for offline listening. Turning this on is the easiest way to stay in sync.
Downloading Individual Songs from iCloud
You always have the option of manually downloading individual tracks from your iCloud over to your iPhone. Here’s how it works:
- Open the Apple Music app and tap on Library if you’re not already viewing it.
- Navigate to Songs or any other section where you keep your music in iCloud.
- Browse through your music and when you find a track you want to download, tap on it.
- On the song’s page, tap on the iCloud download icon next to the track name.
- The song will start downloading. Progress will show under the icon.
- Once finished, you will see a small checkmark instead of the cloud icon. This means the song is now stored offline.
- You can now find and play that downloaded song even without an internet connection!
Manually selecting songs gives you precise control over what gets transferred from iCloud. This works well if you just want a few specific tracks for offline playback.
Where to Find Your Downloaded iCloud Music on iPhone
Music that you download from your iCloud library to your iPhone gets stored in the Downloads section. Here’s how to access it:
- In the Apple Music app, tap on Library in the bottom right.
- Scroll down and tap on Downloaded Music.
- You will see all the songs, albums and playlists you have downloaded from iCloud.
- Tap on a playlist or album to view its downloaded songs.
- Now you can play the downloaded music offline, wherever you are!
It’s easy to find and play your on-device iCloud music. Just look in the Downloaded Music section of your music library.
How to Re-Download iCloud Music onto Your iPhone
Sometimes downloaded iCloud music can get deleted from your iPhone. When this happens, you’ll need to re-download it for offline playback. Here’s how to get that music back:
- Open the Music app and view the Library section.
- Tap on the Downloads category.
- Browse for the previously downloaded album, song or playlist you want to restore.
- Tap on the iCloud download icon next to it to re-download that music.
- Progress will show just like when initially downloading.
- Once it displays a checkmark, that music is once again saved offline on your device.
Thankfully the process for re-downloading music from your iCloud to your iPhone is the same as downloading it the first time. Just tap that iCloud icon again!
Troubleshooting Tips for Transferring iCloud Music
Here are some common troubleshooting tips for getting your iCloud music onto your iPhone:
- Check your internet connection – Your iPhone needs an active internet connection to download music from the cloud. Connect to WiFi or enable cellular data.
- Update your iPhone software – Make sure you’re running the latest version of iOS for the best Apple Music and iCloud performance.
- Update Apple Music – Go to the App Store and check for any Apple Music app updates which may improve music transfers.
- Restart devices – Sometimes restarting your iPhone can resolve temporary glitches when transferring from iCloud.
- Check iCloud storage – You may need to upgrade your iCloud storage plan if your music library exceeds the free allotment.
- Contact Apple Support – For ongoing iCloud download issues, you may need technical support to troubleshoot further.
With a little troubleshooting help, you should be able to successfully get your iCloud music downloads flowing smoothly to your iPhone.
Transferring Playlists from iCloud to iPhone
In addition to transferring music, you may also want to get your iCloud playlists over to your iPhone. Here’s how to sync playlists from iCloud:
- Open the Music app and tap on Library in the bottom right.
- Under Library, choose Playlists.
- Browse your iCloud playlists and tap on the one you want to transfer.
- At the top of the playlist screen, tap on the iCloud download icon.
- This will download all the songs in that playlist to your iPhone.
- When finished, you’ll see a small checkmark next to the playlist name instead of the cloud icon.
- The playlist and its songs will now be available offline on your iPhone.
Syncing playlists is a great way to get whole batches of music from iCloud in one step. Apple makes it easy to download entire playlists for offline listening.
Transferring Photos from iCloud to Your iPhone
Along with your music, you may want to transfer photos or videos stored in iCloud over to your iPhone. Here’s how iCloud photo downloads work:
- Open the Photos app on your iPhone.
- Browse your iCloud Shared Albums or Photo Stream.
- When you find a photo you want to download, tap on the iCloud download icon in the corner.
- The photo will download and save to your Camera Roll.
- You can bulk select multiple photos to download too.
- For videos, tap on the download icon when viewing the clip.
The iCloud download button next to Photos content allows you to selectively save images and videos to your Camera Roll. Your iCloud photos don’t automatically save offline.
Enabling iCloud Photo Library
You can also choose to enable iCloud Photo Library on your device:
- Go to Settings > Photos.
- Tap on iCloud Photos.
- Toggle on iCloud Photo Library and choose to Download and Keep Originals.
- This will download your entire iCloud photo collection for offline access.
Keeping your iCloud Photo Library synced across devices ensures all your images are always available on your iPhone. Just mind your device storage capacity.
Conclusion
In summary, iCloud provides a few different ways to get your music, photos and other content synced from the cloud onto your iPhone for offline use. The Apple Music and Photos apps allow easy downloading of iCloud content with just a tap. You can also use iTunes syncing on desktop or enable full iCloud libraries. With these simple procedures, you’ll have your iCloud media collection available even when you’re not connected online.