Erasing the Macintosh HD is a common task that Mac users perform for various reasons. The Macintosh HD contains the operating system, applications, and user files. Deciding whether to erase the entire drive or just specific data can be confusing. This article will outline when you may need to erase the Macintosh HD, the difference between erasing and formatting, the steps to securely erase the full drive or specific files, and how to recover erased data if needed. Sections will cover an overview of the Macintosh HD, reasons to erase it, erasing vs formatting, steps for drive erasure, secure erase options, erasing specific files, recovering erased files, and restoring the Macintosh HD.
What is Macintosh HD?
Macintosh HD refers to the primary internal hard drive or solid state drive on a Mac computer where the macOS operating system is installed. The name dates back to Mac models from the 1980s and 1990s that shipped with hard drives labeled “Macintosh HD” [1]. Though modern Macs use faster solid state drives, the Macintosh HD name has stuck around for legacy reasons.
When you turn on your Mac and boot into macOS, you’re booting from the Macintosh HD drive. This is the drive that contains critical system files, applications, user accounts, and personal data. Without Macintosh HD, your Mac wouldn’t be able to start up and operate normally.
Some key characteristics of the Macintosh HD drive:
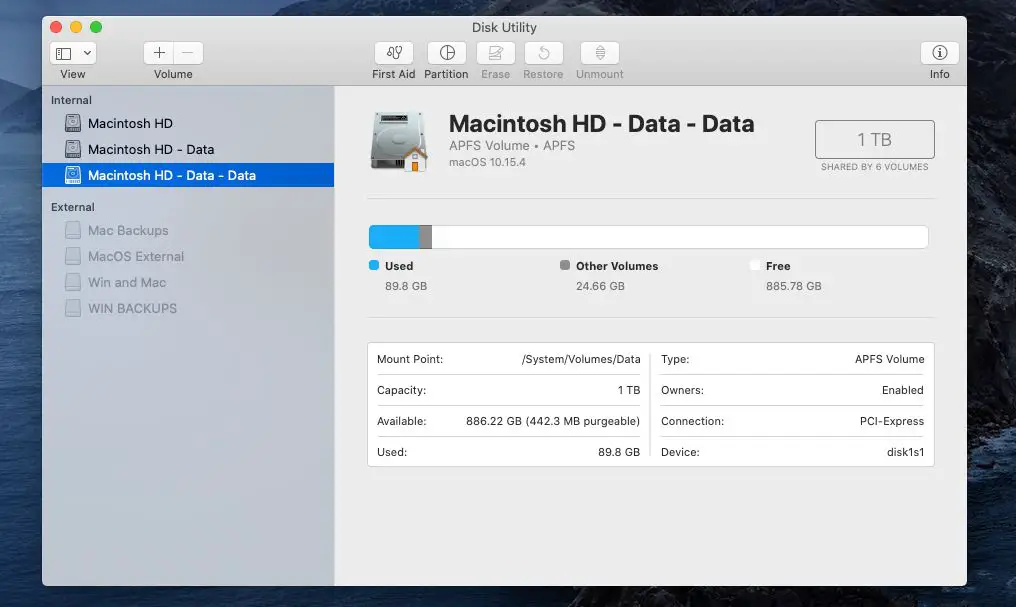
- It’s the primary internal drive on a Mac, typically formatted with Mac OS Extended (HFS+) or APFS file systems.
- Stores the macOS operating system, system files, apps, user files and folders.
- Visible on the desktop with a Hard Drive icon labeled “Macintosh HD”.
- Named “Macintosh HD” by default, but the name can be changed.
- Can be a traditional hard disk drive (HDD) or solid state drive (SSD).
So in summary, Macintosh HD is the main startup disk that contains the macOS system and users’ data. It allows a Mac to operate normally when powered on.
Reasons to Erase Macintosh HD
There are several reasons why someone may want to erase the Macintosh HD:
Selling or gifting the computer – Erasing the hard drive ensures no personal data remains on the computer when selling or gifting it to someone else. This protects sensitive information and gives the new owner a fresh start (Use Disk Utility to erase an Intel-based Mac).
Fixing problems – Erasing the hard drive can help resolve certain performance issues, software problems, or file system corruption. It provides a clean slate if the current OS installation has become unstable (Unable to erase Mac HD in Disk Utility).
Reinstalling the operating system – Erasing the drive is often required before reinstalling macOS from scratch. This ensures all OS files are completely removed.
Removing sensitive data – Erasing the hard drive securely deletes all personal files, applications, and system files. This ensures no sensitive or confidential data remains on the computer.
Freeing up space – Over time, the hard drive accumulates hidden files, caches, and unused applications. Erasing it completely frees up disk space for the new OS and files.
Erasing vs Formatting Macintosh HD
Erasing and formatting a Macintosh HD drive are two different operations that serve different purposes. Formatting restructures how data is stored on the drive, while erasing deletes all data on the drive.
Formatting a Macintosh HD drive rewrites the file system structure on the drive, but does not remove any files or data. It is done to change the file system to a format compatible with your operating system, such as APFS for macOS. Formatting will make all existing files on the drive inaccessible until the drive is reformatted back to its original file system. EaseUS
Erasing a Macintosh HD drive deletes all files, folders, apps, and data stored on the drive. The erase operation clears the data so it cannot be recovered. Erasing is typically done when selling or disposing of a Mac, reinstalling macOS, or wanting to completely wipe a drive before using it for other purposes. The drive can then be reformatted and reused. Apple Support
The key difference is that formatting simply restructures the drive, while erasing deletes all data on it. Formatting maintains data but makes it inaccessible, while erasing removes data entirely.
How to Erase Macintosh HD
Here are the step-by-step instructions for fully erasing the Macintosh HD drive on your Mac:
- Restart your Mac and immediately press and hold the Command + R keys to boot into Recovery mode.
- Select Disk Utility from the macOS Utilities window and click Continue.
- In the sidebar, select the Macintosh HD drive.
- Click the Erase button at the top of the Disk Utility window.
- Enter a name for the erased volume, choose APFS or Mac OS Extended (Journaled) format, and click Erase.
- If prompted, enter your administrator password to confirm the erase.
- Wait for the erase process to complete. This can take several minutes depending on your drive size.
- When completed, quit Disk Utility and you can reinstall macOS if desired.
This will completely erase all data on the Macintosh HD drive, including your user accounts, applications, files, and system settings. Be sure to backup anything important before erasing the drive.
For more details, see Apple’s support article “Use Disk Utility to erase a Mac with Apple silicon” at https://support.apple.com/en-us/102506.
Secure Erase Options
When erasing your Mac’s internal drive, you have the option to do a secure erase. This overwrites the deleted data to make it more difficult to recover. There are a few ways to do this in macOS:
Use Disk Utility’s “Erase” option with the “Most Secure 3-Pass Erase” scheme – this will overwrite the drive data with 3 passes of random data to ensure it cannot be recovered (Apple Support).
Use a third party secure erase tool like Disk Drill to perform multiple passes of overwriting the data (Backblaze). Some tools offer up to 35 pass options for maximum security.
Use the “diskutil secureErase” command in Terminal to overwrite data 7 times meeting Department of Defense standards. This is more secure than Disk Utility’s 3 pass method (Apple Support).
For SSDs, use the “diskutil secureErase” with “crypto” option to encrypt the drive before erasing as this is more secure for flash memory (Apple Support).
Performing a secure erase is important if you are getting rid of, selling or recycling your Mac to prevent personal data from being recovered.
Erasing Specific Files/Folders
Rather than erasing the entire Macintosh HD drive, you can selectively erase specific files or folders to free up space. Here are a couple ways to do this:
Use Finder’s built-in delete function. Select the file or folder you want to delete, then press Command+Delete or click File > Move to Trash. The item will be moved to your Trash. To permanently erase it, empty the Trash by going to Finder > Empty Trash.
Use the rm command in Terminal. Open the Terminal app and type rm -rf /path/to/file-or-folder to immediately and permanently erase the specified item without moving to Trash first. Be very careful with this command as it irreversibly deletes data (source).
Use a third party app like OmniDiskSweeper. This app lets you visualize disk usage and selectively delete large unused files (source).
Deleting individual files and folders can help free space without losing everything on the drive. Make sure you have backups if you might want to restore anything later.
Recovering Erased Files
If you accidentally erased files or folders from your Macintosh HD drive, there are some data recovery options available. The first step is to stop using the drive immediately to avoid overwriting the erased data. Then you can attempt to recover the erased files using data recovery software like EaseUS Data Recovery Wizard for Mac (https://www.easeus.com/mac-file-recovery/accidentally-deleted-macintosh-hd.html). This software can scan your drive and recover deleted files even if you emptied the Trash. You’ll want to recover the files to another drive, not back to the Macintosh HD drive you erased them from.
Another option is to take your Mac to a data recovery service. Reputable companies like DriveSavers can attempt to recover data from erased or damaged drives in a professional lab environment. This can be more successful for large amounts of erased data but is also more expensive. If you accidentally erased your entire Macintosh HD drive, a service may be able to clone the drive and work from the clone to avoid further damage to the original (https://discussions.apple.com/thread/253720225).
The quicker you act after an accidental erasure, the better your chances of recovery. Don’t continue using the drive or attempt to reinstall macOS if files were erased in error. First turn to data recovery software or professional services for the best chance of restoring your lost files (https://onmac.net/recover-erased-hard-drive-mac/).
Restoring Macintosh HD
If you have erased your Macintosh HD drive, it is possible to restore it and reinstall the Mac operating system. Here are the steps to take:
1. Start up your Mac in Recovery Mode by holding Command + R while booting. This will launch the recovery system on your Mac.
2. Open the Disk Utility app within Recovery Mode. Select your erased Macintosh HD drive in the sidebar.
3. Click the “Erase” button to reformat the drive. Choose “APFS” as the format and “GUID Partition Map” as the scheme. Name it “Macintosh HD”.
4. Exit Disk Utility when the erase is complete. Select “Reinstall macOS” from the Recovery Mode utilities window.
5. Follow the onscreen prompts to reinstall the latest macOS version compatible with your Mac. This will install a fresh copy of the operating system on your newly erased Macintosh HD drive.
6. Once the installation is finished, you will be able to restart into the restored macOS on your Macintosh HD drive. Log in with your Apple ID to set up your user account and settings.
Following these steps will completely restore your Mac’s main system drive after accidentally erasing it. Be sure to backup your data before erasing Macintosh HD. Reinstalling the OS will not recover deleted files.
Conclusion
To summarize, the Macintosh HD is the primary system disk drive on a Mac that contains the operating system, applications, user data, and settings. There are important differences between erasing the entire Macintosh HD volume versus individual files and folders. Erasing the full drive deletes all its contents and allows you to reinstall macOS clean. Erasing specific files or folders removes only those items you select.
When erasing any sensitive personal data, it’s critical to use a secure erase method like disk utility’s “zero-out data” option to prevent forensic recovery. Always backup important files before erasing anything. With proper precautions, erasing files, folders or drives enables you to free up space, resolve performance issues, clean install macOS or sell/ donate your Mac safely. Just be certain before erasing the Macintosh HD, as this will require you to fully reinstall your operating system and applications.