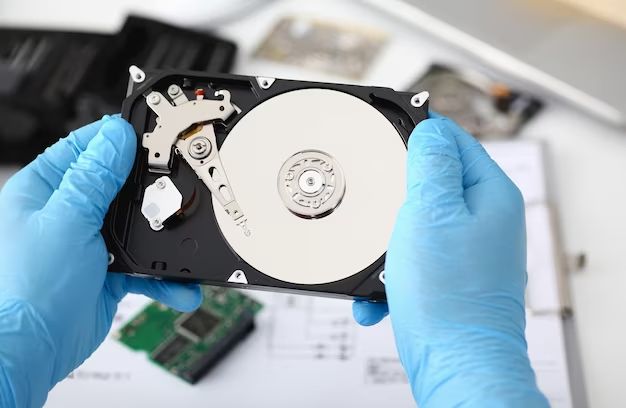
What is a Recovery Drive?
A recovery drive is a bootable USB drive that contains recovery tools to troubleshoot, restore, or reinstall Windows on a computer that won’t start. It provides access to system recovery tools when you can’t normally boot into Windows. The recovery drive allows you to boot your PC, diagnose problems, restore from backup, and reinstall Windows.
Essentially, the recovery drive contains a compressed version of the Windows recovery environment that lets you access advanced diagnostic and repair options when your computer is experiencing problems like system crashes, boot failures, file corruption, or infected system files. It can help recover and restore your PC in such scenarios. The recovery drive runs independently from the main Windows operating system.
The recovery tools include System Restore, Startup Repair, System Image Recovery, Windows Memory Diagnostic, Command Prompt, Networking Tools and BitLocker. You can boot your computer from the recovery drive, choose various recovery and troubleshooting options, and hopefully restore your PC to a working state. Having a dedicated recovery drive is an important backup option.
Citations:
https://answers.microsoft.com/en-us/windows/forum/all/windows-recovery-drive-vs-windows-media-creation/63125a5e-ab0a-4599-abae-7c5121d5ceb9
Why Have a Recovery Drive?
A recovery drive provides several key benefits for troubleshooting and restoring your Windows PC (cite: How to Revive Windows With a Recovery Drive). The main reasons you may want to create a recovery drive are:
- Fix issues preventing Windows from starting – The recovery drive allows you to boot into the recovery environment when Windows won’t start normally. From there, you can run diagnostics, restore system files, or access recovery tools to try fixing the problems.
- Restore a system image backup – System image backups capture your full Windows installation in a single file. The recovery drive lets you restore this image to get your PC back up and running if needed.
- Reinstall Windows – You can use the recovery drive to initiate a clean install or reset of Windows. This is useful if you want to start fresh and eliminate any lingering issues.
Overall, having a dedicated recovery drive gives you the ability to access recovery options when you otherwise couldn’t boot into Windows. It provides a safety net to diagnose or recover from serious system problems (cite: Recovery options in Windows).
When Do You Need a Separate Recovery Drive?
You only need separate recovery drives if the computers have different hardware or versions of Windows. A recovery drive contains drivers specific to the hardware on that computer, like the motherboard, graphics card, etc. It also contains the Windows recovery image for the version installed on that computer.
If you have multiple computers with the same hardware and Windows version, you can use the same recovery drive on all of them. For example, if you have 5 Dell laptops that all came with Windows 10 Home pre-installed, one recovery drive made on any of those laptops will work to restore the others (Microsoft).
However, if you have computers with different brands of hardware or different Windows versions, like Windows 10 Home vs Pro, you will need to make separate recovery drives for each one. The drivers and recovery image will be tailored to that specific computer’s setup.
Creating a Recovery Drive
Creating a recovery drive in Windows is a straightforward process that allows you to backup your system in case of hardware failure or other issues. The recovery drive contains recovery tools as well as a copy of Windows that can be used to restore your system.
To create a recovery drive in Windows 10 or Windows 11, follow these steps:
- Open the Start menu and search for “Create a recovery drive” and select it from the results.
- You may need to enter an admin password or confirm your choice to continue.
- Select your USB drive from the list of drives to use for the recovery drive.
- Windows will copy the recovery image and tools to your USB drive. This may take 10-20 minutes.
- Once complete, you will have a bootable USB recovery drive for your system.
The process is very similar in Windows 8.1. You can access the recovery drive creator by swiping in from the right edge and searching for “recovery drive.”
Overall, creating a recovery drive is a quick and easy process built right into Windows. Following the steps outlined by Microsoft allows you to produce a backup of your system that can be invaluable if you ever need to restore or troubleshoot problems with your PC. For step-by-step instructions, refer to Microsoft’s guide.
What to Include on the Recovery Drive
When creating a recovery drive, you have the option to include backup files and drivers. This allows you to customize the recovery drive to your specific computer and needs.
In terms of backup files, it’s recommended to include a system image if you have one. A system image is a snapshot of your entire system – including the operating system, settings, programs, and files – at a specific point in time. Including this on the recovery drive makes it easy to restore your computer back to that exact state if needed.
You’ll also want to add any important personal files to the recovery drive, such as documents, photos, music, or other media. This ensures you have backups of your important data in case of system failure.
As for drivers, you should include the drivers for your specific hardware devices like video/graphics card, network adapter, sound card, printer, external hard drives, etc. Having these drivers on the recovery drive will allow these devices to work properly when restoring your system.[1]
Finally, make sure to include any specific programs you always want access to, such as security software or utility programs. Also include product keys or licenses you may need to reactivate programs after recovery.
Overall, tailor the recovery drive to your needs by backing up your most vital system images, personal files, drivers, and programs. Just be mindful of storage space on the USB drive.
Using the Recovery Drive
To use the recovery drive to restore your PC, first you’ll need to boot from the recovery drive instead of the main hard drive. Here are the steps:
1. Insert the recovery drive into a USB port and restart your computer. As it boots, press the appropriate key to access the boot menu (usually F12, F8, or F10). This will allow you to select the recovery drive as the boot device instead of the main hard drive.
2. Once the recovery drive boots, you’ll be presented with some recovery options. Choose the option to restore your PC or reset it to factory settings. This will start the recovery process.
3. Follow the on-screen instructions to restore your PC. Depending on the recovery method you chose, this will reinstall Windows while preserving your files and settings, or completely erase everything and reinstall a fresh version of Windows.
4. After the recovery process is complete, you can remove the recovery drive and reboot your PC normally. Your PC should now be restored back to a working state. Microsoft has more detailed instructions on how to boot from and use a recovery drive if needed.
The recovery drive allows you to restore your PC even if the main drive is corrupted or unbootable. Just be sure to create the recovery drive before you have any major problems, as it needs to be prepared ahead of time.
Recovery Drive Limitations
While recovery drives can be useful in restoring your system, there are some important limitations to be aware of:
A recovery drive does not back up all of your personal files and data. It is designed to restore the Windows operating system itself as well as some basic drivers. Any documents, photos, music, or other files you have created will need to be backed up separately (cite https://answers.microsoft.com/en-us/windows/forum/all/what-files-are-actually-on-a-recovery-drive/d2b772e1-868b-41c4-ba2f-3f338dd317b1).
The recovery drive contains drivers compatible with the computer you created it on. If you try to use a recovery drive on different or newer hardware, it may not have the proper drivers installed leading to issues (cite https://superuser.com/questions/1159939/will-a-windows-10-recovery-usb-work-on-a-different-computer).
Microsoft imposes a 32GB size limit on recovery drives. While this is sufficient for the operating system files, it does not leave much room for backups of personal files (cite https://www.tenforums.com/backup-restore/125519-windows-10-recovery-usb-size-3.html).
Alternatives to Recovery Drives
While recovery drives can be useful, there are other options that may work just as well or better in some situations:
System Restore is a built-in Windows feature that allows reverting your PC back to an earlier state if something goes wrong. Restore points are created automatically and before major system changes. Reverting to a restore point may fix issues without needing to completely reinstall Windows (Source).
Cloud backup services provide offsite storage of files and system images. Services like iDrive and Acronis True Image can fully backup a Windows installation and restore it when needed. Cloud backups protect against local drive failures (Source).
External hard drives can also store disk images for recovery purposes. Services like Macrium Reflect create full system backups that can be restored from an external drive. Keeping regular backups avoids the need for recovery drives in many cases.
While recovery drives have their uses, for many people alternative options like system restore points, cloud backups, and external drive images can provide an easier and more robust recovery solution.
Maintaining and Updating Drives
It’s important to periodically recreate your recovery drive to keep it up-to-date with the latest Windows updates and driver versions. Microsoft recommends recreating your recovery drive after any major Windows update or upgrade.
You should also recreate your recovery drive once or twice a year to include any new software, files, or settings you may have added to your system. An outdated recovery drive may be missing important updates and unable to fully recover your PC.
Before recreating your drive, be sure to back up any personal files you may have added to the old drive, such as documents, photos, or music. Then, follow the steps to make a new recovery drive. Microsoft provides full instructions here: https://support.microsoft.com/en-us/windows/create-a-recovery-drive-abb4691b-5324-6d4a-8766-73fab304c246
Keeping your recovery drive up-to-date will ensure you can successfully use it to restore your system should problems arise. Don’t wait until you actually need it to recreate it!
Key Takeaways
In summary, here are some key points on whether you need separate recovery drives for each PC:
– Having a recovery drive for each PC allows you to troubleshoot and restore that specific computer if needed. It’s tailored to that device.
– But for basic consumer setups, one shared recovery drive is often sufficient. As long as all PCs are similar Windows versions and hardware, the drive can be used across multiple devices.
– Separate drives are more important for businesses, networks with different PC models, and anyone who customizes individual device backups.
– You can store multiple system images on one drive. But too many can slow down restores. Balance convenience vs. performance.
– Recovery drives are essential for system recovery when Windows is unusable. But also consider cloud backup for full system images.
– Update recovery drives periodically, such as after major Windows updates or hardware changes. They can become outdated over time.
Overall, evaluate your specific situation. One shared recovery drive offers simplicity for many. But multiple drives provide an extra layer of protection and customization when needed.