Having issues accessing files on your hard drive? Before you panic, know that there are several free methods you can try to recover data from a crashed or corrupted drive. With a little patience and the right tools, you can often salvage your important documents, photos, music and more.
Try data recovery software
One of the easiest ways to recover files from a problematic hard drive is to use free data recovery software. There are many options available, including:
- Recuva – Windows only, recovers files that have been accidentally deleted.
- TestDisk – Windows, Mac, Linux, repairs corrupted drives and recovers lost partitions.
- PhotoRec – Windows, Mac, Linux, specifically for recovering lost photos, videos, documents and archives.
- Disk Drill – Mac OS X, also recovers data from iOS and Android devices.
These programs scan your drive and allow you to preview found files before restoring them. They often work when a drive’s partition table, boot record or file system is damaged. However, if the drive has complete physical/mechanical failure, data recovery software may not be able to access the files.
How to use data recovery software
Follow these basic steps when using free data recovery software:
- Download and install the software. Make sure to choose the version for your computer’s operating system.
- Select the drive you want to recover files from. If it’s an external drive, connect it to your computer.
- Select the types of files you want to recover (pictures, documents, videos, etc.).
- Click “Scan” to search the drive. This may take a while depending on the size of the drive and amount of data.
- Browse through and preview the files found by the software.
- Select the files you want to recover and restore them to another drive with ample free space.
Be extremely careful about what drive you restore files to in order to avoid overwriting the original data. Saved scan results may allow you to retry recoveries as well.
Try the chkdsk or fsck command
Chkdsk for Windows and fsck for Linux and Mac are built-in commands that check drives for errors and attempt repairs. They can fix certaindrive issues, such as file system errors or bad sectors, essentially for free since they are already included in the operating system. Here is a basic rundown of how to use chkdsk and fsck:
chkdsk
- Type “cmd” into the Windows search bar and open the Command Prompt app.
- Type “chkdsk X: /f” where “X” is the letter of the drive you want to check.
- Type “Y” and hit Enter if prompted to dismount the drive.
- Let chkdsk run – this may take a while if repairs are needed.
- Restart your computer and see if the drive’s issues are fixed.
fsck
- Boot into Recovery Mode or from a bootable disk.
- Type “fsck -fy /dev/sdX” where “sdX” is the drive you want to check.
- Let fsck scan and repair any errors on the drive.
- Reboot and verify if the drive is fixed.
Using chkdsk or fsck is free, but can potentially cause further damage if used incorrectly. Be very careful when running these commands.
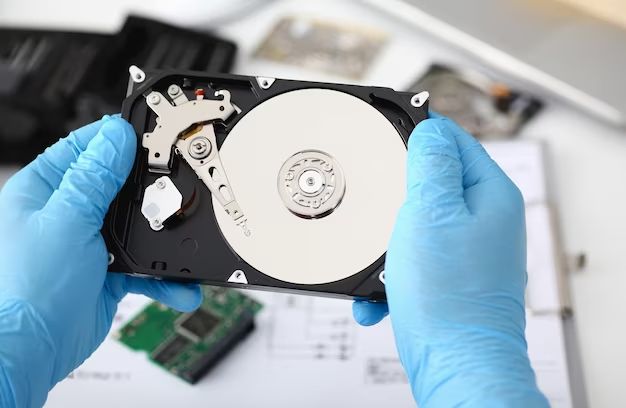
Open and manipulate the drive hardware
If your hard drive is making abnormal clicking or beeping noises, has obvious external damage, or you see frequent I/O error messages, the issue is likely hardware-related. In these cases, you may be able to recover data by doing things like:
- Removing the drive from its enclosure and connecting directly via SATA
- Adjusting or replacing the PCB (printed circuit board)
- Cleaning the contacts with alcohol
- Manually realigning or replacing the read/write heads
This requires technical skill, proper tools and workspace. If you are not specially trained in hard drive repair, consider getting help from professionals instead of attempting it yourself and risking further damage. The steps above are simply some possibilities – every drive failure is unique.
Caution!
Manipulating drive hardware yourself could make your data completely unrecoverable if anything goes wrong. Weigh the risks and proceed with extreme care.
Use a live CD or USB
Booting into a live Linux environment from a CD or USB drive can sometimes allow you to access files on a failing hard drive. Options like Ubuntu Live provide a temporary operating system independent of your installed OS. This may let you backup files when you can’t normally boot into Windows or MacOS. Here’s a quick guide:
- Download an ISO file for a live boot disk and create a CD or USB drive from it.
- Configure your computer to boot from the disk by changing BIOS settings.
- Boot into the live OS, access your hard drive’s files and back them up to another drive.
- Shut down and disconnect the live disk when done.
This method relies on your drive being accessible enough for the live OS to read. It may not work if there is mechanical failure or corrupt firmware.
Send your drive to a professional lab
If you have extremely valuable or irreplaceable data on your drive, and DIY attempts to recover it are unsuccessful, a professional data recovery lab is the last resort. They have specialized tools and clean room facilities to repair drives and extract data at the lowest level. This can cost hundreds to thousands of dollars, but may be well worth it for critical business or personal files.
A few things to keep in mind when using a data recovery service:
- Research companies and read reviews thoroughly before choosing one.
- Get an upfront quote – costs depend on the drive’s condition and the type of recovery needed.
- Ask about their security standards, success rates and certification.
- Make absolutely sure you get your original drive back and keep any data they recover secure.
Professional recovery should be your last attempt after trying free software and methods. But it offers the best chance of getting data back from a drive that’s failed catastrophically.
Try alternative free options
Depending on exactly what happened to your hard drive, a few other free options could help you recover data:
- Internet Archive Wayback Machine – Lets you see cached versions of websites and some files. Useful for retrieving accidentally deleted online data.
- Google Drive/OneDrive Recycle Bin – Cloud storage services often keep deleted files for a certain window of time.
- System Restore – Reverts Windows PCs to an earlier state, before certain system changes/events.
- Backup services – If you have cloud or external drive backups, you may be able to restore missing files from them.
Again, these are just examples. Specific recovery methods depend entirely on your individual situation and the nature of your drive failure or data loss.
Evaluate the costs vs. value of your data
Deciding how much time, effort and money to invest in recovering files should be based on a cost-benefit analysis. Ask yourself:
- How critical are these files? Can I easily replace them?
- How likely is each recovery method to work in my situation?
- How technologically skilled am I? Can I follow complex instructions?
- Is my time better spent recreating the lost data from scratch?
Certain files like work/creative projects or special photos may be worth almost any price to recover. But generic downloads or documents you can easily find again online likely aren’t worth thousands to rescue professionally. Know when to cut your losses versus pull out all the recovery stops.
Prevent the need for recovery
Rather than going through the hassle of trying to recover data from a damaged or corrupted hard drive, it’s much easier to simply prevent drive failure and data loss in the first place. Some tips:
- Keep your drives in proper environments – cool, clean, dry, sturdy.
- Handle drives gently. Don’t jostle or drop them.
- Make sure you “eject” or properly disconnect external drives before removing them.
- Install updates/patches for your operating system and drives.
- Don’t interrupt drive read/write operations.
- Use surge protectors and UPS battery backups.
- Maintain malware/virus protection and defenses.
- Back up your data regularly to external and cloud services.
Practicing basic drive care, maintenance and data backup practices will save you from panic later when something inevitably does go wrong.
Conclusion
Recovering lost files from a troubled hard drive doesn’t necessarily require an expensive professional service. Free software solutions, built-in commands, live boot environments and manual hardware repairs can often salvage the data at no cost if you’re willing to invest some time and effort.
But ultimately, prevention is the best medicine. Regular backups and general drive health maintenance will render data recovery unnecessary in most cases. Know your options, but don’t rely on needing them.
| Recovery Method | Cost | Likelihood of Success | Ease of Use |
|---|---|---|---|
| Data recovery software | Free | Moderate | Easy |
| chkdsk or fsck | Free | Low-Moderate | Moderate |
| Drive hardware manipulation | Free | Low (risk of permanent failure) | Difficult |
| Live boot disk | Free | Low-Moderate | Moderate |
| Professional data recovery | Expensive | High | Easy |