What Is an External Hard Drive?
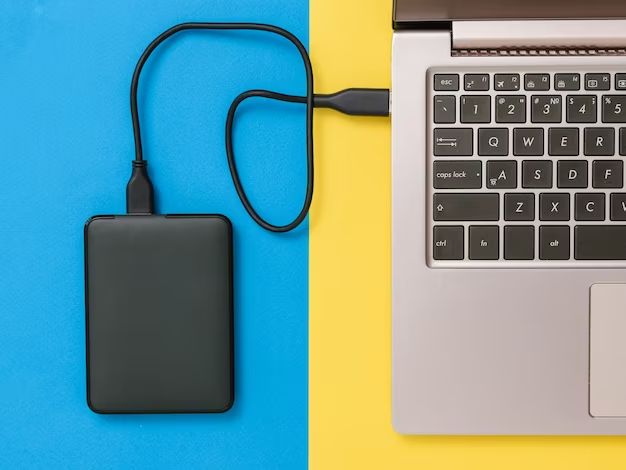
An external hard drive is a portable storage device that plugs into a computer externally, rather than being located inside the computer’s casing. It connects to the computer through a USB port, FireWire port, or wirelessly using Wi-Fi. External hard drives typically have high storage capacities and are often used to back up computers or serve as a network drive (Definition of external hard drive in computer).
External hard drives are physically separate from the computer and store data outside of the internal hard drive. This allows for expanded storage capacity beyond what can fit internally. It also provides a way to backup important files separate from the main internal drive in case of system failure. Key advantages of external drives are their portability, storage size, and ease of use for transferring data between computers (Definition of external drive).
Overall, an external hard drive is a plug-and-play storage device that provides flexibility for computer file storage, backups, and transferring data.
When To Use an External Hard Drive on a Mac
There are several key reasons you may want to use an external hard drive with your Mac:
Extra Storage – External hard drives provide a simple way to expand your storage capacity. The large capacities available in external drives today allow you to store huge amounts of photos, videos, music, documents, and other files. An external drive gives you flexibility to add terabytes of storage as you need it. (Source)
Portability – External drives are designed to be portable so you can easily transport large amounts of data between locations and computers. Their compact size makes them easy to take on the go.
Backups – External drives are ideal for backing up your Mac’s internal drive. You can perform full system backups to safeguard your data or schedule regular incremental backups. Storing backups on an external drive protects your data if your Mac’s internal drive fails.
File Sharing – It’s easy to share and transfer large files between Macs by using an external drive. You can avoid email size limits or uploading files to cloud storage.
Added Performance – You can potentially improve system performance by using an external drive to store files and free up space on your Mac’s internal drive.
Connecting an External Hard Drive to a Mac
Connecting an external hard drive to a Mac is a straightforward process. Here are the steps to connect using USB, Thunderbolt, or USB-C cables:
1. Plug the external hard drive into a power source if needed and turn it on.
2. Connect the drive to the Mac using the appropriate cable (USB, Thunderbolt, or USB-C). Make sure both ends of the cable are securely inserted.
3. The Mac will automatically detect the external drive once connected. It may take a few seconds for the drive to appear.
4. An icon for the external drive will show up on the desktop. You can also find it under Devices in the Finder sidebar.
That’s it! The external hard drive is now physically connected to the Mac and ready to use. The drive should automatically mount itself so you can access files. If not, try the steps under “Mounting the External Hard Drive.”
For wireless connections using Bluetooth, follow the instructions that came with the wireless external hard drive to pair it to your Mac.
For more details, refer to Apple’s support guide: https://support.apple.com/guide/mac-help/connect-storage-devices-mac-mchl027f1d66/mac
Mounting the External Hard Drive
After physically connecting your external hard drive to your Mac, you need to mount the drive to access its contents. Mounting a disk makes it available for read and write access by the operating system. Here are the main ways to mount an external drive on a Mac:
Using Disk Utility
The easiest method is to use the Disk Utility app included with macOS. Open Disk Utility, locate your external hard drive in the sidebar, and click the “Mount” button. This will mount the drive and make it accessible in Finder. You can also check the box to remount the drive on reboot if needed (Source: https://support.apple.com/guide/disk-utility/mount-a-volume-thats-been-ejected-dskutl1027/mac).
Terminal command
You can use the diskutil mount command in Terminal to mount drives. For example: diskutil mount /Volumes/ExternalDriveName. The full path is required. This method can force mount external drives not recognized by Finder (Source: https://www.easeus.com/computer-instruction/how-to-mount-disk-mac.html).
Troubleshooting tips
If your external drive won’t mount, try disconnecting and reconnecting, using a different cable/port, or restarting your Mac. For drives stuck in a read-only state, you can remount them as writable in Disk Utility. If nothing works, you may need to reformat the drive before it will mount properly again.
Viewing External Hard Drive Contents
Once your external hard drive is connected and mounted to your Mac, you can view its contents using Finder or the command line.
To view the external drive in Finder:
- Open a new Finder window and look for the external hard drive under Locations in the left sidebar. It will be listed by its name.
- Click on the external hard drive to view its folders and files.
- You can browse and open files directly within Finder as you normally would.
To view the external drive from Terminal:
- Open the Terminal app in your Applications > Utilities folder.
- Type
ls /Volumesand press return to list all mounted drives. - Your external drive will be listed here by its name.
- To view the contents of the external drive, type
ls /Volumes/ExternalDriveNamewhere ExternalDriveName is the actual name of your drive. - This will list all the folders and files on the top level of the external drive.
- You can go deeper by adding folder paths, e.g.
ls /Volumes/ExternalDriveName/Folder1/Subfolder
Both Finder and the command line provide easy ways to view the contents of your external hard drive on a Mac. With Finder you get a graphical view for browsing, while Terminal gives you more details and control.
(Source: https://support.apple.com/guide/mac-help/see-the-devices-connected-to-your-mac-mchlp1039/mac)
Transferring Files To and From External Drive
Transferring files between your Mac and an external hard drive is easy once the drive is properly connected. Here are step-by-step instructions for moving files between your Mac and external drive:
To copy files from Mac to external drive:
- Connect the external hard drive to your Mac using the appropriate cable or adapter.
- Open Finder and locate the files you want to move. Select them.
- Drag the selected files to your external hard drive listed in the sidebar under Locations or Devices.
To copy files from external drive to Mac:
- Connect the external hard drive to your Mac.
- Open Finder and click on your external hard drive in the sidebar under Locations or Devices.
- Drag files from your external hard drive to where you want them copied on your Mac such as Documents or Desktop.
You can also use the Finder menu’s Copy and Paste commands to transfer files between your Mac and external drive.
For faster file transfer speeds, utilize the USB 3.0 or USB-C ports on your Mac as they offer faster data throughput compared to older USB 2.0 ports. Always safely eject the external drive before disconnecting it from your Mac.
Citations:
Connect and use other storage devices with Mac
How to Move/Transfer Files from Mac to External Hard Drive?
Backing Up a Mac to an External Drive
One of the most common and recommended uses for an external hard drive with a Mac is to utilize it for backups. macOS includes a built-in backup utility called Time Machine that can automatically backup your Mac’s drive to an external drive periodically. Time Machine will backup everything on your Mac including the operating system, applications, settings, files, and folders. Time Machine will keep hourly backups for the past 24 hours, daily backups for the past month, and weekly backups until your drive is full. https://support.apple.com/en-us/HT201250
To use Time Machine with an external drive, simply connect the drive to your Mac and open Time Machine preferences in System Settings. Select the external drive as the backup destination, and Time Machine will automatically handle the backup process in the background moving forward. Time Machine makes it easy to go back and restore individual files, folders, or your entire system from the external drive backup when needed. Keeping regular Time Machine backups to an external drive provides vital protection against data loss and system problems on a Mac.
There are also third party backup utilities that can backup a Mac to an external drive, usually offering more customization and scheduling options compared to Time Machine. Apps like Carbon Copy Cloner and SuperDuper! allow full system cloning and incremental backups to external storage. Having a bootable duplicate of your Mac drive is useful for disaster recovery purposes. Overall, an external drive is a convenient, affordable and smart way to backup the important files and information on your Mac.
Partitioning an External Hard Drive
Partitioning an external hard drive on a Mac allows you to create separate volumes on the drive that function independently. This can help organize and separate different types of data. Here are the steps to partition an external hard drive on Mac:
1. Connect the external hard drive to your Mac and launch Disk Utility. Disk Utility can be found in Applications > Utilities.
2. In the sidebar, select the external drive you want to partition.
3. Click the Partition button at the top of the Disk Utility window.
4. Under Partition Layout, click the Add button to create a new partition.
5. Adjust the size of each partition by dragging the white handles between them. Assign a name, format, and scheme to each partition.
6. Click Apply when you are satisfied with the partitioning layout to partition the external drive.
Partitioning an external drive allows you to separate data such as backups, multimedia files, documents, and Time Machine backups while keeping everything consolidated on one physical drive. Just note that partitioning deletes all existing data on the drive, so be sure to backup first.
For more details, refer to Apple’s Disk Utility user guide.
Troubleshooting External Hard Drive Issues
External hard drives, though convenient, can sometimes run into problems being detected or working properly with your Mac. Here are some tips for troubleshooting common external hard drive issues on a Mac:
If your external hard drive is not showing up at all, first check that the drive is properly plugged in and connected. Try connecting to different USB ports on your Mac as well. You can also try using a different cable if you have one available.
Go to Finder > Preferences and make sure the ‘External disks’ option is checked under ‘Show these items on the desktop’. This should make any connected external drives show up on your desktop.
If the drive is still not recognized, try resetting the NVRAM on your Mac, as incorrect disk settings may be stored there. To do this, shut down your Mac, then turn it on and immediately press and hold Command + Option + P + R. Hold until you hear the reboot sound a second time.
For drives that show up but don’t work properly, open Disk Utility and see if the external drive shows up there. You may be able to mount it successfully in Disk Utility even if it is not mounting on the desktop.
As a last resort for drives not mounting, you can try terminal commands like diskutil list and diskutil mount disk#, replacing # with the disk number. This may manually mount unrecognized drives.
Repeated drive issues may indicate a damaged drive, so it’s a good idea to backup any important data, reformat the drive, and run diagnostics using your Mac’s Disk Utility or the manufacturer’s tools.
Safely Removing and Ejecting External Drive
It’s important to properly eject and disconnect your external hard drive before unplugging it from your Mac. Improperly disconnecting the drive can lead to data loss or file system corruption. Here are some tips for safely removing an external drive:
– Click the eject button next to the drive icon on your desktop or in the Finder sidebar. This will unmount the drive from your system before disconnecting it. You can also right-click the drive icon and select “Eject” (Source).
– Drag the drive icon from the desktop to the Trash. This will eject the drive.
– Use the “Disk Utility” app to eject the drive. Open Disk Utility, select the external drive, click the “Eject” button.
– Use the “drutil eject” terminal command to eject the drive if other methods don’t work.
– Once ejected properly, you can safely unplug the physical drive without risk of data loss. Avoid unplugging the drive while it’s being accessed or written to.