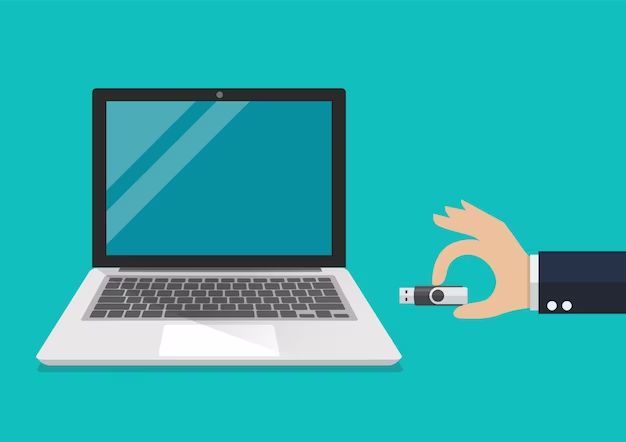
Using a flash drive, also known as a USB drive, is a convenient way to store and transfer files between computers. Flash drives plug into your computer’s USB port and function as portable external storage devices. Whether you want to copy files from one computer to another or just free up hard drive space on your main computer, accessing and using a flash drive is easy if you know the steps.
What is a Flash Drive?
A flash drive, sometimes called a thumb drive, pen drive, or USB drive, is a small storage device that plugs into your computer’s USB port. It’s called a “flash” drive because it uses flash memory, a type of electronically erasable programmable read-only memory (EEPROM).
Flash drives come in a range of storage capacities, from 1 gigabyte to 256 gigabytes or more. The storage space allows you to copy and transfer documents, photos, videos, music, and other files from one device to another. Many flash drives have a removable cap that protects the USB connector when not in use.
Because flash drives are small, lightweight, and don’t require external power sources, they offer a compact and convenient way to take your files anywhere. They can also be reused over and over again.
Locating the USB Ports on Your Computer
Before using a flash drive, you first need to locate an available USB port on your desktop or laptop computer. Here’s how to find them:
- On a laptop, USB ports are typically located along the sides or back. Many laptops have at least two USB ports so you can connect multiple devices.
- On a desktop computer, USB ports are usually on the front or back of the CPU tower. Older computers may have USB 1.1 or 2.0 ports, while newer ones likely use faster USB 3.0 ports.
- USB ports are rectangular slots that fit the flat end of a USB cable or flash drive. Inside each port is a metal contact plate that connects to the flash drive.
- USB ports sometimes have a USB symbol next to them, which resembles a trident.
- USB ports on computers may be different colors like blue, black, or white. The color doesn’t affect the functionality.
Make sure to plug your flash drive directly into the computer’s USB port instead of a keyboard or monitor USB hub. The computer connection will ensure proper power and data transfer speed.
Inserting the Flash Drive
Once you’ve located a USB port, you can insert the flash drive. Follow these instructions:
- Locate the USB connector on the flash drive. It’s the metal rectangular tip that plugs into the port. The connector slides into the port.
- Align the USB connector on the flash drive so that the metal contacts are face down and point into the computer’s USB port.
- Gently push the connector all the way into the port until it’s firmly seated. Don’t force it.
- If your flash drive has a power/activity light, it’ll likely flash once you’ve properly inserted the drive.
- Avoid repeatedly plugging and unplugging the flash drive which can damage the port and connector.
USB ports only allow insertion one way, so don’t worry about orienting the drive incorrectly. Once fully inserted, the flash drive will be detected by your computer and show up as a connected device.
Accessing the Flash Drive Files
After you’ve inserted the flash drive into your computer’s USB port, you’ll need to access it like other drives to view files and folders. Here are the ways to access a flash drive on Windows and Mac computers:
On Windows
- Open File Explorer by right-clicking the Start menu and selecting File Explorer.
- In the left pane, expand This PC, Computer, or My Computer depending on your Windows version. Locate and click on the flash drive letter and name.
- The contents of the flash drive will display in the right pane. Click folders and files to open them.
- You can also access the flash drive in My Computer or the This PC shortcut on the desktop.
On Mac
- Open Finder via the Dock or Applications folder.
- On the left sidebar under Devices, click the name of your flash drive (often “Untitled”).
- The flash drive contents will display in the Finder window. Open files and folders as needed.
- You can also click the flash drive icon on the desktop to open it.
Once open in File Explorer or Finder, you can access files on the flash drive like those on your hard drive. Copy, move, delete, rename, open, edit, etc. When finished, eject the flash drive before unplugging it.
Safely Removing the Flash Drive
Don’t just unplug your flash drive when you’re done accessing the files. Safely eject it first to avoid file transfer issues or data corruption. Here are the proper ways to eject a flash drive:
On Windows
- Click the Safely Remove Hardware icon in the system tray (bottom-right).
- Select Eject for your flash drive name.
- A Safe to Remove Hardware message will appear when it’s safe to disconnect.
- If you don’t see the icon, click Show Hidden Icons in the system tray.
On Mac
- Right-click the flash drive icon on the desktop or in Finder.
- Select Eject from the pop-up menu.
- Wait for the ejection process to finish before unplugging.
Properly ejecting the flash drive clears it from the system which prevents anything from writing to it during removal. You can then unplug the USB and take it anywhere.
Tips for Using Flash Drives
Follow these tips when using flash drives to store and transfer computer files:
- Plug the flash drive directly into the computer instead of USB hubs, keyboards, or monitors for best performance.
- Use the Safely Remove process before disconnecting the drive to prevent errors.
- Store flash drives in a safe, dry location when not in use to avoid physical damage.
- Back up important flash drive files on your computer or other drives in case of corruption.
- Use flash drive cases or caps to protect the USB connector when transporting them.
- Avoid touching the metal contacts on the USB connector to prevent transfer issues from oils.
- Scan flash drives for viruses when moving them between unfamiliar computers.
Reasons Your Flash Drive May Not Be Accessible
In some instances, you may insert a flash drive but it doesn’t show up or is inaccessible on your computer. Common reasons include:
- Improperly inserted USB connector – Make sure it’s fully plugged in to the port.
- Wrong file system – The drive may be formatted for a non-Windows/Mac system.
- Drive letter conflict – Try assigning it a different letter.
- Outdated USB drivers – Update your USB drivers from Device Manager.
- Dead USB port – Try another port or restart your computer.
- Full hard drive – Delete files to free up space for the flash drive.
- Corrupted files – Scan for errors and reformat if necessary.
If issues persist, try your flash drive on a different computer to confirm whether the problem is with the drive or your computer’s USB connection. Contact the manufacturer if the issue seems to be with the drive itself.
Ways to Format a Flash Drive
If your flash drive isn’t properly formatted for your operating system, you may get errors when trying to access it. Here are the steps to format a flash drive on Windows and Mac:
On Windows
- Open File Explorer and right-click the flash drive.
- Select Format from the menu.
- Choose the file system (often NTFS or FAT32) and click Start.
- Click OK on the warning prompt to confirm.
On Mac
- Open Finder and select the flash drive.
- Click Erase in the toolbar.
- Provide a name and select a format like MS-DOS (FAT).
- Click Erase to confirm and reformat the drive.
Reformatting will erase all data on the drive, so be sure to back up your files first if you need to preserve anything. Then you can reformat to make the drive compatible.
Conclusion
Using a USB flash drive is an easy way to add more external storage and transfer files between computers. Simply insert the drive into an open USB port, access it like you would any other drive, and transfer or manage files as needed. Make sure to properly eject the drive before removing it. Following the right steps will ensure your flash drive works properly each time.
