RAID (Redundant Array of Independent Disks) is a data storage technology that combines multiple disk drive components into a logical unit. RAID 5 is a commonly used RAID level that provides data striping with distributed parity. It offers fault tolerance by reconstructing lost data if one drive fails. The benefits of RAID 5 include:[1][2]
- Data is striped across all drives, improving performance
- Parity allows data to be reconstructed if a drive fails
- Can withstand failure of 1 drive without data loss
- Cost-effective protection for data
This guide will walk through the steps to add a new drive to an existing RAID 5 array in Windows 10, allowing you to expand the storage capacity.
Prerequisites
Here are the hardware and software requirements for adding a drive to a RAID 5 array in Windows 10:
- Existing RAID 5 array with at least 3 drives
- Available drive bay and power connector in your computer to add the new drive
- Windows 10 operating system
- New compatible hard drive to add to the array that matches or exceeds the capacity of existing drives
- Basic knowledge of Disk Management utility in Windows 10
The existing RAID 5 array must have been created in Windows using Disk Management or other software RAID management utilities. The new drive you add should match the interface (SATA, SAS etc), rotational speed (7200 RPM, 15000 RPM etc), and capacity of the existing drives for optimal performance. The Windows 10 computer must have an available drive bay to physically install the new drive. The basic steps covered in this guide require using the Windows Disk Management utility to identify the RAID array and add the new drive.
Choose a New Drive
When choosing a new drive for RAID 5, it’s important to consider compatibility and performance. The new drive should match the existing drives in terms of interface, speed, and size for optimal performance.
Most experts recommend enterprise-class HDDs like Seagate Exos or WD Red Plus for RAID 5 arrays. These drives are designed for 24/7 operation and have features like vibration tolerance and enhanced error recovery. Consumer-grade drives may work, but have higher failure rates.
All the drives in the array should share the same interface – SATA, SAS, etc. Mixing drive interfaces can severely limit performance. For SATA, stick with 6Gbps drives or faster.
For drive size, match the existing capacity or go slightly larger. Too small and you waste capacity, too large and the rebuild process is more stressful on the array. Aim for drives around 2-6TB for home or small office use.
For spindle speed, 7200 RPM is recommended for optimal performance. SSDs can work in some RAID controllers, but ensure your controller supports TRIM commands before using SSDs.
Lastly, purchase all drives for the array at once if possible. Staggering drive purchases over time increases likelihood of incompatibility.
Install the New Drive
Installing the new drive into your PC involves mounting it in an open bay and connecting the necessary cables.
First, make sure your computer is powered off and unplugged. Open up your computer case and locate an empty drive bay. Most modern PC cases have tool-free drive bays that allow you to secure the hard drive without screws. Slide the drive into the bay until it clicks into place.
Next, connect the power and data cables. Hard drives require a power connector from your PC’s power supply. This is usually a SATA power connector. Attach this to the back of the drive. For the data connection, use a SATA data cable and plug one end into the motherboard SATA port and the other end into the drive.
Make sure all connections are snug. Close up your computer case and boot up your PC. The drive should now be detected in Windows.
Initialize the Drive
Before Windows can use a new drive, you must initialize and format it so the operating system recognizes it. Initializing a drive erases any existing partitions and prepares the drive to be formatted.
According to Microsoft, “Initializing the disk prepares it for use by clearing the index, zeroing sectors, and creating the GUID Partition Table (GPT) or master boot record (MBR), depending on the disk size.”1
To initialize a new drive in Windows 10:
- Open Disk Management by pressing Windows Key + R and entering “diskmgmt.msc”
- Right-click the new disk and select “Initialize Disk”
- Choose either MBR or GPT partitioning and click OK.
GPT is recommended for drives over 2TB in size. MBR is best for smaller drives or for compatibility with older operating systems.
After initializing, you must still format the disk before it can store data. Initializing simply prepares the drive for the formatting process.
Identify the RAID Array
To identify which disks comprise the existing RAID 5 array in Windows 10, follow these steps:
1. Open the Disk Management utility. To do this, right click the Start menu and select “Disk Management”.
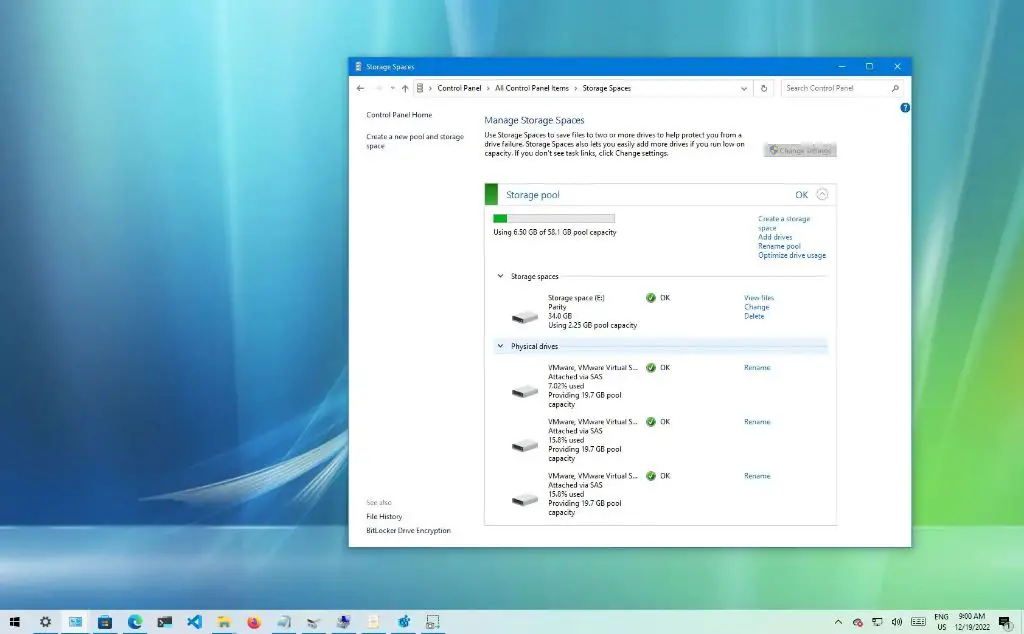
2. In the lower portion of the Disk Management window, you will see a list of all the disk drives connected to your system. Drives that are part of a RAID array will be marked with a status of “Online” and have a blue bar underneath them.
3. Make note of which disk drives have the blue bar, as those are the ones currently being used in your RAID 5 array. The new drive you want to add will likely show a status of “Offline” and have a black bar.
4. You can also look in the upper portion of the Disk Management window to see information about your “Disk Groups”. This will show you which drives are part of the RAID 5 array based on their assigned drive letters.
5. Once you’ve identified the existing RAID drives, you can proceed with adding the new drive to the array. Be sure not to accidentally remove one of the existing drives, as that could cause issues.
For more details, refer to Microsoft’s guide on Identifying Disks in Disk Management.
Add Drive to Array
To add the new drive to the existing RAID 5 array in Disk Management, follow these steps:
-
Open Disk Management (diskmgmt.msc). Right-click the existing RAID 5 array and select Add Mirror.
-
In the Add Mirror window, select the new drive you want to add from the Available disks section. Click Add Mirror.
-
This will start the RAID rebuild process. The Status will show “Regenerating” during this process. It may take several hours depending on the size of the drives.
-
You can continue using the RAID array during the rebuild process, but performance may be degraded.
-
When the rebuild is complete, the status will change to “Healthy”. The new drive is now fully integrated into the RAID 5 array.
The RAID 5 array capacity will be increased after adding the new drive. You can verify the new total capacity in Disk Management.
Let RAID Rebuild
Once the new drive has been added to the RAID 5 array, the array will need to rebuild to redistribute data across all the drives. This rebuild process synchronizes data across the new and existing drives in the array.[1] The rebuild time can take 1-2 days depending on the size of the array and disk activity during the rebuild.
For example, rebuilding a 10 TB RAID 5 array with four 3 TB drives could take 24-48 hours if the server is relatively idle during the rebuild. The rebuild rate may be slower if there is heavy read/write activity on the drives during the process. With larger arrays, the rebuild time increases proportionally. A 100 TB array could take weeks to rebuild after adding a new drive.
It’s crucial not to interrupt the rebuild process once it begins. Turning off the server or disconnecting drives mid-rebuild can cause data loss or array corruption. Set aside enough time for the rebuild to complete before using the expanded array.
Verify Expanded Capacity
After allowing time for the RAID array to rebuild, you can verify that the total capacity has increased in File Explorer.
Open File Explorer and navigate to This PC. The total combined capacity of all drives in the RAID 5 array will be shown.
Compare this to the total capacity before adding the new drive. It should show an increase equal to the capacity of the newly added drive, minus the capacity required for parity data (which is the equivalent of one drive’s worth of capacity in a RAID 5 array).
For example, if the original RAID 5 array had 3 x 1TB drives (total 2TB capacity), and you added a fourth 1TB drive, the total array capacity after rebuild should show as 3TB (the added 1TB, minus 1TB for parity).
You can also view the properties of the RAID 5 volume itself to see the total capacity and confirm the expansion was successful.
If the expanded capacity is not showing correctly in File Explorer, you may need to troubleshoot the rebuild process and verify the new drive was added to the array properly.
Maintenance Tips
To maintain optimal performance and reliability of your RAID 5 array, it’s important to follow best practices for ongoing maintenance and monitoring:
Regularly check the status of your RAID array using your RAID management software to verify all drives are online and rebuilding is not in progress. Watch for warning signs like high drive temperatures or increased read/write errors that could indicate a potential drive failure (Source: https://www.pitsdatarecovery.net/raid-5-reconstruction/).
Replace any failed drives immediately to avoid degraded performance or potential data loss. Hot spares can be used to automatically begin rebuilding the array when a failure occurs (Source: https://superuser.com/questions/1327943/personal-raid5-long-run-maintenance).
Consider proactively replacing older drives before they fail to minimize the chance of multi-drive failures. Drives older than 3-5 years are more prone to failure (Source: https://www.salvationdata.com/technical-tips/raid-5-array/).
Schedule regular backups of your RAID 5 array to external drives in case recovery is needed. Maintain multiple versions of backups over time.
Keep your RAID drivers and firmware up-to-date to take advantage of performance improvements and bug fixes. Follow your manufacturer’s guidance on firmware updates.
Use enterprise-grade drives designed for 24/7 operation and RAID environments. Consumer-grade drives may have shorter lifespans and higher failure rates.
Provide adequate cooling and ventilation to keep drives within their normal operating temperatures. Excessive heat can shorten drive lifespan.
Consider monitoring SMART drive attributes to detect signs of impending failure before a catastrophic error occurs.
