The iPhone offers various ways to transfer and access data like photos, videos, music, and documents when connected to a computer. One of the most common methods is through a direct USB connection between the iPhone and a Windows PC or Mac. With a USB cable, you can sync content libraries, access the iPhone’s file system, and freely transfer data between devices.
When properly set up, connecting your iPhone to a computer via USB provides complete access to the phone’s storage. You can browse files and folders directly, import and export media, back up data, and more. While wireless options like AirDrop exist, a wired USB connection offers the fastest and most versatile data transfer experience.
This guide will walk through the steps to enable file sharing on an iPhone, connect it to a computer via USB cable, access the file system, and transfer various types of files and data. We’ll also cover third-party apps that make file management easier, as well as troubleshooting tips.
Enable File Sharing
The first step to allow USB data transfer on an iPhone is to enable File Sharing in the Settings app. File Sharing allows apps on your iPhone to share documents and data with your computer when connected via USB. Here’s how to enable it:
1. Open the Settings app on your iPhone.
2. Scroll down and tap on “File Sharing.” It’s usually near the bottom of the list on the left side.
3. On the File Sharing screen, make sure the toggle switch next to “File Sharing” is turned on (green). If it’s off, tap on it to enable it.
Once File Sharing is enabled, you’ll be able to transfer files and data between your iPhone and computer. According to Apple Support, File Sharing allows you to transfer documents to and from certain apps that support it [1]. Some common apps that support File Sharing include Pages, Numbers, Keynote, and more.
Connect with USB Cable
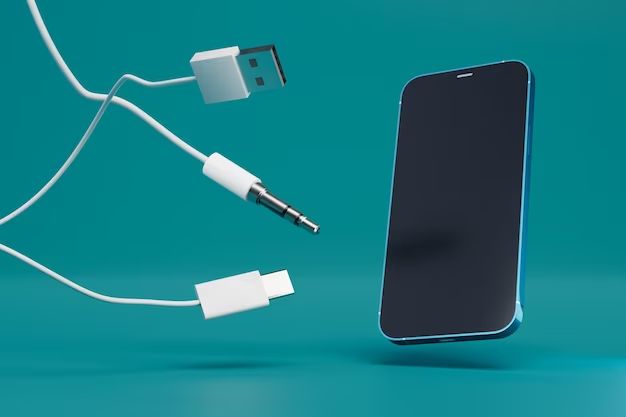
To enable data transfer between your iPhone and computer, you need to use the appropriate Apple USB cable to connect the two devices. The iPhone uses Apple’s proprietary Lightning connector, so you’ll need a USB cable with a Lightning connector on one end and a USB connector on the other end to plug into your computer.
Apple provides USB cables with all new iPhones that can be used for connecting to a computer. You can also purchase separate Lightning to USB cables from Apple or third party manufacturers. Look for cables advertised as supporting data transfer and charging (Amazon). Avoid cheaper cables that are only for charging and do not support data transfer.
Once you have the appropriate Lightning to USB cable, connect the Lightning end into the charging port on your iPhone and the USB end into an open USB port on your computer. Most modern Windows PCs and Macs have USB-A ports, but some newer laptops only have USB-C ports, in which case you would need a Lightning to USB-C cable.
Access iPhone Files
You can access and view files stored on your iPhone by connecting it to your computer via a USB cable. Apple Support notes that when you connect your iPhone, it will show up in Finder on a Mac or File Explorer on a Windows PC.
Once your iPhone appears, you can click on it to view the files and folders stored on the device. This will allow you to see photos, videos, music, documents, and other files that are saved on your iPhone. You can then copy files between your iPhone and computer by dragging and dropping them.
According to Lifewire, when you connect your iPhone via USB, it will mount as a drive on your computer. You can then browse and access the iPhone storage just like you would with an external hard drive or USB flash drive.
This direct USB connection provides an easy way to view and transfer files between your iPhone and computer without needing additional software or wireless file sharing services.
Transfer Photos
One of the most common reasons to enable file sharing on an iPhone is to transfer photos and videos to a computer. With a USB cable, you can easily export photos and videos from your iPhone camera roll and save them to your desktop or laptop.
To begin, connect your iPhone to your computer using the USB cable that came with your device. Make sure your phone is unlocked and File Sharing is enabled under Settings > General > File Sharing on the iPhone. Open the Photos app on your computer and your iPhone should appear in the sidebar as a device.
You can now click on your iPhone in the sidebar and view all the photos and videos saved to the camera roll. Simply select the files you want to transfer and click Import or Download. The photos will be saved to a folder on your computer.
According to Apple’s support article, transferring photos via USB is fast and preserves the original image quality. The Photos app on Mac or the Photos app in Windows 10 provides an easy way to bulk export all photos or just selected albums.
Transfer Videos
You can transfer videos off your iPhone and save them as files on your computer using a USB cable connection. To get started, connect your iPhone to your computer using the included USB to Lightning cable. Open the Photos app if you’re on a Mac or the File Explorer if you’re on Windows. Your iPhone should appear as a device.
Navigate to the DCIM folder, then the folder titled 100APPLE. This is where your iPhone camera videos are stored. You can select multiple videos and copy or drag them over to save on your computer. The video files will have .MOV extensions.
Alternatively, you can use the Image Capture app on a Mac or the Photos app on Windows 10 to import videos from your iPhone. This gives you the option to delete the videos off your iPhone after importing if you need to save space.
By default, transferred iPhone videos may be resized or compressed by your computer. To preserve full quality, go to Settings > Photos on your iPhone and enable ‘Transfer to Mac or PC’ which will keep original versions when transferring to your computer.
Transfer Music
You can transfer music files from your iPhone to your computer using iTunes. First, connect your iPhone to your computer using the USB cable that came with your device. Open iTunes and click on your iPhone icon. Next, go to the “Music” section and check the “Sync Music” checkbox. You can then select which playlists, artists, albums or genres to sync from your iPhone to iTunes. Click “Apply” to start the transfer.
To export your entire music library or specific playlists from your iPhone to your computer, first connect your iPhone and open iTunes. Go to the “Playlists” section, right click on the playlist you want to export and select “Export Playlist”. Alternatively, you can click “File” then “Library” > “Export Library” to export your entire music collection. The files will save to your computer as an XML file which you can then import into other music apps.
As an alternative, you can use the free AirDroid app to wirelessly transfer music from your iPhone to your computer over Wi-Fi.
Transfer Documents
One of the most common file types people want to transfer between an iPhone and a computer are documents like Word docs, Excel spreadsheets, PDFs, and text files. Here’s how to move these types of documents from your iPhone to your computer via USB:
First, connect your iPhone to your computer using the included USB cable. Open iTunes on your computer and click on your iPhone icon. Go to the File Sharing section. Here you will see a list of apps that support file sharing. Scroll down and click on the app that contains the documents you want to transfer, like Pages or Numbers.
On the right side, you will see a list of documents stored within that app on your iPhone. Select the files you want to transfer by holding down Command (Mac) or Control (PC) and clicking on each one. Then click ‘Save to’ and choose where you want to save the files on your computer. The document(s) will be exported and saved to the designated location.
This provides an easy way to get Word docs, spreadsheets, PDFs, and other documents off of your iPhone and onto your computer for backup or further editing. Just connect with a USB cable, find the files within the app in iTunes, and click to export to your computer.
Apps for File Transfer
One of the easiest ways to wirelessly transfer files between your iPhone and a computer is by using a file transfer app. There are several excellent free and paid apps that allow you to quickly move photos, videos, documents and other files without any cables. Here are some top options for wirelessly transferring files from your iPhone:
File Transfer App allows you to share files between iPhone, iPad, computer and other nearby devices. It has a user-friendly interface and works across iOS, Windows, macOS, and Android.
Smart Transfer App offers fast, limitless data transfer between major smartphone platforms. It can transfer photos, videos, music, contacts, messages and more.
Troubleshooting
Here are some common solutions for issues that may arise when transferring data via USB from an iPhone:
If you get an error message like “A device attached to the system is not functioning,” this typically indicates a connectivity issue between the iPhone and the computer. First, check that the USB cable is not damaged and is properly connected at both ends. Try connecting the iPhone to a different USB port or using a different cable. Restarting both the iPhone and computer can also help in some cases (Source 1, Source 2).
If your iPhone is only charging and not connecting for data transfer when plugged into your computer, make sure you have the necessary software installed, like iTunes or iCloud. Go to Settings > General > CarPlay and ensure that USB Accessories are enabled. Toggle USB Restricted Mode off and back on if needed. Finally, update to the latest iOS software on your iPhone (Source 1).
For issues transferring photos or videos specifically, check that you have enabled the Photos app to transfer data in Settings > Photos. Make sure there is sufficient storage on the receiving device as well. As a last resort, try using a third-party app like iMazing to transfer your media files (Source 2).
If none of those solutions work, you may need to reset your iPhone’s settings, which will clear any USB restrictions while keeping your data intact. Visit an Apple store for hands-on troubleshooting if problems persist.