Sometimes your Mac may experience issues that prevent it from starting up properly. This can be caused by things like corrupted system files, malware, or even just an accidental change to system settings. When this happens, you’ll want to boot your Mac into Recovery Mode so you can repair, restore, or reinstall macOS.
Recovery Mode is a special troubleshooting environment that lives on a hidden partition of your startup disk called the Recovery HD. The Recovery HD contains utilities like Disk Utility, Terminal, Reinstall macOS, and more to help you diagnose and fix problems. Here’s how to boot into the Recovery HD on a Mac to access these tools.
What is the Recovery HD?
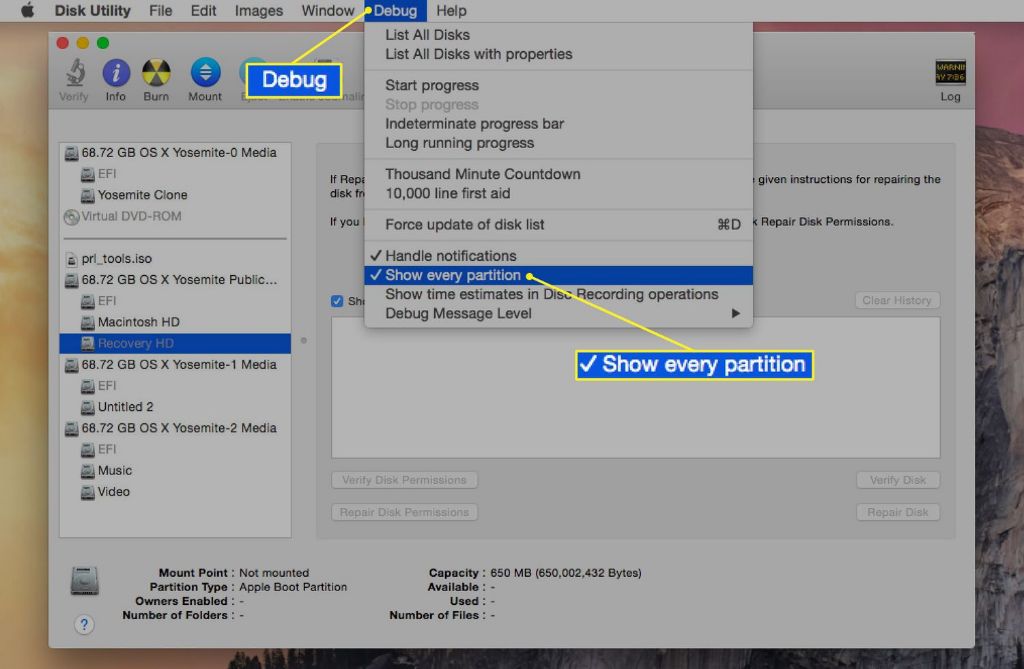
The Recovery HD is a special partition on the startup disk of your Mac that contains utilities to help verify and repair issues with macOS. It contains a copy of the macOS installer so you can reinstall the operating system. It also provides access to Disk Utility, Terminal, Network Utilities, and other tools to troubleshoot problems before reinstalling macOS.
Some key things the Recovery HD contains:
- Disk Utility – Repair and manage disks and volumes
- Terminal – Access command line interface
- Reinstall macOS – Download and install latest macOS
- Network Utilities – Troubleshoot network and internet issues
- Firmware Password Utility – Manage firmware passwords
- Startup Security Utility – Manage settings for secure boot
The Recovery HD is created automatically by macOS and is typically invisible in Finder. It’s usually around 650MB-1.5GB in size depending on the model Mac. As long as you don’t delete it, the Recovery HD will always be available when booting your Mac.
How to Boot into Recovery Mode
There are a couple different ways to boot into Recovery Mode to access the Recovery HD on your Mac. The easiest method depends on what type of Mac you have:
Boot into Recovery on Macs with Apple Silicon
For Macs with the M1 or M2 chip, here are the steps to boot into Recovery Mode:
- Fully shut down your Mac
- Press and hold the power button
- Keep holding the power button until you see the startup options appear
- Release the power button
- Click on the Options button under the gear icon
- Select “Recovery” then click Continue
Your Mac will now boot into Recovery Mode to display the macOS Utilities window.
Boot into Recovery on Intel-based Macs
For older Macs with Intel chips, use these steps:
- Fully shut down your Mac
- Press and hold the Command + R keys immediately after pressing the power button
- Keep holding Command + R until you see the Apple logo appear
- Release the keys – your Mac will boot into Recovery Mode
Alternatively, you can hold Option + Command + R which boots into internet Recovery Mode instead to download and install the latest macOS over the internet. This requires an internet connection.
Once your Intel Mac boots into Recovery, you’ll also see the macOS Utilities window.
How to Use macOS Utilities in Recovery Mode
Once you’ve successfully booted into Recovery Mode, you’ll be presented with the macOS Utilities window. This screen provides access to various troubleshooting tools to verify and repair your system.
Here are the utilities you can access on this screen and how to use them:
Get Help – Guides and Online Support
Click “Get Help” to open Safari and access online help guides and Apple’s support site. Useful if you need assistance using the recovery tools.
Reinstall macOS – Erase, Download, and Install Latest macOS
This utility lets you erase your startup disk and do a fresh install of the latest macOS version compatible with your Mac. Your Mac will need an internet connection to download the installer.
Follow the prompts to select your disk, choose options like keeping data or erasing the disk, then proceed through the installation process. Make sure you have backups before erasing!
Disk Utility – Repair, Erase, and Manage Disks
Disk Utility lets you verify and repair corrupted disks and volumes, erase and reformat drives, partition disks, and more. Useful for fixing disk errors that may be preventing macOS from starting up.
To use it:
- Select your startup disk or volume from the left sidebar
- Click First Aid and select Run to check for errors
- Use the other tabs like Erase, Partition, and RAID to manage your storage
Disk Utility can fix simple disk problems, but for more advanced diagnostics use Apple Diagnostics instead.
Apple Diagnostics – Test Hardware Issues
Apple Diagnostics runs a series of tests on the Mac hardware and connected peripherals to check for issues. It can help identify failed components like RAM, wireless cards, and other parts.
To use it:
- Click Apple Diagnostics
- Follow the prompts to select your language and run testing
- Review the test results – any issue codes can be searched for specific solutions
If Apple Diagnostics detects a hardware issue, you may need to contact Apple Support or an Apple Authorized Service Provider to have it inspected and repaired.
Terminal – Command Line Interface
Terminal gives you command line interface access for advanced troubleshooting and repair tasks. Useful if you’re technically inclined.
You can use commands like fsck to check disks, reboot to restart, top to view processes, ping to test networks, and much more. Use caution as some commands can make changes.
Reboot/Shut Down – Exit Recovery Mode
When you’re done using the Recovery utilities, click the Reboot or Shut Down buttons to exit Recovery Mode and continue starting up your Mac as normal.
Other Methods to Get into Recovery Mode
In addition to the standard keyboard shortcuts, there are a few other ways to boot into Recovery Mode on Mac:
- Boot while holding N key if FileVault is enabled – works on models 2018 and later
- Select Recovery HD from Startup Manager (Option key method)
- Use macOS Recovery app if Recovery HD is missing or damaged
- Internet Recovery Mode – Command + Option + R on Intel Macs
So if the usual methods aren’t working, try one of these alternatives to boot into Recovery Mode as needed.
What to Do After Using Recovery Mode
After you’ve completed your troubleshooting or repairs using the Recovery utilities, here are some next steps to take:
- Restart your Mac normally and verify the issues are resolved
- Update macOS to the latest version if you reinstalled an old one
- Restore your data from a backup if you erased the disk
- Reset NVRAM/SMC if you continued to have startup problems
- Make new backups once your Mac is back up and running
- Consider installing macOS on an external drive for future recovery use
Following up with these items can help ensure your Mac is fully recovered and prevent potential problems going forward.
Conclusion
Booting into Recovery Mode is a crucial troubleshooting tool for Mac users. It provides access to Recovery HD utilities that can diagnose hardware issues, repair disk errors, reinstall macOS, wipe your drive, access Terminal, and much more.
By learning the various keyboard shortcuts or Startup Manager methods to boot into Recovery Mode, you’ll be prepared to troubleshoot just about any Mac startup, performance, or system issue you encounter. Run Disk Utility, Apple Diagnostics, and reinstall macOS as needed – just be sure to have a backup first!
With the Recovery HD, you’ll always have a safety net to fall back on for Mac troubleshooting. So get comfortable using it, and Recovery Mode can help get your Mac back up and running smoothly.