If you find that your disk is write-protected, meaning you are unable to modify or delete files on the disk, there are a few things you can try to change the write-protection status.
What Does “Write Protected” Mean?
A disk that is “write-protected” has restrictions in place to prevent files from being modified or deleted. This is usually done intentionally, to protect important data from accidental changes. There are a few common ways a disk can become write-protected:
- A physical switch or tab on the disk itself is moved to the “lock” position.
- On a USB flash drive, the lock switch is slid to the locked position.
- The disk mount in your operating system is configured as read-only.
- The file permissions on the disk are set to be read-only.
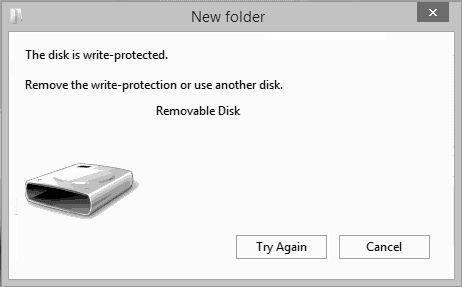
Trying to modify files on a write-protected disk will result in errors. Before you can make changes to the disk, you need to remove or disable the write-protection.
Check for a Physical Write Protect Switch
Many types of removable media like SD cards and USB flash drives have a physical switch or tab that controls the write-protection. Locate this switch or tab on your device and make sure it is not in the locked position. Something as simple as sliding the switch back to the unlocked position can remove the disk’s write-protection.
Here are some examples of what a physical write-protect switch may look like:
- SD cards – A small switch on the side that slides between unlocked and locked.
- USB drives – A small slider that reveals a hole in the unlocked position.
- Floppy disk – A small plastic tab that slides to cover a notch when locked.
If your device has a similar switch or slider, check that it is in the correct unlocked position. This should immediately resolve the write-protection on devices that use physical controls.
Disable Write Protection on USB Drives
USB flash drives may appear write-protected even if the physical lock switch is not enabled. This can happen if the drive is configured to be read-only through software.
To remove this kind of write-protection from a USB drive on Windows:
- Open File Explorer and locate the USB drive.
- Right click on the drive and select Properties.
- Go to the Security tab and then Advanced.
- Uncheck the box next to “Read-only” under Removable Storage Access.
- Click OK to save the changes.
This will configure the USB drive to allow files to be written to it again, removing the software-level write-protection.
Check Mount Options
Disks connected to your computer, whether internal or external, are “mounted” by the operating system which allows them to be accessed. The options for mounting a disk can include making it read-only, essentially write-protecting it.
To check for this on Linux:
- Run
mountto see the mounted filesystems. - Look for the line mentioning your disk. It will show the mount options in parentheses.
- If it says “(ro)” for read-only, the mount will need to be remounted as read-write.
To remount as read-write:
- Unmount the disk with
umount /path/to/disk - Remount it as read-write using:
mount -o remount,rw /path/to/disk
This will now allow writing to the disk again.
Adjust File Permissions
If a disk itself is not write-protected, but you find you are still unable to modify files, the file permissions may be restricting access. The owner, group, and world permissions dictate who can read, write or execute files on Linux and macOS systems.
To check if file permissions are causing write issues on a disk:
- Try modifying or creating a file on the disk as your regular user.
- If you get a “permission denied” error, file permissions may be blocking writes.
- Run
ls -lto view permissions of files on the disk. - Check that the write permission, indicated by “w”, is not restricted.
If the permissions show write is restricted, you can run the chmod command to add write permission:
chmod +w /path/to/file
You can also use chmod recursively to update permissions on directories:
chmod -R +w /path/to/directory
This will add write permissions and prevent the permission denied errors when trying to make changes to files.
Disable Write Protection in Disk Utility
On Mac OS, you can use Disk Utility to view and change settings related to write protection.
- Open Disk Utility
- Select the disk device from the sidebar
- Click the Info button
- Check if Write Protection says “Yes”
- To remove the write protection, click Erase in the top menu
- Name the disk and select a format
- Click Erase – This will remove write protection
After following these steps to erase and reformat the disk, it should no longer have any write protection enabled.
Remove Physical Locks or Pins
On some removable disks like micro SD cards, there may be a physical lock or pin that needs to be adjusted to remove write protection. This is common on cards used in devices like cameras and video game consoles.
Check your SD card for a small tab or switch along one edge:
- Adjusting this tab on some cards will slide to uncover or cover a small hole, toggling write protection.
- Other cards may have a push-pin in the hole that needs removed to enable writing.
If your card has a similar physical lock or pin, be sure it is slid open or removed entirely before inserting the card in your computer. This mechanical protection overrides any software settings for write access.
Replace the Disk
In some unfortunate situations, the write protection mechanisms in a disk can fail or get stuck. No amount of software or permission changes will allow writing to the disk again. Some signs of this include:
- The physical lock switch is broken
- The disk reports as read-only when no protection is enabled
- Errors keep appearing when trying to write to the disk
For SD cards and USB drives, the simplest solution is to replace the malfunctioning device with a new one. Flash-based storage has grown inexpensive enough that replacement is now viable for even large capacity drives.
Replacing a malfunctioning internal disk is more complex, but still an option if the disk cannot be made writable again through other means. In either case, be sure to transfer any important data off the disk before replacing it.
Low-Level Format as a Last Resort
If all else fails, performing a low-level format on the disk may reset its protection state. This is an advanced procedure that completely erases the disk and allows recreating a fresh filesystem.
Important: Low-level formatting will destroy all data on the target disk. Only attempt this if you are certain the disk cannot be written to and you have no need to recover its data.
To low-level format a disk on Windows:
- Open Command Prompt as Administrator
- Run
diskpartto begin DiskPart utility - Enter
list diskto identify the problem disk’s number - Select the disk with
select disk X(replace X with its number) - Run
cleanto perform the low-level format
On Linux, use a tool like gparted to format the disk. On Mac, you can use Disk Utility to erase the disk with Mac OS Extended format, which low-level formats it.
With the disk reset after low-level formatting, you should now be able to write to it like normal. Use disk management tools to create a new partition and filesystem.
Conclusion
Write-protected disks can be annoying to deal with if you don’t know what’s causing them. In many cases, it ends up being a simple physical switch or software setting that needs toggled off. Check for physical locks, remount the disk as writable, and ensure permissions allow writes to remove most write protections.
If a disk still says read-only with no locks enabled, replacing the faulty hardware is the definitive solution. And for truly stuck disks, low-level formatting as a last resort will wipe the slate clean. Just be absolutely sure your data is backed up before taking that plunge!
