Solid state drives (SSDs) are becoming increasingly popular for computer storage due to their faster speeds and improved reliability compared to traditional hard disk drives (HDDs). When installing a new SSD or troubleshooting potential issues with an existing drive, it can be helpful to view details about the drive in Windows Disk Management.
What is an SSD?
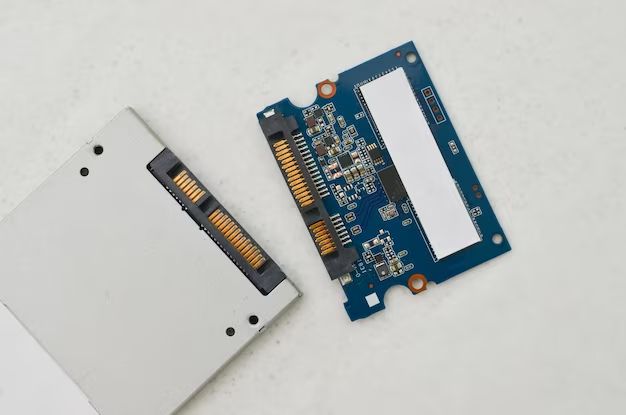
An SSD is a type of storage device that uses flash memory chips rather than spinning platters to store data. Some key advantages of SSDs over HDDs include:
- Faster read and write speeds – SSDs can access data much more quickly than HDDs.
- Improved reliability – SSDs have no moving parts, making them less prone to mechanical failure over time.
- Compact size – SSDs take up less physical space than HDDs with the same storage capacity.
- Low power usage – SSDs consume much less electricity than HDDs.
While SSDs are more expensive per gigabyte than HDDs, prices have been dropping steadily. The performance benefits of SSDs make them popular for boot drives as well as frequently accessed programs and files.
Viewing SSD Details in Disk Management
Disk Management is a built-in Windows utility that provides information about drives installed on your computer. To open Disk Management in Windows 10 or Windows 11:
- Open the Start menu and search for “Disk Management”. Select the Disk Management app to launch it.
- Right-click the Start menu and choose “Disk Management” from the menu.
- Open the Control Panel, go to System and Security > Administrative Tools, and launch Disk Management.
Disk Management shows details on both internal and external drives connected to your computer. Any SSDs installed in your system will be listed along with their model number, capacity, partition style, and other details.
Identifying the SSD
SSDs can be identified easily in Disk Management, as they have the words “Disk Drive” or “Solid State Drive” listed under the Type column. HDDs will be labeled as “Hard Disk Drive”. The SSD will also have a different drive letter than your main HDD, typically Drive C.
Checking Capacity
The capacity column in Disk Management shows the total usable storage space on the SSD, reported in gigabytes (GB) or terabytes (TB). This can be cross-checked against the rated capacity printed on the SSD’s label or in the specifications online to verify all of the expected storage is available.
Partition Style
How the drive is partitioned is shown under the Partition Style column. Most SSDs will use the common GUID Partition Table (GPT) scheme. Older operating systems may instead partition the drive with Master Boot Record (MBR), which has limitations on maximum partition sizes.
File System
The file system that is formatting the SSD’s partitions is shown in the File System column. Most modern Windows versions will use NTFS on SSDs. Other potential file systems include FAT32 or exFAT if the drive is being used for external storage.
Drive Health
While SSDs are less prone to failure than HDDs, it is still possible for them to malfunction or start exhibiting signs of decreased performance over time. The general drive status is shown under the Status column.
Possible status indicators include:
- Healthy – Drive is functioning normally.
- Warning – There are errors detected that could impact performance.
- Failed – Drive is no longer working properly.
If the SSD is shown as anything other than Healthy, there may be underlying issues that require troubleshooting.
Other SSD Details
Beyond the basic identifying information and specifications provided in Disk Management, there are some other technical details that can be helpful to know about an SSD.
Controller and Flash Memory
The SSD controller and flash memory chips are two of the most important components. The controller manages all read/write operations on the drive, while the flash memory stores the actual data.
Higher-end SSD models typically have more sophisticated controllers and higher-grade flash components that improve performance and endurance. Tools such as CrystalDiskInfo can provide more insight into these aspects.
Write Endurance
One specification for SSDs is write endurance – this indicates how much data can be written to the drive before performance starts to deteriorate. Most modern SSDs are rated for at least several hundred terabytes. The SSD’s firmware tracks usage to spread out writes evenly across memory cells.
TRIM Support
TRIM is a command SSDs utilize to help maintain optimal performance. When data is deleted on an SSD, TRIM tells the drive those blocks can be wiped and reused. Enabling TRIM prevents read/write speed degradation over time.
Encryption Support
Some SSD models support on-the-fly encryption of all data written to the drive for added security. This protects the contents of the SSD if it is disconnected from the computer or falls into the wrong hands.
Judging Overall Health
In addition to the drive status shown in Disk Management, CrystalDiskInfo provides more granular metrics like used reserve blocks, erase counts, and total data written. Monitoring changes in these values over time gives a good indication of the SSD’s remaining lifespan.
Running Diagnostics on the SSD
If you notice your SSD running slower than expected or exhibiting other unusual behavior, it’s a good idea to run some diagnostics tests on the drive.
Using Built-In Windows Tools
Windows includes some basic built-in disk diagnostic utilities:
- CHKDSK – Checks drive sectors for errors and repairs any found issues.
- SFC – Verifies important Windows files are not corrupt.
- DISM – Scans Windows image files and replaces any damaged or missing components.
Opening a Command Prompt window as Administrator and running these commands can often resolve minor SSD problems that could impact performance.
Manufacturer SSD Tools
Most SSD manufacturers provide their own drive utility software with advanced diagnostic and performance tuning features. These tools will provide the most in-depth SSD health assessment.
Examples include:
- Samsung Magician
- Crucial Storage Executive
- WD SSD Dashboard
The manufacturer’s SSD software can diagnose issues like outdated firmware, enable TRIM if unsupported by the OS, and monitor usage metrics not visible in other utilities.
Third-Party SSD Tools
There are also many third-party disk diagnostic tools available such as:
- CrystalDiskInfo – Provides health status, power-on hours, temperatures, and Bad Sectors.
- Hard Disk Sentinel – Comprehensive HDD/SSD diagnostic and benchmarking.
- SSDLife – SSD-specific tool showing usage statistics and estimated lifetime remaining.
Using both the manufacturer software and other advanced third-party tools provides the most complete picture of your SSD’s performance and health.
Fixing Common SSD Issues
If you discover a problem with your SSD through Disk Management or drive diagnostics, there are some potential solutions to try:
Update Firmware
An outdated SSD firmware version can lead to instability and performance problems. Updating to the latest firmware from the manufacturer’s website often resolves many issues.
Run CHKDSK
As mentioned previously, CHKDSK will scan for file system errors and bad sectors on the drive. Run CHKDSK from the command prompt to fix any problems found.
Secure Erase SSD
Completely erasing all contents of the SSD using the drive manufacturer’s secure erase tool can clear up problems caused by corrupt data.
Change SATA Cable
If you are still experiencing SSD issues, try swapping out the SATA cable connecting it to the motherboard. A faulty cable can mimic SSD failures.
Update BIOS/Drivers
Outdated system BIOS or storage drivers can sometimes lead to SSD detection issues or instability. Updating to the newest available versions may help.
Disable Power Saving
Disabling any hard disk power saving settings in the OS power options has been known to resolve erratic SSD behavior for some users.
Replacing a Failing SSD
If none of these troubleshooting tips resolve your SSD problems, the drive itself may be failing. At that point your best option is replacing the SSD.
Cloning Existing SSD
Specialized disk cloning software makes it easy to migrate everything on your current SSD over to a new replacement drive. Popular options include:
- Acronis True Image
- EaseUS Todo Backup
- Macrium Reflect
After cloning, you can swap out the old drive for the new SSD and boot normally without reinstalling the OS or programs.
Clean Install on New SSD
If drive cloning is not an option, you’ll need to do a fresh OS installation on the replacement SSD.
- Back up any data and files you want to transfer from the old SSD.
- Perform a clean install of your operating system on the new SSD.
- Install drivers and applications.
- Transfer over any data from your backup.
Although more time consuming, a clean install ensures you start fresh with optimal SSD performance.
Conclusion
SSDs are great for boosting computer performance, but it is important to monitor their health status. Disk Management in Windows provides an easy way to view basic SSD details like capacity, status, and partition style.
More advanced tools such as manufacturer utilities and third-party diagnostics provide deeper insights on SSD performance metrics and usage statistics. Running regular SSD checks gives you a chance to head off potential problems before they result in data loss or drive failure.
With proper care and maintenance, an SSD can last many years and provide noticeably faster access to everyday files and programs. Paying attention to the SSD details in Disk Management and taking action when issues arise will help ensure reliable solid state performance.