Adding an external hard drive to a Dish receiver allows you to significantly expand your storage capacity for recordings beyond what is available internally. With an external drive connected, you can store hundreds of hours of shows, movies, and other content to watch whenever it’s convenient for you.
Dish receivers like the Hopper, Wally, and others are compatible with external USB hard drives. Once properly connected and enabled, the Dish receiver will automatically begin storing new recordings to the external drive when the internal drive is full. You can also manually transfer recordings from the internal drive over to the external drive to free up space.
Overall, connecting an external hard drive enables a Dish subscriber to build an extensive on-demand video library without having to worry about running out of DVR storage space. It provides a simple way to future-proof your Dish receiver and have essentially unlimited capacity for recordings.
Benefits of Connecting an External Hard Drive
One of the biggest benefits of connecting an external hard drive to your Dish receiver is the ability to record more shows and movies. The amount of recordings your Dish receiver can store is limited by its internal hard drive capacity. For example, the Hopper 3 receiver contains a 2TB internal hard drive, which can store around 500 hours of HD programming (source). By connecting an external drive, you expand your available storage space, allowing you to record many more hours of content.
With an external drive connected, you don’t have to worry about running out of room and missing recordings if your internal hard drive fills up. You can store your favorite shows, important events, movies, and more without having to delete content to make space. This gives you much more recording flexibility and convenience.
External Drive Requirements
In order to connect an external hard drive to your Dish receiver, the drive must meet certain requirements:
Storage Limits:
- Connected to Hopper: minimum 320 GB, maximum 7 TB (External Hard Drive Diagram and Support – MyDISH)
- Connected to Wally: minimum 500 GB, maximum 4 TB (External Hard Drive – MyDISH – DISH Network)
- Connected to other receivers: minimum 50 GB, maximum 2 TB (External Hard Drive – MyDISH – DISH Network)
Formats: The external hard drive must be formatted as FAT32 or EXT2 (External Hard Drive – MyDISH – DISH Network).
Power: The external hard drive should have its own dedicated power source. Relying solely on bus power from the receiver’s USB port is not recommended.
Connecting the External Drive
Connecting an external hard drive to your Dish receiver is straightforward. Here are the steps to connect the drive physically:
- First, locate the USB port on the back of your Dish receiver. This is where you will plug in the hard drive.
- Connect the power cable to your external hard drive if it requires an external power source. Plug the drive into a surge protector or wall outlet.
- Use a USB cable to connect your external hard drive to the Dish receiver’s USB port. The cable should be USB 2.0 compatible for best performance.
- If the external drive has an activity light, check that it turns on once connected to show that the receiver is interacting with the drive.
- Position the external drive near your Dish receiver using the stand or horizontal/vertical orientation recommended by the manufacturer.
That covers the basics of physically connecting your external hard drive to a Dish receiver. Once everything is plugged in properly, you’ll need to enable the external drive through your receiver’s settings.
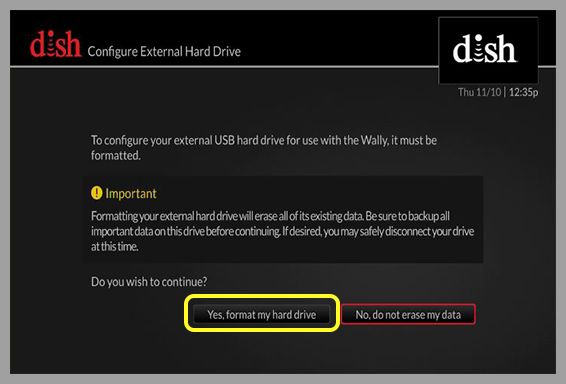
Enabling External Storage
Once the external hard drive is physically connected to the Dish receiver via the USB cable, you need to enable the receiver to recognize and use the drive for DVR storage. This is done through the receiver’s settings menu:
1. Press the Menu button on your Dish remote.
2. Navigate to Settings > External Storage.
3. Select Enable. This will prompt the receiver to detect the connected external drive.
4. A message will appear confirming an external drive is connected. Select Yes to enable DVR service on the detected external drive.
5. Select Enable when prompted to confirm enabling the external storage device. This will initialize and format the drive for use with your Dish receiver.
Once initialization is complete, you will see the external hard drive details and storage capacity show up in the External Storage menu. Your receiver is now ready to start recording to the connected external drive.
Source: Connect ViP Receiver to External Hard Drive – MyDISH
Transferring Recordings
Once the external hard drive is connected and enabled for storage on your DISH receiver, you can start transferring recordings over to the new drive. Here are the steps to transfer recordings:
- From live TV, press the DVR button on your DISH remote twice. This is the round button in the center below the row of four color buttons.
- Select Manage Recordings.
- Use the arrow buttons to highlight the recordings you want to move to the external drive.
- Press the Red button for Options.
- Select Transfer Recordings.
- Choose the external hard drive as the destination.
The selected recordings will now be moved from the DISH DVR to the connected external hard drive. This allows you to free up space on the internal DVR and store more recordings long-term on the external drive. According to DISH Support, recordings can be transferred back to the DVR from the external drive as well if needed.
Recording to the External Drive
Once the external drive is connected and enabled, you can set future recordings to save directly to the drive instead of the internal hard drive. Here are the steps:
- Press the DVR button on your Dish remote.
- Select the Program Guide.
- Use the arrow buttons to highlight a future program you want to record.
- Press Select to bring up the program info overlay.
- Choose Record Series or Record Once.
- A confirmation will appear showing where the recording will be saved. Choose Options to change the storage location.
- Select the external drive as the Recording Storage location.
- Confirm to set all future recordings for that program to save to the external drive.
Now any scheduled recordings for that program will be stored directly onto the connected external hard drive rather than taking up space on the internal receiver hard drive. This allows you to save more recordings beyond the limited DVR storage space.
For more details, refer to Dish’s support article on managing recordings with an external hard drive.
Playback from the External Drive
Once recordings have been transferred to the external hard drive, you can access and play them back directly from the drive. Here are the steps to play back existing recordings:
1. Press the DVR button on your Dish remote twice to access the list of recorded programs.
2. Use the arrow buttons to navigate to the folder for External Hard Drive Recordings. Select this folder to view all recordings stored on the external drive.
3. Highlight the recording you want to watch and press Select. The recording will begin playing back.
The playback process is the same as watching a recording stored on your DVR. You can pause, rewind, fast forward or stop playback at any time.
One advantage of using an external hard drive is it expands your storage capacity allowing you to save more recordings long-term. Just connect the external drive and access all of your saved shows whenever you want to watch them.
Maintenance
To keep your external hard drive performing well for many years, it’s important to take proper care of it. Some tips for maintaining your external drive include:
Reduce the risk of physical damage by handled the drive gently, storing it properly when not in use, and transporting it carefully if taking it on the go. Hard drops, bumps, and shocks can damage the drive. Use a protective case or bag when traveling with the drive.
Avoid extreme temperatures. Don’t leave the drive in very hot or cold environments. Temperature fluctuations can lead to condensation forming which can short out the electronics. The safe operating temperature range is typically 50 to 95 degrees Fahrenheit.
Don’t unplug the drive when it’s writing or reading data. This can corrupt the data. Safely eject the drive before unplugging it. Also avoid turning off or restarting your Dish receiver when the external drive is being accessed.
Periodically scan the drive for errors. Use the built-in tools in your Dish receiver to run occasional diagnostics on the external drive and check for bad sectors or data corruption. This allows you to detect and address issues early.
Keep the drive reasonably full. Don’t let it sit empty most of the time. This can lead to the platters seizing up over time. Recording shows regularly helps keep all parts of the drive moving properly.
By taking proper precautions and doing periodic maintenance, your external drive can remain healthy and functional for many years. Handle it with care!
Troubleshooting
If you encounter issues connecting or using your external hard drive with your Dish receiver, there are some troubleshooting steps you can try:
Reset the receiver – Unplug the power cord from the back of the receiver for 10 seconds before plugging it back in. This can help resolve temporary glitches (my.dish.com).
Check external drive connections – Make sure the drive is properly connected to the USB port on the receiver. Try a different USB port or cable if possible.
Check drive formatting – The external drive needs to be formatted as FAT32 or EXT2/3. Reformat the drive if necessary using your computer (avsforum.com).
Allow time to detect drive – It can take several minutes for the receiver to detect and set up a new external drive. Wait 5-10 minutes before troubleshooting further.
Check drive health – If the receiver doesn’t recognize the drive, it could be damaged or malfunctioning. Try connecting it to a computer to check its status.
Update receiver software – Make sure your receiver is running the latest software, which may include fixes for external drive connectivity.
Factory reset – As a last resort, reset your receiver to factory default settings if you continue having external drive problems.
