Memory cards, such as SD cards and micro SD cards, are small storage devices that allow you to save photos, videos, music, and other files on a removable flash memory chip. They are commonly used in digital cameras, smartphones, tablets, and other electronics to expand storage capacity. Sandisk is one of the leading brands for memory cards.
This article will provide step-by-step instructions on how to properly connect a Sandisk memory card to a Mac computer. We’ll cover how to insert the card, mount it so the Mac can access the files, import files like photos to the Mac, and safely eject the card when finished.
Prepare Your Sandisk Memory Card
Before using your SanDisk memory card with your Mac, it’s important to make sure the card is properly formatted. SanDisk memory cards may come pre-formatted with FAT32 formatting, but it’s best to reformat the card to ensure full compatibility with Mac OS 1.
To format your SanDisk memory card on Mac:
- Insert the memory card into your Mac’s card reader or SD card slot.
- Open Disk Utility (located in Applications > Utilities).
- Select your SanDisk memory card in the left sidebar.
- Click “Erase” at the top.
- Choose “Mac OS Extended (Journaled)” as the format.
- Click “Erase” to confirm.
This will reformat your SanDisk card to be fully optimized for use with Mac OS. Now your memory card is ready to save files, photos, videos, and more.2
Locate the Memory Card Slot
The location of the memory card slot varies depending on your Mac model:
- MacBook Pro – The SD card slot is located on the right side of the MacBook Pro, next to the HDMI port. See image below:
- MacBook Air – MacBook Air models from 2018 and later include an SD card slot located on the right side of the laptop, next to the USB port. See image below:
- iMac – The SD card slot on an iMac is located on the back of the screen, on the right side. See image below:


Older Mac models may not include a built-in SD card reader, in which case you’ll need an external USB card reader.
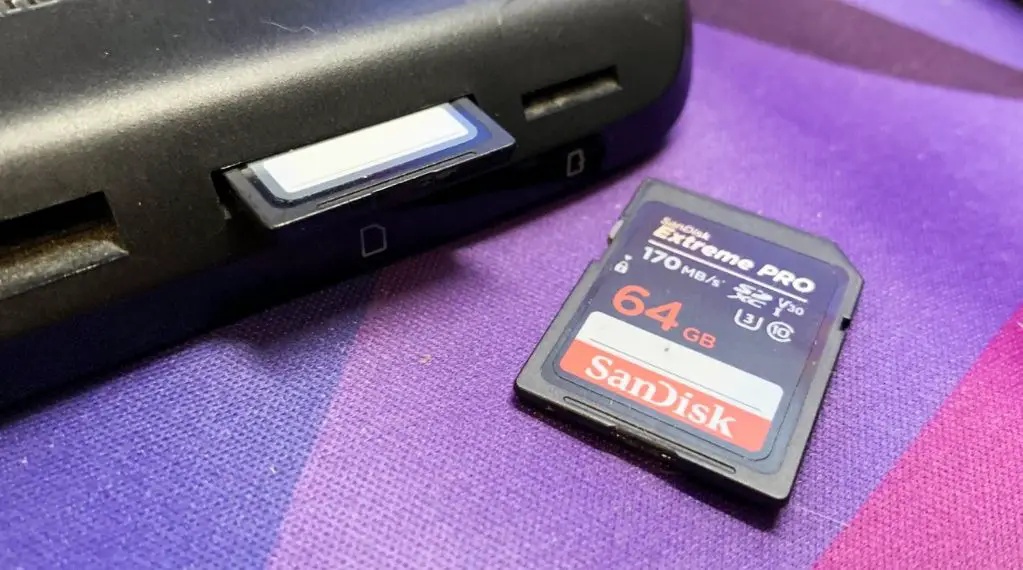
Insert the Memory Card
When inserting the memory card into the SD card slot, make sure the metal contacts on the card are facing down and pointing toward the computer. The SD card should slide smoothly into the slot if inserted correctly. Do not force the card into the slot upside down or backwards, as this can damage both the card and the computer’s SD card reader. Gently push the card into the slot until you feel it click into place.
According to Apple Support, “With the card’s metal contacts facing down and pointing toward the computer, insert the card into the slot.”1 Forcing the card incorrectly can easily break the small pins inside the SD card slot.
Mount the Memory Card
On modern versions of Mac OS like Big Sur and Ventura, SD cards and other external storage devices usually mount automatically when inserted into the computer. This means the operating system will recognize the device and make it accessible from the Finder.
However, in some cases the SD card may fail to mount properly. If you insert the card but do not see it appear in Finder, you may need to manually mount it.
To manually mount the SD card on your Mac, open the Terminal app and type the following command:
diskutil list
This will show all recognized disks and volumes on your system. Look for your SD card in the list and note the identifier, it will look something like /dev/disk2.
Then type the following command, replacing disk# with your SD card’s identifier:
diskutil mount disk#
For example:
diskutil mount disk2
This should mount the SD card. You can then access it from the Finder to view files and import photos or videos from the card.
If the card still fails to mount, you may need to try reformatting it or check for hardware issues.
Access the Memory Card Files
Once the memory card is mounted, you can access the files and folders on it through the Finder window. To open a Finder window showing the contents of your memory card:
1. Click on Finder in your Dock to open a Finder window.
2. In the left sidebar of the Finder window, you should see your memory card listed under the Devices section with the name you gave it when mounting (such as “SD Card”). Click on it to view the contents.
3. The right side of the Finder window will now display the files and folders on your SD card. You can navigate through them just like you would with folders on your hard drive.
To open a file, simply double click on it. To open a folder, single click on it. You can copy, move, rename, delete and manage the card’s contents just like regular folders and files on your Mac’s hard drive.
When you are finished accessing the files on your memory card, be sure to properly eject it before removing it from your Mac. See the “Safely Eject the Card” section below for details.
Import Files from the Card
Once the memory card is mounted on your Mac, you can easily transfer files by dragging and dropping them from the card to any folder on your Mac.
To do this, open a Finder window and locate the mounted memory card, which will appear in the Finder sidebar under Devices. Click on the card to view its contents. Then open another Finder window showing the destination folder where you want to transfer the files. Select the files on the memory card you wish to import, drag them over to the destination folder window, and drop them in. The files will copy over.
You can also import photos and videos specifically using the Photos app. With the memory card mounted, open Photos and go to File > Import. This will display options to import from the connected memory card. You can select the photos/videos to import and choose the album or folder where you want them copied. Click Import when ready and the transfer will begin.
The Photos app provides handy built-in tools for managing imports from external devices like memory cards. However, manual drag and drop works for any type of file and gives you full control over the transfer destination.
(Source: https://support.apple.com/guide/photos/import-photos-and-videos-phtad27f9ce6/mac)
Safely Eject the Card
It’s important to properly eject your Sandisk memory card before removing it from your Mac’s card reader. Simply pulling the card out without ejecting can lead to data loss or corruption. An improper ejection means the operating system doesn’t get a chance to complete any file transfers that may still be in progress.
To safely eject the Sandisk card, first locate it on your desktop or in the Finder sidebar under Devices. Then either drag it to the Trash icon in your Dock or right-click on it and select ‘Eject’. You’ll see the card icon disappear from your desktop to indicate it’s now safe to remove from the Mac.[1]
Ejecting properly essentially informs your Mac that you’re going to disconnect the drive, allowing it to wrap things up before you yank out the card. This prevents any data corruption or damage. So get in the habit of always properly ejecting your Sandisk card before taking it out of your Mac.
Troubleshooting Tips
If your Sandisk memory card is not being detected or you cannot access the files on your Mac, there are some troubleshooting steps you can try:
Check your Mac’s Finder preferences to make sure external disks are set to show up. Go to Finder > Preferences > General and make sure “External disks” is checked (source). This will ensure external disks like SD cards mount correctly.
Try connecting the SD card to another Mac or Windows PC. If it works there, it’s an issue with your specific Mac. Reboot your Mac and try again.
Inspect the SD card and card reader for any issues like dust or damage. Clean the contacts gently with a soft cloth.
Run First Aid on the SD card using Disk Utility. This checks and repairs errors (source).
Reset the Mac’s NVRAM by shutting down, holding Command + Option + P + R on restart until you hear the startup chime again. This resets connected devices.
As a last resort, format the SD card using Disk Utility to erase and reformat it. This will delete all data but may resolve detection issues.
If you still can’t access the SD card, the card itself may be corrupted or damaged. You’ll likely need to replace it.
Conclusion
Connecting a Sandisk memory card to your Mac is a straightforward process that involves just a few steps. To recap, you first prepare the memory card by formatting it if necessary using Disk Utility. You then locate the memory card slot on your Mac, gently insert the card, and allow your Mac to mount the drive. Once mounted, the memory card will appear as a drive on your desktop that you can access to view, copy, and manage files.
When you are finished transferring files, it’s important to properly eject the memory card before removing it to prevent data loss or corruption. If you have trouble getting your memory card to mount, try rebooting your Mac or using a card reader instead.
For more help using memory cards with a Mac computer, check out Apple’s official support site at https://support.apple.com/en-us/HT204384. You can also find detailed tutorials for formatting, troubleshooting, and managing memory cards on your Mac from sites like iDownloadBlog.
