What is a corrupted folder?
A corrupted folder is a folder that has become damaged or unusable due to errors in its file system structure. This can happen for a variety of reasons:
File system corruption – Issues with the file system itself, such as bad sectors on a hard drive, can cause parts of the folder data to become unreadable or invalid. This leads to errors when trying to open files in the folder.
Improper shutdown – If the system is powered off unexpectedly, open files and folders may not close properly. This can leave the folder in an invalid state that prevents access.
Drive failures – Problems with the physical hard drive, like bad sectors, can make parts of a folder’s data unreadable. This damages the folder structure.
Virus infection – Viruses and malware can sometimes directly damage or corrupt folders as part of their malicious activities.
Exceeding file limits – Folders have limits on the number of files they can store. Exceeding these limits can corrupt the folder structure itself.
The result is that Windows can no longer reliably read data from the damaged folder, leading to errors like “Folder is corrupted and unreadable” when trying to open it. The folder itself still takes up space on the disk but its contents can’t be accessed normally.
Symptoms of a Corrupted Folder
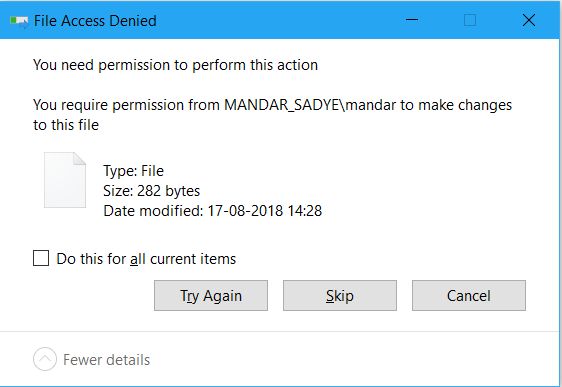
There are several common symptoms that indicate a folder has become corrupted. The most obvious sign is error messages when trying to open the folder. For example, you may see an error stating “The file or directory is corrupted and unreadable” [1]. This indicates the file system structure has been damaged.
Inability to open the corrupted folder is another clear symptom. When you try to open the folder in Windows Explorer, it may hang, crash, or simply fail to open. This is a sign of file system corruption or invalid data in the folder [2].
Overall system instability like crashes or freezes can also occur if the corrupted folder contains important system files. Corruption of system files can make the entire operating system unstable [2].
Back up important data
Before attempting to delete a corrupted folder, it’s crucial to back up your important files and data first. This is because the process of deleting the corrupted folder could result in additional data loss. To keep your files safe, copy important data to an external hard drive or cloud storage before proceeding.
To backup your data:
- Connect an external hard drive with enough storage space for your files.
- Open File Explorer and navigate to folders containing data you want to backup.
- Select and copy important folders and files (e.g. Documents, Pictures, Desktop).
- Paste the folders/files to your external drive.
Backing up to an external drive allows you to restore your data in case anything goes wrong while trying to delete the corrupted folder. With your files copied safely to another location, you can proceed with deleting the corrupted folder without worrying about permanent data loss.
Try deleting normally first
The first step when trying to delete a corrupted folder is to simply right-click on it and select “Delete.” This will attempt to delete the folder through the standard Windows process. If the folder is not highly corrupted, this may work to remove it.
To delete a folder this way on Windows 10 or 11:
- Navigate to the location of the corrupted folder in File Explorer.
- Right-click on the folder and select “Delete” from the menu.
- A dialog box will ask you to confirm deletion. Click “Yes.”
Windows will then attempt to delete the folder. If it fails, you will see an error message stating “Cannot delete folder: An unexpected error is keeping you from deleting this folder.”
If right-click deleting fails, it means the folder is too corrupted for the normal Windows process to handle. In that case, you will need to move on to some more advanced deletion methods to force the removal of the problematic folder.
Use Command Prompt
The Windows Command Prompt provides access to built-in commands that can help delete corrupted folders. Two useful commands are DEL and RD (remove directory).
DEL allows you to delete files by name, even if Windows refuses to delete them through normal methods. To use DEL, open the Command Prompt and navigate to the folder containing the corrupted file. Then type “DEL filename.ext” and hit enter to force delete the file [1].
RD allows you to delete entire folders in a similar manner. Navigate to the parent folder containing the corrupted folder. Then type “RD foldername /S /Q” to remove the entire folder and all its contents. The /S deletes all files and /Q suppresses confirmation prompts [1].
Keep in mind, DEL and RD should only be used on corrupted files/folders as they bypass the Recycle Bin. But they provide a quick method to force delete problem files using Command Prompt.
Try Unlocker
If the built-in Windows tools are unable to delete the corrupted folder, the next step is to try a third party utility like Unlocker. Unlocker is designed specifically for deleting files and folders that Windows refuses to remove.
To use Unlocker:
- Download and install Unlocker from their official website.
- Right-click on the corrupted folder and select Unlocker from the context menu.
- Unlocker will analyze the folder and provide deletion options like Delete, Permanently Delete, Rename, etc.
- Select the deletion option you want and Unlocker will force the removal of the folder.
Unlocker is able to circumvent the system permissions or locks that are preventing Windows from deleting the corrupted folder normally. It’s a powerful utility that often succeeds when native Windows tools fail.
Disable indexing
Disabling indexing may allow you to delete a corrupted folder. According to How to Disable Indexing in Windows 10 and Should You …, you can disable indexing by going to the folder properties. Under the General tab, uncheck the box next to “Allow files on this drive to have context indexed” and click the OK button. This prevents Windows from scanning the files and may resolve issues that are preventing deletion.
Disabling indexing tells Windows to stop scanning the corrupted folder. By preventing Windows from accessing the files, it may then allow you to delete the folder without errors. Turning off indexing is worth trying if other methods have failed to delete the corrupted folder.
Edit registry
One method to force delete a corrupted folder is to edit the Windows registry. The registry stores folder associations that tell Windows how to handle different file types. If these associations get corrupted, it can prevent deleting a folder.
To fix this, open the Registry Editor and navigate to HKEY_CLASSES_ROOT. Look for keys associated with the file types in the corrupted folder, and delete them. This will remove the corrupted associations so Windows no longer tries to access the problematic folder.
For example, if there is a corrupted JPG photo folder, find and delete the .jpg and .jpeg keys. Be very careful editing the registry and back it up first. After removing the relevant keys, try deleting the folder again in File Explorer.
Source: https://www.diskpart.com/windows-10/force-delete-corrupted-folder-windows-10-1503.html
Use Powershell
Powershell provides advanced commands that can forcefully delete corrupted folders that resist normal deletion methods. The Remove-Item cmdlet includes a -Force parameter that will delete read-only, hidden, and system files without prompting for confirmation.
To use Powershell to delete a corrupted folder, first open Powershell as an administrator. Then navigate to the folder location containing the corrupted folder using the Set-Location or cd command.
To delete the corrupted folder including all contents, type:
Remove-Item -Path 'folderpath' -Recurse -Force
The -Recurse parameter deletes all contents of the folder recursively. The -Force parameter forces deletion without prompting.
You can also try deleting the corrupted folder’s security permissions before attempting deletion again:
$acl = Get-Acl 'folderpath'
$acl.SetAccessRuleProtection($true, $false)
Set-Acl 'folderpath' $acl
This removes inherited permissions from the folder so you can delete it directly. Using Powershell provides access to advanced options for forcing deletion of stubborn corrupted folders.
Format Drive
Formatting the drive should be used as a last resort, as it will erase all data on the drive. Before formatting, be sure to back up any important files you want to keep. To format the drive on Windows:
- Open File Explorer and right-click on the drive you want to format.
- Select “Format” from the menu.
- Choose the file system you want to use – NTFS is recommended for internal hard drives.
- Check the “Quick Format” box.
- Click “Start” to begin formatting.
Formatting will take some time to complete. Once finished, the drive will be empty and you can begin saving files to it again. Any previous corrupted folders should now be removed.
Again, this erases everything on the drive so make absolutely sure to back up your data first. Formatting is a last resort when you need to fully clean a drive of corruption issues.
