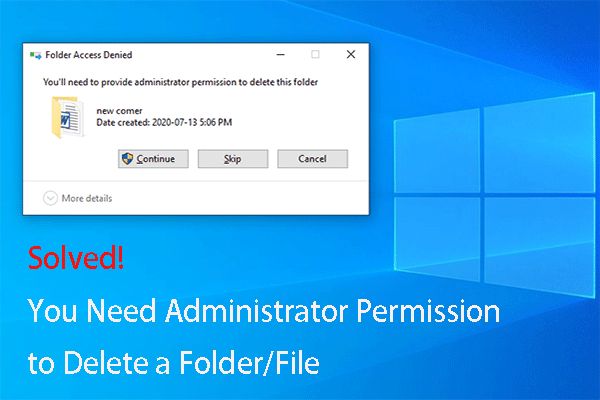
Sometimes a user may come across a folder in Windows 10 that they are unable to delete, even when logged in as an administrator. There are a few common reasons why a user might get a message that says “You’ll need to provide administrator permission to delete this folder” or “Access denied” when trying to delete a folder:
- The folder was created by another user account, so even though you are an admin, you don’t own the folder.
- The folder has inherited permissions from a parent folder that restrict deletion.
- The folder contains system files or other protected content.
- You are not logged into an admin account, or administrator privileges have been restricted.
Being unable to delete a folder can be frustrating for users who expect full access as an administrator. Following the steps to take ownership and grant yourself Full Control permissions will resolve folder deletion access issues. Understanding the reasons folders may require admin access helps diagnose and fix the problem.
Prerequisites
To delete a folder as an administrator in Windows 10, you must first ensure you are logged into an account with administrator privileges. The default administrator account in Windows 10 is named “Administrator.” To log into this account:
- Press Windows + R to open the Run dialog box.
- Type “net user administrator /active:yes” and press Enter. This will activate the built-in admin account (Source: https://www.minitool.com/news/need-administrator-permission-to-delete-folder.html).
- Log out of your current user account.
- At the login screen, enter “Administrator” as the username and enter the admin password.
Once logged in as the administrator, you will have full privileges to delete any folder on the system.
Locate the Folder
The first step to delete an administrator folder in Windows 10 is to locate and open the folder in File Explorer. To open File Explorer, you can use the keyboard shortcut Win + E or click on the File Explorer icon in the taskbar. File Explorer allows you to browse and manage folders and files on your Windows 10 system.
Once File Explorer is open, navigate to the folder you want to delete. You can browse through the left pane to find the drive and folder location. Or you can use the search bar at the top of File Explorer to search for the folder name.
For example, if you want to delete a folder named “AdminFolder” on your C: drive, you would browse to This PC > C: > Users > Administrator > AdminFolder. Or search for “AdminFolder” and click on it when it appears in the results.
Make sure you have opened and selected the correct folder before moving to the next steps. Locating the folder is crucial so that you delete the intended folder.
Sources:
https://www.minitool.com/news/windows-10-open-file-explorer.html
https://www.digitalcitizen.life/open-file-explorer-windows/
Take Ownership
To take ownership of the folder you want to delete, right click on the folder and select Properties. In the Properties window, click on the Security tab, then click the Advanced button at the bottom.
In the Advanced Security Settings window, click the Change link next to the Owner field at the top. This will open another window where you can enter an object name to take ownership. Type your username and click Check Names to verify it. Finally, click OK to apply the change.
According to iTechGuides, taking ownership of the folder gives you full control to delete it.
Grant Full Control
To grant full control permissions to the folder you want to delete, you’ll need to give your user account full access. Here are the steps:
1. In the Properties window, go to the Security tab and click “Edit.”
2. This will open the Permissions window. Click “Add” to add a user or group.
3. Type your username in the text box and click “OK.” Your account should now be added to the Group or user names list.
4. With your username selected, check the box for “Allow” under the Full control permission.[1]
5. Click “OK” to apply the permissions.
This will grant your account full access to make changes, including deleting the folder.
Delete the Folder
Once you have granted yourself full control permissions over the folder, you can proceed to delete it. To delete the folder:
- Open File Explorer and navigate to the location of the folder you want to delete.
- Right click on the folder and select Delete from the context menu.
- A prompt will appear asking you to confirm deletion of the folder. Click Yes to proceed with permanently deleting the folder.
Deleting the folder this way will bypass permission issues since you already granted yourself full control over it in the previous steps. The folder will be immediately deleted from the file system without being moved to the Recycle Bin first.
If you receive an error message about being unable to delete the folder even after updating permissions, the folder may be corrupted. In this case, you can try using the DEL command in Command Prompt to force delete the folder.
Confirm Deletion
After deleting the folder, a confirmation prompt will appear asking if you want to permanently delete the folder. This serves as a final verification to prevent accidental deletion.
To complete the deletion, click “Yes” on the confirmation prompt. This will permanently remove the folder and its contents from the system. According to Microsoft, the confirmation prompt in Windows provides an additional layer of protection when attempting to delete files or folders. By clicking “Yes”, you are confirming your choice to permanently delete the selected folder.
Check Deletion
After deleting the folder, it’s important to verify that the folder no longer exists. To check, open File Explorer and navigate to the location where the folder was previously located. The folder should no longer appear in the folder list.
You can also try searching for the folder name using the search bar in File Explorer. If the search returns no results, then the folder has been successfully deleted.
Checking the deletion is an important step to confirm that the folder can no longer be accessed. This prevents accidental data loss if the folder was not fully deleted. Once you’ve verified the folder no longer exists in File Explorer, you can be certain the deletion process was successful.
Restore Deleted Folder
If you realize shortly after deleting a folder that you need to restore it, there are a couple options:
First, check the Recycle Bin. All deleted folders are sent to the Recycle Bin, so you may be able to restore the folder from there. Simply open the Recycle Bin, right-click on the deleted folder and select “Restore”. This will restore the folder to its original location.
If the folder is no longer in the Recycle Bin, you can try using System Restore to roll back your system to an earlier restore point before you deleted the folder. Go to Start > Control Panel > Recovery > Open System Restore. Choose a restore point prior to when you deleted the folder and restart your computer.
Finally, you can use third party data recovery software like Wise Data Recovery to scan your hard drive and recover deleted files and folders. This is the best option if the folder is no longer in the Recycle Bin and you don’t have a valid system restore point.
Conclusion
Deleting a folder as an administrator in Windows 10 requires a few steps. First, you need to locate the folder and take ownership of it. This involves right-clicking the folder, selecting Properties, switching to the Security tab, and clicking Advanced to change ownership.
Next, you’ll want to grant yourself full control permissions over the folder. You can do this by selecting your user account on the Security tab of the folder Properties and choosing Allow for the Full Control permission.
Once you have ownership and full control permissions, you can delete the folder by right-clicking and selecting Delete. Windows will prompt you to confirm the deletion. After deleting, double check that the folder is gone by verifying it no longer appears in File Explorer.
If you accidentally delete the wrong folder or need to restore it, you may be able to recover it from the Recycle Bin within a certain time period. However, directly deleted folders bypass the Recycle Bin so you’ll need to use backup software or system restore points to recover them.
In summary, taking ownership, granting full control permissions, and directly deleting are the main steps to delete any folder as administrator in Windows 10.