We all know the frustration of trying to delete a file in Windows, only to get an error message that the file cannot be deleted. This usually happens when the file is being used by a program or process that has locked the file, preventing Windows from deleting it.
In this article, I’ll walk you through the most common reasons why you might get the “cannot delete file” error in Windows, along with the steps you can take to force delete the problematic file. We’ll cover a range of solutions from the simple to the more technical, so keep reading to find a fix that will work for your situation.
Common Causes of “Cannot Delete File” Error
Here are some of the most frequent causes of the “cannot delete file” problem in Windows:
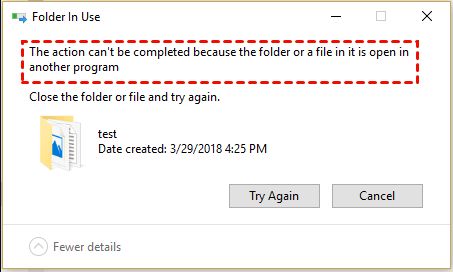
File Is in Use by Another Program
The most common reason you can’t delete a file is because it’s currently open or in use by another program on your computer.
For example, if you have a Word document open and try deleting the file, you’ll get an error because Word has locked the file while it’s open. You need to close the program using the file first before you can delete it.
You Don’t Have Permissions to Delete the File
On Windows computers with multiple user accounts, you may not have the permissions required to delete certain protected system files or files in another user’s folder.
Trying to delete these files will result in a “cannot delete” error or access denied message. You’ll need admin or owner-level permissions to force delete protected files.
The File is Corrupted
Sometimes system files or program files can become corrupted, meaning the file is damaged and unreadable by Windows. Deleting corrupted files often results in errors.
You may be able to restore corrupted files from backup or use special software to repair the damage before attempting to delete.
The File is Being Used by a Windows Process
Certain Windows processes and services run in the background and use system files as they operate. If one of these processes has a lock on a file you’re trying to delete, Windows can’t delete it.
You’ll need to stop the process using the file before you can remove it from your system.
You Have the File or Folder Open in Windows Explorer
If you try deleting a file while you have it open in File Explorer or another Windows Explorer window, you can sometimes get a “cannot delete” error. This is because Explorer puts a lock on the open file.
Simply closing the Explorer window housing the file should eliminate the lock so you can delete it.
The File is on a Read-Only Network Share
If you’re trying to delete a file on a network share that’s been set to read-only access, you’ll encounter issues deleting it. Ask the network admin to grant you read-write or full access to the network share.
The File is Protected by BitLocker or Encryption
On drives protected by Windows BitLocker or another full disk encryption utility, you may not have permissions to delete certain protected files critical to the encryption system.
You’ll need to temporarily suspend or decrypt the drive first before deleting protected files.
Force Delete a File in Use by Running Processes
If a running process or background service has a lock on the file you want to delete, you can’t delete it without first closing that process. Here’s how to find and end processes that have locks on your file:
Use Task Manager to End Processes Using the File
1. Press Ctrl + Shift + Esc to open Task Manager. Go to the “Processes” tab.
2. Click on the “CPU” column header to sort processes by CPU usage. Processes using your file will likely have higher CPU.
3. Right click each process at top of CPU list and choose “End Task” to terminate processes one-by-one until you find the one locking the file.
4. Once the process locking the file shuts down, you should be able to delete the file.
Use Unlocker Utility to Force Stop Processes
Unlocker is a free utility that lets you easily see which processes have locked a file, and force them to close so you can delete the file.
1. Download and install Unlocker. Right click on the locked file, choose Unlocker, and click “Unlock All” to close processes locking the file.
2. Once Unlocker has forced processes to close, you can delete the file in Windows Explorer.
3. You can also use Unlocker’s “Delete pending file on reboot” option to schedule deletion of a locked file next time you restart your PC.
Gain Permissions to Delete Restricted System Files
If you get a “cannot delete” error because you lack the permissions to delete a protected Windows system file, here’s how to gain delete access:
Take Ownership of the File
You can take ownership to gain full control permissions over a file or folder:
1. Right click on the file/folder and choose “Properties”. Go to Security tab > Advanced.
2. Click “Change” next to owner name and choose your user account as the owner. Apply changes.
3. Go back to Security tab and give your user account Full Control permission. Click Apply and OK.
4. You can now delete the file that you’re the owner of.
Enable the Hidden Admin Account
Enabling the built-in System Administrator account will give you unrestricted delete permissions:
1. Open Command Prompt as Admin and run `net user administrator /active:yes`
2. Log out and log back into the Admin account when prompted at login screen.
3. You can now delete any file as the all-powerful Admin user. Don’t forget to disable the account when done!
Use TakeOwn.exe Sysinternals Tool
The TakeOwn.exe tool from Microsoft’s Sysinternals suite allows you take ownership of files via the command line:
1. Download TakeOwn.exe from the Microsoft Sysinternals site.
2. Open Command Prompt as Admin and navigate to the download folder.
3. Run `takeown /f “C:\File_Path” /r /d y` (replace file path with your file).
4. Type `y` to confirm taking ownership of the file and all child objects.
5. The file will now be owned by Administrators allowing you to delete it.
Repair or Restore Corrupted Files Preventing Deletion
If Windows reports the file is corrupted or unreadable when you try to delete it, you’ll need to restore or repair the file before you can remove it:
Restore Previous Version from File History
1. Right click on the corrupted file and choose “Restore previous versions” if available.
2.Browse through previous versions of the file and restore uncorrupted version to overwrite damaged file.
3. Once restored, you should be able to delete the file normally.
Use SFC /ScanNow to Repair System Files
1. Open Command Prompt as Admin and run `sfc /scannow` to scan for corrupted Windows files.
2. SFC will repair damaged system files by replacing them with a cached copy which should resolve the corruption.
3. Restart computer once SFC scan completes and try deleting file again.
Repair the File’s Associations
1. Navigate to the file in File Explorer, right click and choose “Properties”. Click “Change” under Opens With.
2. Select recommended program and click OK to repair corrupt file associations.
3. Try deleting the file again after resetting its associations.
Reinstall Corrupted Program or Software
If a program file is corrupt, fully uninstall and reinstall the damaged program or software to replace corrupt files with new clean copies that can be deleted.
Delete Files Open in Windows Explorer
Windows puts a lock on files when you directly open them in Explorer, preventing access by other processes. To delete a file you have open in Explorer:
Close All Explorer Windows Housing File
1. Ensure the file you want to delete is not open in ANY Explorer windows.
2. Completely close out of File Explorer using the X button on all open Explorer windows.
3. With no Explorer windows accessing the file remaining open, you should be able to delete it.
Unlock File with Unlocker Before Deleting
1. Install Unlocker from above instructions if not already installed. Right click on locked file in Explorer and choose Unlocker.
2. Click “Unlocker” which will close the Explorer handle accessing the file so it can be deleted.
3. Delete the now-unlocked file in Explorer or via Unlocker’s delete option.
Restart Explorer Process to Clear All Locks
1. Press Ctrl + Alt + Delete and open Task Manager. Go to the Processes tab.
2. Locate explorer.exe process, right click and choose “Restart” to restart Explorer.
3. All Explorer file locks will be cleared, allowing you to now delete the file.
Modify Folder Permissions to Delete Files on Network Shares
To remove a file on a read-only network share, ask the network admin or owner to modify the share permissions and allow you delete access:
Have Admin Grant You Full Control or Modify Permission
The easiest way to resolve a deletion error on a read-only share is to have the network administrator or share owner grant your account increased permissions:
– Full Control permission lets you delete any files in the share
– Modify permission allows you to edit, rename, and delete files
Make the Share Publicly Writable
For less restricted shares, the admin can set the share permissions to allow Everyone full read/write ability. This will let any user connect and delete files.
Temporarily Take Ownership of the File
Using takeown.exe you can take ownership of the file on the network share and grant yourself perms to delete it. But this only works if the share isn’t restricted to read-only for Everyone.
Disable or Decrypt Encrypted Drives Before Deleting Files
You won’t be able to delete protected files on an encrypted drive locked by BitLocker or other encryption until you decrypt the drive:
Temporarily Decrypt BitLocker-Protected Drive
1. Open Control Panel > BitLocker Drive Encryption. Click on your protected drive and choose “Turn off BitLocker”.
2. Choose “Decrypt drive” option when prompted and enter your recovery key. Wait for decryption process to complete.
3. You can now delete any file on the decrypted drive. Re-enable encryption when done.
Fully Decrypt Third-Party Encrypted Drive
With third party encryption tools, you’ll need to completely decrypt the drive using the software’s decryption function. Then you can delete protected files.
Disable Encryption And Re-enable After Deleting
Alternatively, you may be able to temporarily suspend encryption protection on the drive to delete files. Be sure to immediately re-enable encryption after deleting to maintain security.
Delete the File on Reboot to Bypass Locks
As a last resort, you can schedule deletion tasks to run the next time you restart your PC since this will clear all file locks:
Use Unlocker to Delete on Restart
1. Install Unlocker if you don’t have it already and right-click on the locked file. Select Unlocker.
2. Choose the “Delete on reboot” option to schedule the file to be deleted next restart.
3. File will be permanently deleted when you reboot computer.
Create a Deletion .BAT File to Run at Startup
1. Create a .BAT file containing the line `DEL “C:\File_Path”` and save to Startup folder.
2. Change the file path to that of your locked file.
3. On next reboot, the deletion .BAT file will run before any locks are placed, deleting the file.
Use DEL on Reboot with SCHTASKS Command
1. Open an Admin Command Prompt and run:
`SCHTASKS /CREATE /TN “DeleteFileTask” /SC ONSTART /RU SYSTEM /RL HIGHEST /TR “DEL C:\File_Path”`
2. This schedules the DEL command to run at next startup as SYSTEM, before any file locks init.
Conclusion
While undeletable files in Windows can be incredibly frustrating, in most cases you can resolve the issue and force delete the file with the right tools and techniques. The key is identifying what is locking the file, whether it’s a running process, permissions restriction, corruption issue or something else entirely.
Armed with the solutions outlined in this article, you should now have a better understanding of what causes the “cannot delete file” error, along with the steps to troubleshoot and eliminate the problem obstruction so you can permanently remove unwanted files from your system. Just take it slow, use caution when messing with system files, and be patient resolving underlying issues preventing file deletion.
