If you want to delete all user accounts, apps, files, and settings on your Mac with Ventura and do a clean install, there are a few methods you can use. The quickest and easiest way is to erase the startup disk and reinstall macOS. This will delete everything and reset the Mac to factory default settings. Here’s a quick overview of how to erase the startup disk and do a clean install of Ventura:
Use Disk Utility to Erase the Startup Disk
The quickest way to delete everything on your Mac is to erase the startup disk. Here’s how:
- Restart your Mac and immediately press and hold Command + R keys to boot into macOS Recovery mode.
- When the macOS Utilities window appears, select Disk Utility.
- In Disk Utility, select the disk that contains macOS (usually named Macintosh HD).
- Click the Erase button near the top of the Disk Utility window.
- Enter a name for the disk (you can keep Macintosh HD).
- Choose APFS as the format.
- Click Erase to confirm.
Erasing the disk will delete all data, accounts, apps, files, and settings. It’s the most thorough option before reinstalling the operating system.
Reinstall macOS
After erasing the disk:
- Quit Disk Utility.
- Return to the macOS Utilities window and choose Reinstall macOS.
- Follow the onscreen instructions to reinstall Ventura.
The Mac will reboot from the startup disk several times during install. When finished, you’ll be welcomed with the Setup Assistant to create a new admin account and configure basic settings.
Alternative: Erase from macOS Ventura
If you can boot to the desktop in Ventura, you can also erase the startup disk this way:
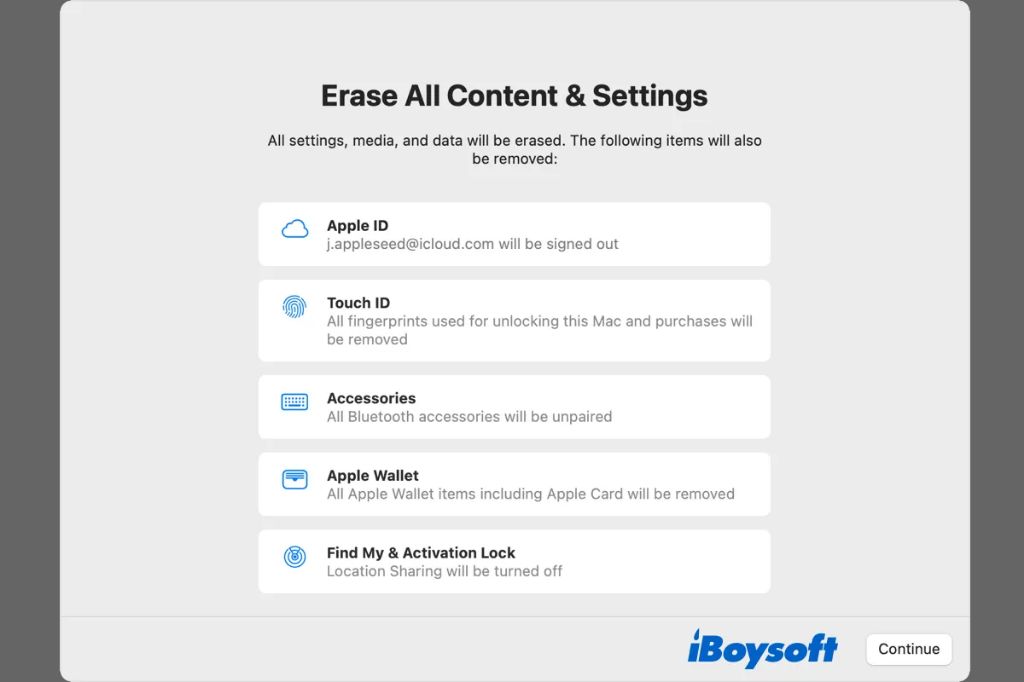
- Go to System Preferences > Erase All Content and Settings.
- Enter your admin password when prompted.
- Choose Erase All to confirm.
This will log you out and reboot to macOS Recovery to erase the disk. Follow the steps above to reinstall macOS after erasing.
Alternative: Use Disk Utility in Ventura
You can also erase the startup disk from within Ventura, without rebooting to Recovery first:
- Go to Finder and select Applications > Utilities > Disk Utility.
- Select the startup disk in the sidebar.
- Click Erase near the top of the window.
- Name the disk, choose APFS format, and click Erase.
After the disk is erased, you can reinstall Ventura from the App Store or boot to Recovery to reinstall. Both options will give you a brand new system.
Alternative: Use Terminal to Erase Disk
You can also use the diskutil command in Terminal to erase the startup disk. Be very careful with this method!
- Open Terminal (in /Applications/Utilities/).
- Enter
diskutil listand identify the disk identifier for the startup disk. It will likely bedisk0. - Enter
diskutil eraseDisk JHFS+ "Macintosh HD" disk0(replacing disk0 with the actual disk identifier). - Enter your admin password when prompted.
- The disk will be erased and formatted as Mac OS Extended (Journaled).
Once erased via Terminal, you can reinstall Ventura normally.
Alternative: Use Target Disk Mode
If you have another Mac available, you can connect the two in target disk mode and erase the startup disk that way:
- On Mac 1, boot to target disk mode by holding T key on startup.
- Connect Mac 1 to Mac 2 with a Thunderbolt or USB-C cable.
- On Mac 2, open Disk Utility and select Mac 1’s disk.
- Erase the disk using the steps above.
- Once erased, exit target disk mode on Mac 1 and reinstall macOS.
This allows you to erase Mac 1’s disk while booted to another Mac.
Alternative: Use Internet Recovery
If you can’t boot to macOS Recovery by holding Command + R, you can boot to Internet Recovery over Wi-Fi:
- Power on the Mac and immediately hold Option + Command + R.
- Connect to a Wi-Fi network when prompted.
- The Mac will boot to recovery OS downloaded from Apple servers.
- Open Disk Utility and erase the startup disk.
- Quit Disk Utility and reinstall macOS.
Internet Recovery allows you to erase and reinstall over the Internet, no local Recovery partition required.
What Gets Deleted When Erasing the Startup Disk?
Erasing the startup disk deletes:
- All user accounts and home folders
- Apps and programs
- System settings and preferences
- Network settings and keychains
- Cached and temp files
- Virtual memory files
- System logs
- Mail data and database files
- Printers and fax data
- Fonts, caches, and more
Basically, everything gets deleted. It returns the Mac to the same blank state as when you first booted it up.
How to Save Files Before Erasing
Before erasing, it’s a good idea to copy important files off of the Mac if possible. Here are some options:
- Copy files to an external hard drive, USB stick, or storage device.
- Use cloud storage like iCloud, Dropbox, OneDrive to sync files off the Mac.
- Connect Mac to another Mac in target disk mode to copy files.
- Use a cloud backup service like Backblaze to restore files later.
If you can’t boot to the desktop to copy files, recovery options are limited. A backup is always smart before erasing.
Reasons to Erase the Startup Disk
Why would you want to completely erase the Mac and delete everything this way? Here are some common reasons:
- Installing a new version of macOS like Ventura
- Troubleshooting performance issues or system problems
- Resolving file system corruption
- Removing malware or viruses
- Selling or gifting the Mac to someone else
- Eliminating personal or sensitive data
- Factory reset before repair or return
A clean slate is sometimes the quickest solution if the Mac is having major issues or you want to recycle it to someone else.
How to Recover Deleted Data
If you forgot to copy important files off the Mac before erasing, all hope is not lost. Here are some ways to try recovering deleted data:
- Use a backup service like Time Machine to restore missing files.
- Use data recovery software to scan and recover deleted data.
- Take the Mac to a data recovery service for professional file extraction.
- On non-SSD drives, try file carving with data recovery tools.
- Check cloud storage like Dropbox for synced file versions.
Data recovery becomes difficult on newer Macs with fast SSD storage vs traditional hard disks. Regular backups are the best way to protect important files when erasing.
Before Selling, Wiping, or Gifting Your Mac
If you plan to sell, gift, or recycle your Mac, make sure to fully wipe data first:
- Backup important data
- Sign out of accounts in settings
- Erase the startup disk
- Disable Find My Mac
- Remove activation lock
This protects your personal information and prepares the Mac for the next owner. Don’t skip security steps before parting ways with your Mac.
Conclusion
Erasing the startup disk is an easy yet thorough way to delete everything on a Mac and start fresh. Options like macOS Recovery, Disk Utility, Terminal, and target disk mode give you flexibility. Remember to back up first and reinstall macOS after erasing. With a little prep, you can wipe a Mac clean and restore it to factory settings.