A USB drive, also known as a flash drive or thumb drive, is a portable storage device that connects to a computer’s USB port. USB drives are commonly used to store and transfer files, back up data, share files between computers, and expand a computer’s storage capacity.
There are several reasons why someone may want to delete files from a USB drive, including:
- Freeing up space on the USB drive
- Permanently removing sensitive or private files
- Cleaning up old files that are no longer needed
- Fixing errors or crashes caused by problematic files on the drive
- Preparing the USB drive for reuse with new files
Knowing how to properly delete files from a USB drive on a Mac is important to maintain the drive and use it effectively.
Locate the USB Drive
When you plug in a USB drive to your Mac, it will typically show up on your desktop or in the Finder window. Here’s how to find the USB drive:
Open Finder by clicking the Finder icon in your dock or selecting Finder from the Applications folder. In the Finder sidebar, under Devices, you should see your USB drive listed. You can also look on your desktop to see if an icon for the USB drive appears there.
If you don’t see the USB drive in Finder or on the desktop, try the following:
- Make sure the USB drive is properly plugged into your Mac.
- Try unplugging the USB drive and plugging it back in.
- Check the Finder Preferences to make sure “External disks” is checked under “Show these items on the desktop” (Finder > Preferences > General).
Once you have located the USB drive in Finder or on the desktop, you can proceed with ejecting and deleting files from the drive.
Eject the USB Drive
Before deleting any files or removing the USB drive from your Mac, it is important to properly eject the drive first. Ejecting the drive prevents any data corruption or loss by ensuring all file operations have completed.
To eject a USB drive on a Mac:
- Locate the USB drive icon in your Finder sidebar or on your desktop.
- Right-click (or control-click) on the USB drive icon.
- Select “Eject” from the menu.
- You can also eject the USB drive by dragging its icon from the desktop to the Trash.
According to Apple Discussions, ejecting the USB drive is an important step, as it ensures any writes to the drive have completed before removing it.
Delete Files from the USB Drive
Deleting files from a USB drive on a Mac does not permanently erase the data – it simply removes the file references from the drive’s directory so that the space taken up by those files can be overwritten with new data. The original file contents still reside on the drive until that space is reused.
To delete files from the USB drive:
- Open Finder and locate the USB drive under Devices in the sidebar. Click on it to view its contents.
- Select the files or folders you want to delete by clicking on them. You can select multiple items by holding down the Command key while clicking.
- With the items highlighted, press the Delete key or right-click and select Move to Trash.
The files will be moved to the Trash folder. To fully remove the deleted items from the USB drive:
- Open the Trash folder and highlight the files you want to permanently delete.
- Right-click on the selected items and choose Delete Immediately.
- This will permanently erase the files from the USB drive and free up space.
You can also bypass the Trash when deleting by pressing Option + Command + Delete. This will permanently erase the files right away. Be careful when using this shortcut as there is no way to recover the data after deletion.
Once all the files are removed, eject the USB drive properly before disconnecting to ensure no data is lost. The used space on the drive will now show as free space available for new files.
Empty the Trash
After deleting files from the USB drive, it’s important to also empty the Trash on your Mac. When you delete files, they are moved to the Trash, but the space they take up on the drive is not freed up until the Trash is emptied.
To completely remove the deleted files from the USB drive and free up used space, you need to:
- Open the Finder window
- Click on the Trash icon in the Dock
- Click on the “Empty” button in the upper right corner of the Finder window
- Click “Empty Trash” in the confirmation dialog
Once the Trash is emptied, the files will be permanently deleted from the USB drive. According to Apple’s support documentation, emptying the Trash also helps ensure that no sensitive or private data remains on the USB drive after deletion.
Alternative Methods
In addition to dragging files to the Trash, there are a couple other ways to delete files from a USB drive on a Mac:
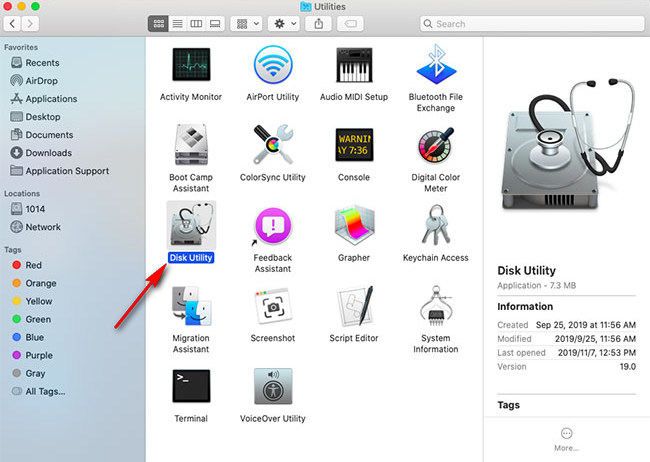
You can use Disk Utility to erase the contents of a USB drive. Launch Disk Utility, select your USB drive from the sidebar, click “Erase” in the top menu bar, choose a format like “Mac OS Extended (Journaled)” and click “Erase” to confirm. This will delete all files on the USB drive (Source).
For more advanced users, you can use Terminal to securely delete files. Open Terminal and use the “rm” command to remove files or “srm” to securely delete them. For example, “rm -rf /Volumes/USB/folder” would delete the folder from the USB drive. Make sure to type the correct path. Be very careful when using Terminal to delete files as the process is irreversible (Source).
These methods allow you to delete files without using the Finder or Trash. However, dragging to the Trash is simpler for most users.
Formatting a USB Drive
Formatting a USB drive erases all data on the drive and prepares it for new use. You may want to format a USB drive if you are recycling an old drive, want to change the file system, or need to troubleshoot corruption or performance issues. Formatting completely erases and reformats the drive.
To format a USB drive on a Mac:
- Connect the USB drive to your Mac.
- Open the Disk Utility app (located in Applications > Utilities).
- Select the USB drive in the sidebar.
- Click the Erase button at the top.
- Choose a format like APFS, Mac OS Extended, MS-DOS (FAT), or ExFAT.
- Give the drive a name.
- Click Erase to confirm.
This will quickly format the entire USB drive, deleting all data and preparing it for new files. Be absolutely certain you have backups before formatting a drive.
Recovering Deleted Files
If you accidentally deleted files from your USB drive on your Mac, you may be able to recover them using data recovery software. Some options to try recovering deleted files include:
Mac Free USB Flash Drive Data Recovery – This free software allows you to scan your USB drive and recover deleted files like photos, documents, and videos.
Do Your Data Recovery Free – This free data recovery tool for Mac can retrieve lost files from USB drives, memory cards, and external hard disks.
Mac USB Flash Drive Data Recovery Pro – For more advanced recovery, this paid software can recover deleted files like photos, documents, videos, and more.
To optimize your chances of successfully recovering deleted files, avoid writing new data to the USB drive. The sooner you run data recovery, the better, as overwritten files are harder to recover. Also be sure to recover files to a different drive, not the USB you are scanning.
Safely Removing the USB Drive
Before physically removing the USB drive from your Mac, it’s important to properly eject it first to avoid potential data corruption or drive errors. Here are the proper steps for safe drive removal:
- Locate the drive icon on your desktop or in the Finder sidebar and click the eject button next to it. This will unmount the drive from your system.
- A message will appear notifying you it’s safe to remove the drive. Wait for this message before proceeding.
- Physically remove the USB drive from its port on your Mac.
As a precaution, we recommend always ejecting your drive properly before removal rather than just pulling it out. This ensures all data writes have completed and the drive has been fully disconnected from your system before being taken out. Following these simple steps helps avoid any potential file corruption or damage to the drive itself.
Summary
In this guide, we covered the main steps for deleting files from a USB drive on a Mac:
- Locate the USB drive on your desktop or in the Finder sidebar
- Eject the USB drive by right-clicking and selecting Eject
- Drag files to the Trash to delete them
- Empty the Trash to permanently delete the files
Some best practices for managing USB drives on a Mac include:
- Always eject the USB drive before unplugging it to prevent data loss
- Use the Finder to delete files instead of formatting, which erases everything
- Be very careful when permanently deleting files, as they can’t be recovered
- Consider using encryption and passwords to secure sensitive data on USB drives
Following these simple steps will allow you to safely delete files from a USB drive on your Mac. Handle USB drives with care to avoid losing important data.