If your iPhone is disabled and you need to connect it to your computer to restore it, you may run into issues with USB restricted mode. This security feature limits access to the iPhone over a USB connection when the device hasn’t been unlocked for over an hour. Fortunately, there are a few methods you can try to get around USB restricted mode and restore your disabled iPhone.
What is USB Restricted Mode?
USB restricted mode is an iPhone security feature introduced in iOS 11.4.1. It is designed to prevent unauthorized access to data on a locked iPhone through the Lightning port.
Here’s how it works:
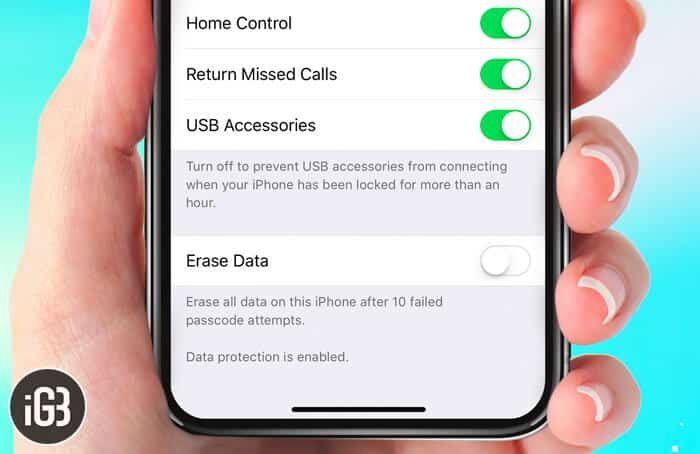
- If your iPhone hasn’t been unlocked for more than 1 hour, USB restricted mode kicks in.
- When activated, the Lightning port is essentially disabled and limits communication to charging only.
- This means you cannot connect the iPhone to a computer and access data on it, even if the phone is in recovery mode.
- The only way to regain full USB functionality is to unlock the iPhone with a passcode or Face ID/Touch ID.
The goal is to prevent tools like forensic software to crack into iPhones via their USB data connections. For most users, this extra security is welcome. But if your iPhone is disabled and you can’t unlock it normally, it poses a problem for recovering data.
Why USB Restricted Mode Causes Problems on Disabled iPhones
A disabled iPhone essentially means that it is locked with the message “iPhone is disabled. Connect to iTunes.” This prevents you from unlocking it normally without connecting to a computer.
But if USB restricted mode is also activated when the iPhone is disabled, then the computer connection is limited. iTunes will not recognize the iPhone properly in recovery mode due to the restricted USB access.
So in order to get around this catch-22 situation, you need to disable USB restricted mode first before you can restore your disabled iPhone.
Method 1: Hard Reset
Performing a hard reset on your iPhone forces it to restart, which resets the 1-hour countdown timer for USB restricted mode.
To hard reset a disabled iPhone:
- Press and release the Volume Up button.
- Press and release the Volume Down button.
- Finally, press and hold the Side button until you see the Apple logo.
This will restart your iPhone. Then immediately connect it to your computer and open iTunes. The USB restricted mode timer will have reset, allowing full USB access so that you can restore the iPhone out of its disabled state.
Pros:
- Quick and easy process
- Does not require a computer initially
- Works on all iOS versions that have USB restricted mode
Cons:
- Small timing window before USB restricted mode reactivates after 1 hour
- Won’t work if iPhone is fully crashed
Method 2: Recovery Mode
You may be able to bypass USB restricted mode by putting your iPhone into recovery mode before connecting it to a computer.
To do this:
- Connect your iPhone to your computer while powered off. Use a Lightning cable.
- Press and hold the Side button until you see the recovery mode screen.
- If prompted, click Update or Restore on iTunes.
With this method, some users have reported successfully restoring their disabled iPhones without running into USB restricted mode limitations.
Pros:
- Able to completely restore iPhone and remove disabled state
- Does not require unlocking iPhone when disabled
Cons:
- May not work on all devices or iOS versions
- Could still run into USB restricted mode after restarting into recovery
Method 3: Airplane Mode
Turning on Airplane mode is reported to prevent USB restricted mode from activating on some devices. Try these steps:
- Turn on Airplane mode on your disabled iPhone if possible.
- Connect the iPhone to your computer with a Lightning cable.
- Open iTunes and see if it recognizes your device in recovery mode and allows restoring.
Airplane mode turns off all wireless connectivity, which seems to pause USB restricted mode from counting down after 1 hour. This may provide enough time to restore your disabled iPhone.
Pros:
- Does not require restarting iPhone or unlocking it
- Airplane mode is easy to enable even when iPhone is disabled
Cons:
- May not work reliably on all iOS versions
- Need to still act fast before the 1 hour countdown elapses
Method 4: Restore with a Locked iPhone
If you have a second iPhone that is locked, you can use it to possibly disable USB restricted mode on your disabled iPhone.
Here are the steps to try:
- Make sure both iPhones are running the same iOS version.
- Turn on USB restricted mode on the second locked iPhone by leaving it unplugged for over an hour.
- Connect the locked iPhone to your computer first.
- Open iTunes and enter recovery mode on this iPhone but do not restore yet.
- Disconnect the locked iPhone and very quickly connect your disabled iPhone.
- Hopefully iTunes recognizes it now without USB restrictions blocking access.
This process seems to transfer the “unlocked” state from the first iPhone to the disabled one. Some users have reported success in restoring their disabled devices this way.
Pros:
- Able to fully restore disabled iPhone and recover data
- Does not require unlocking disabled iPhone
Cons:
- Requires a second locked iPhone on same iOS version
- Precise timing and steps are vital
- May not work reliably
Method 5: Remove SIM Card
Some reports indicate removing the SIM card from your disabled iPhone can prevent USB restricted mode from ever activating.
To try this:
- Use the SIM card removal tool that came with your iPhone to eject the tray.
- Slide out the SIM card and leave it out.
- Connect your disabled iPhone to your computer.
- Hopefully iTunes recognizes it without USB restricted mode enabled.
Without a SIM card inserted, some devices seem to keep USB access open indefinitely. If you run into issues restoring, reinsert the SIM card and perform a hard reset to restart the process.
Pros:
- Avoids dealing with USB restricted mode altogether
- Increases chances of successfully restoring iPhone
Cons:
- Requires physical SIM card removal
- May not work reliably on all device models
Method 6: Update iTunes
Some reports indicate that having an outdated version of iTunes installed on your computer could trigger problems with USB restricted mode when trying to restore your disabled iPhone.
Make sure to update to the latest version of iTunes on your Windows PC or Mac. This may resolve any software-related issues that prevent recognizing your iPhone properly in recovery mode.
You can update iTunes through the following:
- Windows: Open the Microsoft Store app and go to Updates to check for iTunes updates.
- Mac: Open the App Store app and go to Updates to check for iTunes updates.
Pros:
- Simple software update to try
- May resolve any USB restriction bugs
Cons:
- No guarantee that iTunes update will help
Method 7: iCloud Erase
If none of the previous methods work, you can erase your disabled iPhone remotely using Find My on iCloud.
Here is how to do an iCloud erase:
- On a computer, visit www.icloud.com and login to your iCloud account.
- Click Find iPhone.
- Select your disabled iPhone.
- Choose Erase iPhone at the bottom.
- Confirm again that you want to erase all content and settings.
After the erase completes, your iPhone will restart fresh as a new device. You can then set it up normally, bypassing the disabled state. Unfortunately, this method also erases your data, but lets you reuse the iPhone again.
Pros:
- Remotely bypass disabled mode without USB access
- Works even with severe crashes or disabled states
Cons:
- Erases all device data permanently
Conclusion
USB restricted mode makes it more challenging to restore disabled iPhones that are locked for security reasons. But as you can see, there are a variety of methods that may help you successfully disable USB restricted mode temporarily in order to recover and restore your iPhone out of its disabled state.
Trying techniques like a hard reset, recovery mode, Airplane mode, using a second iPhone, removing the SIM card, or updating iTunes can sometimes deactivate USB restrictions so your computer recognizes the iPhone. But if all else fails, an iCloud erase still gives you a fresh start.
Just be aware that USB restricted mode is designed as an important security feature. Any workaround to disable it could also potentially expose your data briefly. So once you resolve your iPhone’s disabled issue, you may want to leave USB restricted mode active again.
With some luck and proper timing using the right steps, you should ultimately be able to disable USB restricted mode on a disabled iPhone in order to restore normal functionality again.
