Downgrading a Mac refers to installing an older version of the macOS operating system in place of the current version. There are a few reasons why someone may want to downgrade their Mac OS:
Improve performance – Older Macs may run faster and smoother on a previous macOS version compared to the latest release which requires more system resources.1
Compatibility – Downgrading allows you to run older software or devices that may not be supported on newer macOS versions.
Dislike new features – If a user is unhappy with changes in the newest OS, downgrading allows them to revert to an older version they prefer.
Testing purposes – Developers may downgrade to test software on previous versions of macOS.
Overall, downgrading gives users more control and lets them run the optimal OS for their needs.
Back Up Your Data
Before downgrading your Mac, it is critical that you back up all of your important files, documents, photos, music, and other data. Downgrading can potentially wipe your entire hard drive, so a backup is essential to avoid permanent data loss.
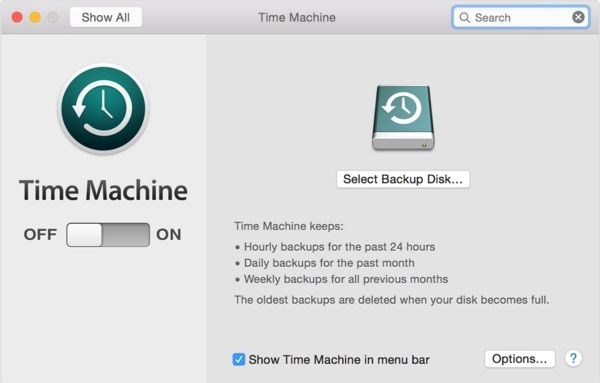
The best way to back up a Mac is using Time Machine. Time Machine automatically makes incremental backups of your entire Mac hard drive to an external storage device like an external hard drive or NAS. It will back up your entire user account, including system files, apps, settings, and all of your personal data.
To make a Time Machine backup before downgrading, connect your external backup drive and select “Back Up Now” from the Time Machine menu in your menu bar. Let the backup fully complete before proceeding with any downgrading steps. Time Machine will ensure you have a full, bootable snapshot of your original Mac system before making any major changes.
You can also manually backup important files by copying them to an external drive. Be sure to backup any data not included in your user account like network storage folders or external media.
Having a complete Time Machine or manual backup is the best way to downgrade safely without worrying about data loss. Be extremely cautious about downgrading without a backup, as it could result in permanent data deletion.
Check Compatibility
Before downgrading your Mac’s operating system, it’s crucial to check that the version you want to downgrade to is compatible with your specific Mac model. According to Sweetwater ([Sweetwater, 2023]), you can only downgrade to an OS version that was previously available for your Mac. For example, if your Mac originally shipped with macOS Monterey, you cannot downgrade below macOS Monterey.
In general, here are the Mac models and the oldest OS versions they support:
- Macs from 2020 and later – macOS Big Sur 11
- Macs from 2017 to 2019 – macOS High Sierra 10.13
- Macs from 2015 to 2016 – OS X El Capitan 10.11
- Macs from 2013 to 2014 – OS X Mavericks 10.9
- Older Macs – OS X Mountain Lion 10.8
Downgrading to an unsupported OS can lead to potential issues like drivers not working properly and features not being available. It’s best to consult Apple’s support documents to verify compatibility before attempting a downgrade.
Prepare for Installation
To downgrade your Mac OS, you will need to create a bootable USB installer for the older OS version you want to install. Here are the steps:
First, download the installer file for the target OS version from the Mac App Store. For example, if you want to downgrade to macOS Mojave, download the macOS Mojave installer.
Next, plug in a USB flash drive that is at least 12GB in capacity. Using a 16GB or larger drive is recommended.
Then open the Terminal app and enter a command to create a bootable installer on the USB drive. The exact command will depend on the OS version but it will reference the installer you downloaded.
For example, to create a bootable macOS Mojave installer:
sudo /Applications/Install\\ macOS\\ Mojave.app/Contents/Resources/createinstallmedia –volume /Volumes/MyUSB
Replace “MyUSB” with the name of your USB drive. This will erase the USB drive and create the bootable installer.
Once complete, you’ll have a bootable USB drive ready to install the older OS version.
Erase and Install
To downgrade your Mac, you will need to completely erase your existing macOS installation and perform a clean install of the older operating system. Here are the steps to erase your drive and install the older OS version:
First, restart your Mac and immediately press and hold Command-R when you hear the startup chime to boot into Recovery mode. This will launch the Recovery app. In the Recovery window, select “Disk Utility” and click Continue.
In Disk Utility, select your startup disk from the sidebar and click “Erase” at the top. Choose a name for the disk, select “Mac OS Extended (Journaled)” for format, and click “Erase” to confirm. This will completely erase your existing macOS installation.
Once the drive is erased, quit Disk Utility to return to the Recovery window. Now you can install the older OS version by selecting “Reinstall macOS” and following the onscreen prompts. Be sure to select the correct OS version you wish to downgrade to from the dropdown menu. The installer will guide you through the clean installation process.
After installation is complete, you can migrate your data from a backup and reinstall apps to finish setting up your downgraded Mac. See the Migration Assistant and Reinstall Apps sections below for more details.
For step-by-step guidance, refer to Apple’s support article “Erase and reinstall macOS” (https://support.apple.com/guide/mac-help/erase-and-reinstall-macos-mh27903/mac).
Migration Assistant
One of the easiest ways to transfer your data from your older Mac to your new Mac is by using Apple’s Migration Assistant. Migration Assistant allows you to transfer information from a Time Machine backup, another Mac, a Windows PC, or even from an external drive (source 1).
To use Migration Assistant, first make sure you have a Time Machine or other backup of your old Mac. Then on your new Mac, open the Migration Assistant application which can be found in Applications > Utilities. Migration Assistant will walk you through the steps to select the backup drive and then transfer your user accounts, applications, settings, files, and more to the new Mac (source 2).
Migration Assistant makes it easy to transfer everything over from an old Mac to a new Mac while keeping all your data and settings intact. It’s automated and avoids having to manually move files and reconfigure your applications.
Reinstall Apps
After downgrading your Mac, you will likely need to reinstall apps that were previously installed. Here are some tips for redownloading your apps from the App Store and the web:
For apps purchased on the App Store:
- Open the App Store on your Mac and sign in with your Apple ID.
- Click on your name in the bottom left corner and go to the Purchases section. This will show all apps you’ve previously downloaded.
- Find the app you want to reinstall and click the download button next to it. The app will begin downloading again.
- You can also search for the app directly to redownload it.
For apps installed from the web:
- Go to the website for the app and look for the download or installer file.
- Download the installer and go through the installation steps again.
- You may need to re-enter your license key or login details.
- Check the app website for instructions on reinstalling.
Be patient as redownloading and reinstalling apps can take some time. Make sure to only install apps that are compatible with your now older OS version.
Troubleshooting
Downgrading your MacOS version can sometimes encounter problems, but there are ways to troubleshoot and fix many issues.
One common problem is missing files or data after downgrading. To avoid this, be sure to properly back up your data using Time Machine before beginning the downgrade process. If you find files missing after downgrading, you may be able to restore them from your Time Machine backup. Just re-connect the Time Machine drive and use the Migration Assistant to transfer files back to your Mac [1].
You may also run into compatibility issues if you downgrade too many versions at once. Check Apple’s documentation to see which MacOS versions are compatible with your Mac model before downgrading. If you receive compatibility errors, you may need to downgrade in smaller steps to an intermediate version before going to your desired version [2].
If your Mac refuses to downgrade and shows “This volume cannot be downgraded” errors, you likely have the APFS format on your drive. You can fix this by erasing your drive and reformatting it to MacOS Extended (HFS+) before reinstalling the older MacOS version [3].
With some care taken ahead of time and troubleshooting as needed, you should be able to successfully downgrade your MacOS while keeping your data intact.
Tips and Best Practices for Downgrading MacOS
Here are some pro tips to ensure a smooth and successful downgrade of your Mac operating system:
Before downgrading, be sure to back up your Mac using Time Machine or another backup solution. This will allow you to restore your files and settings if anything goes wrong during the downgrade process (Source).
Check that the version of macOS you want to downgrade to is compatible with your Mac’s hardware. Apple provides a support document listing compatibility for each macOS version (Source).
Download the macOS installer for the version you’re downgrading to before erasing your current system. This ensures you have the installer ready to go (Source).
Reset your Mac’s NVRAM before downgrading to clear out any settings that could interfere with the install process (Source).
Use Disk Utility to erase your Mac’s internal drive where macOS is currently installed. This prepares it for a clean install of the older version.
After downgrading, you can use Migration Assistant to transfer your apps, files, and settings from a Time Machine or other backup.
Be prepared to reinstall any apps that aren’t compatible with the now older macOS version.
If issues come up after downgrading, troubleshooting steps like safe mode, SMC/NVRAM resets, or reinstallation may help.
Conclusion
To recap, the key steps covered in this guide to downgrade your Mac while keeping your data are:
- Back up your data to an external drive or cloud storage.
- Check hardware and software compatibility with the target OS version.
- Prepare for installation by clearing storage space and getting installer files.
- Use Disk Utility to erase the startup disk and perform a clean install of the older OS.
- Use Migration Assistant to transfer apps, files, and settings from the backup.
- Reinstall any crucial apps that aren’t compatible with the now-downgraded OS.
- Troubleshoot issues like missing data, incompatible apps, or performance problems.
Downgrading to an older macOS can provide benefits like improved performance, compatibility with older hardware/software, and access to features no longer in the latest versions. Just be sure to carefully plan the process and back up your data to avoid losing any important files. With some diligent preparation, you can successfully downgrade while keeping the data you need.