Spilling liquid on your laptop keyboard can be an annoying and potentially damaging accident. Thankfully, drying out a wet laptop keyboard is possible if you take quick action. Here are some tips on how to safely dry your laptop keyboard.
Quick Answers
Here are quick answers to common questions about drying a wet laptop keyboard:
- Turn off the laptop immediately and disconnect any cables or devices.
- Dry excess liquid by holding the laptop upside down over a towel.
- Do not try to turn on the laptop until it is completely dry, which can take 1-2 days.
- Remove keycaps carefully and clean underneath them with a cotton swab.
- Use a can of compressed air to blow out any moisture under the keys.
- Place the laptop in front of a fan to help circulate air and dry it faster.
- Do not use a hairdryer or other heat source which could damage the laptop.
Assessing the Damage
When liquid gets spilled on a laptop keyboard, it’s important to quickly assess the extent of the damage. Here are some steps to take:
- Turn off the laptop immediately and disconnect any cables, USB devices, etc. Leaving it on risks short circuiting and further damage.
- Shake the laptop gently to drain off any excess liquid. Do this over a towel or sink.
- Turn the laptop upside down and leave it that way so liquid doesn’t seep deeper into the keyboard or other components.
- Remove the battery from the laptop if possible. This prevents accidental turn on.
- Check for any visible moisture or wet spots under the keys. This indicates deeper seepage.
- Inspect to see if any keys are sticky, discolored or not working properly.
Based on this initial inspection, you’ll know if drying the keyboard may be possible or if you need to get professional repairs.
Drying the Surface of the Keyboard
After removing any standing liquid, the next step is to thoroughly dry the laptop’s keyboard and case. Here are safe ways to dry the surface:
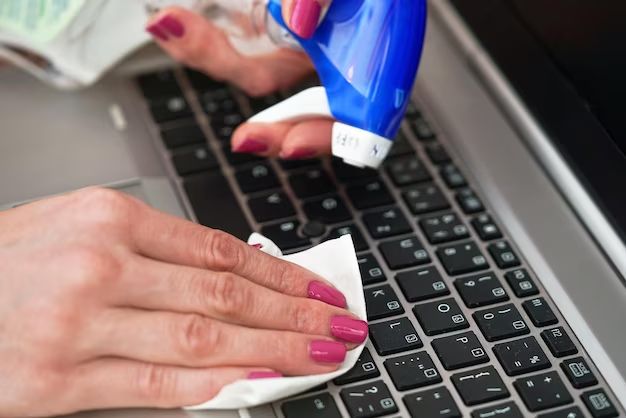
- Use a microfiber cloth or towel to gently blot up any excess moisture on the keyboard or case. Don’t rub aggressively.
- Lightly brush keys with a dry toothbrush to lift water from between the keycaps.
- Use a can of compressed air to blow between the keys and chase away moisture.
- Place the laptop in front of a fan turned on low. Air circulation will help evaporate liquid.
- Insert a few silica gel packs near the laptop. These moisture-absorbing packets help draw out dampness.
Avoid using any heat sources like hairdryers or placing the laptop in direct sun which could warp the plastic casing.
Taking Apart the Keyboard
To fully dry underneath the keyboard keys, it’s best to remove them for cleaning. This involves taking apart the laptop which requires care and precision. Here are the general steps:
- Refer to a service manual for your specific laptop model for breakdown instructions.
- Use a small Philips head screwdriver to remove screws from the bottom case panel.
- Once the case is open, locate the keyboard ribbon connector and carefully detach it.
- Slowly start prying up each plastic keycap from the keyboard starting in a corner or side.
- Use a pair of tweezers to grasp and pull up each keycap until it detaches.
- Place each keycap in order on a clean surface so you can reattach later.
Taking apart a laptop keyboard takes concentration and organization. Have the service manual for your model on hand and work carefully on a clean, well-lit surface.
Cleaning Under the Keys
With the keycaps removed, it’s easier to fully dry out the keyboard plate underneath. Be very gentle when cleaning to avoid damaging small components.
- Use cotton swabs dipped in isopropyl alcohol to wipe away any liquid or debris around connectors.
- Use a can of compressed air to blow out any moisture hiding under the keyboard plate or around ribbon cables.
- If any connector or part shows corrosion, wipe it carefully with alcohol using a cotton swab.
- Check for any remaining sticky spots and repeat gentle blotting or air drying until fully dry.
Take your time and methodically check the underside of each key area for any lingering moisture before reassembling.
Reassembling the Laptop
Once fully dry, the laptop keyboard can be carefully reassembled. Follow these steps:
- Check for any small parts from the keyboard which may have come loose and replace them.
- Use tweezers to grip and re-seat each keycap in the proper order and alignment on the keyboard plate.
- Reattach the keyboard ribbon connector to the motherboard.
- Replace the bottom case cover and re-insert screws to fasten.
- Reconnect any cabling and replace the laptop battery.
Double check that keys are seated properly without gaps or misalignments before tightening screws. Test a few keys to make sure they are functioning before fully reassembling.
Drying Out the Laptop
After thorough cleaning and reassembly, the last step is allowing adequate drying time for any interior moisture to fully evaporate before using your laptop again.
- Leave the laptop powered off for at least 24 hours, ideally 2-3 days.
- Remove any batteries or accessories which may retain moisture.
- Place the closed laptop near a fan or dehumidifier to aid drying.
- Put silica gel packs or rice near the laptop to absorb ambient moisture.
- Check for any condensation or moisture inside the screen or case before turning on.
Have patience and allow your laptop to completely air dry before attempting to turn it on again. This prevents electrical issues or component damage.
Testing for Full Functionality
Once sufficiently dried out, power your laptop on and test for full functionality:
- Turn on the laptop and listen for the fan and hard drive sounds indicating startup.
- Check that the screen image appears and is free of pixelation or discoloration.
- Connect to power and confirm that the battery icon charges when plugged in.
- Check that keyboard keys feel firm and springy when pressed.
- Press every key individually to confirm full responsiveness.
- Use an external mouse and USB drive to verify all ports are working.
If you find certain keys not working or any other functionality issues, there may still be moisture present. Repeat drying efforts until laptop performance is back to normal.
When to Seek Professional Help
While many spilled laptops can be revived with thorough DIY drying, sometimes professional repairs are necessary if there is:
- Visible corrosion on electronics after cleaning.
- No power when pressing the power button.
- Distorted or flickering screen display.
- Keys or components that feel loose or are missing.
- Any strange smells from inside the laptop case.
Seeking professional help is wise if moisture reached internal components or you lack the tools for full disassembly. A repair shop can properly diagnose and fix any issues.
Preventing Future Spills
Here are some tips to avoid spilled liquid damage to your laptop in the future:
- Never eat or drink over or around your laptop.
- Install a splash-proof cover over your keyboard if using around liquids.
- Close lid when transporting drink nearby to protect the screen.
- Keep drinks on a separate table or surface than your laptop.
- Store laptop in carrying case rather than loose in a full bag or briefcase.
Practicing care when using your laptop around potential spills can help avoid accidents and expensive repairs down the road.
Conclusion
Drying out a wet laptop keyboard is possible with some careful disassembly and drying steps. Quick action is key after an accident to prevent permanent water damage or electrical issues. In most cases, you can revive a soaked laptop keyboard with thorough cleaning, drying, and inspection. Just be sure to take your time and follow each step methodically. With some patience, you can get your laptop working again after a spill. Implement some preventative habits as well to avoid future liquid accidents.