What is an SSD?
An SSD, or solid-state drive, is a type of computer storage that uses flash memory instead of a spinning hard disk drive (HDD). SSDs have no moving parts and store data in microchips. This makes them much faster, quieter, and less prone to mechanical failure than HDDs.
Some key advantages of SSDs over HDDs include:
- Faster read/write speeds – SSDs can access data almost instantly, while HDDs require time for the discs to spin and the head to move to the correct position. This makes SSDs feel much more responsive.
- Better durability – With no moving parts, SSDs aren’t susceptible to damage or degraded performance from shock, vibration, or magnetic fields.
- Lower power consumption – SSDs consume much less power than spinning hard drives.
- Faster start-up times – PCs with SSDs can boot in seconds rather than the minutes required by HDDs.
- Compact and lightweight – SSDs take up less space and weigh less than HDDs.
For most computing tasks like booting the operating system, launching apps, transferring files, SSDs provide significant speed advantages over traditional HDDs. This makes them ideal for both consumer and business use cases.
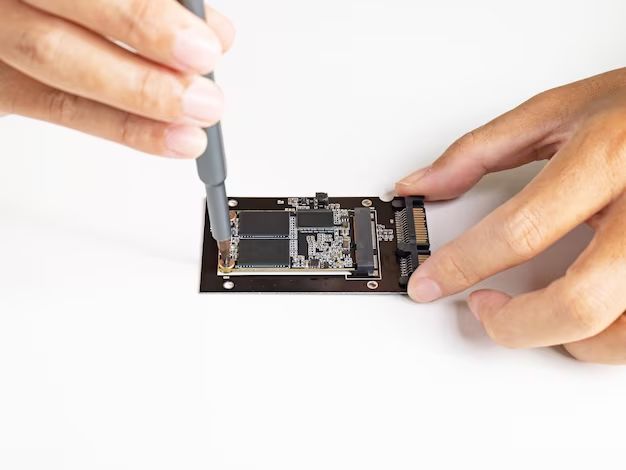
Checking if you have an extra SSD
To check if your extra SSD is detected in Windows, you’ll need to access the Device Manager and Disk Management utilities.
First, open the Device Manager by right-clicking the Start menu and selecting it from the menu. Expand the Disk drives section and look for your SSD listed there. If you see the SSD listed, Device Manager has detected it.1
Next, access Disk Management by right-clicking This PC or the Start menu and selecting Manage, then Disk Management. This will show all connected disk drives. Look for your SSD here. If it shows up but doesn’t have a drive letter or format, the SSD will need to be initialized and formatted before use.
If neither Device Manager nor Disk Management show the extra SSD, it likely isn’t being detected properly. You may need to check your SATA cable connections, update drivers, or change a BIOS setting to enable it.
Enabling the extra SSD in BIOS
To enable the extra SSD in the BIOS, you’ll need to enter the BIOS setup utility during boot. The key to press varies between computer manufacturers, but common keys are F2, F10, DEL, or ESC. Refer to your computer or motherboard manual for the proper key.
Once in the BIOS, you’ll need to navigate to the storage or NVMe settings. For Intel NUC devices, go to Advanced > Devices > NVMe Configuration (cite: https://www.reddit.com/r/intelnuc/comments/psdov1/how_to_enable_second_ssd/). For ASUS or MSI motherboards, go to Advanced > Storage Configuration or Storage > NVMe Configuration (cite: https://www.partitionwizard.com/news/how-to-enable-m-2-in-bios.html).
In the NVMe or SATA settings, make sure the extra SSD is enabled and set to the desired mode, such as AHCI. Save changes and exit the BIOS.
Partitioning and Formatting the SSD
Once you have enabled the extra SSD in the BIOS, the next step is to partition and format it so you can start using it. This is done in Windows using the Disk Management utility.
To access Disk Management, right-click the Start menu and select “Disk Management”. This will open the utility where you can see all the drives connected to your system.
Right-click on the SSD you want to format and select “New Simple Volume”. This will launch the partition wizard. Here you can select the partition style – MBR or GPT. GPT is newer and required for drives larger than 2TB or for using certain features like UEFI boot. For most home users, MBR is fine.
Next, specify the size of the volume if you want only a portion of the SSD partitioned. Assign a drive letter so Windows can access it. Then select your formatting options – NTFS is recommended for SSDs. Give the drive a label if desired.
Click “Next” and “Finish” to complete the partitioning and formatting. The SSD will now show up as usable storage space in File Explorer. You may need to restart your PC for the drive letter to be accessible.[1]
Assigning a Drive Letter
After partitioning and formatting the SSD, you may need to assign it a drive letter so that Windows recognizes it. Here’s how to add a drive letter:
- Open up Disk Management in Windows.
- Right-click on the unallocated partition on the SSD and choose “New Simple Volume”.
- Follow the wizard, choosing a drive letter to assign to the SSD partition.
- Make sure not to select a drive letter already in use.
If the SSD partition already has a letter assigned, you can change it by right-clicking and choosing “Change Drive Letter and Paths”. This allows you to select a new unused drive letter to assign to that partition.
Assigning a unique drive letter is crucial for Windows detecting the SSD as an accessible new volume for storing data. According to this MacRumors forum post, Windows sometimes fails to assign a drive letter automatically when installing a new drive, so you may have to manually add one.
Enabling TRIM Support
TRIM is an essential feature for SSDs that helps maintain performance and lifespan. It allows the operating system to notify the SSD which blocks of data are no longer in use and can be wiped internally. This helps reduce write amplification on the SSD.
To enable TRIM support on Windows, you need to use the command prompt. Here are the steps:
- Open the command prompt as administrator.
- Type “fsutil behavior set DisableDeleteNotify 0” and press Enter. This enables TRIM.
- Type “fsutil behavior query DisableDeleteNotify” and press Enter. Verify that it shows DisableDeleteNotify = 0 to confirm TRIM is enabled.
You can also use third-party utilities like hdparm on Linux to enable TRIM. For example:
sudo hdparm –user-master u –enable-idle_unpark /dev/sda
This command enables TRIM for the SSD at /dev/sda. Check your SSD drive path before running. TRIM is crucial for maintaining the performance and reliability of your SSD.
Transferring your data
One of the easiest ways to transfer your data from your HDD to your SSD is to use cloning software. Popular cloning tools like EaseUS Partition Master and Macrium Reflect allow you to quickly clone your entire HDD over to your SSD.
To use cloning software:
- Install and open the cloning software.
- Select your HDD as the source drive.
- Select your SSD as the target drive.
- Click clone/copy. The software will copy all data from the HDD to the SSD.
- Once complete, restart your computer and set your SSD as the boot drive in BIOS.
Another option is to use the Robocopy command built into Windows. Robocopy allows you to precisely mirror files and folders from one drive to another. To use Robocopy:
- Open Command Prompt as Administrator.
- Type the robocopy command to copy files/folders from HDD to SSD. For example:
robocopy C:\Users D:\Users /E /COPY:DAT /R:5 /W:5 - Robocopy will copy the Users folder from C: drive to D: drive.
Be sure to double check that all your data transferred correctly before reformatting your original HDD.
Enabling write caching
Enabling write caching on your SSD can significantly improve performance by allowing the drive to cache writes before committing them to permanent storage. This allows the drive to optimize when and how data is physically written. Write caching is usually disabled by default on most SSDs.
To enable write caching, open Device Manager in Windows, expand the Disk drives section, right click on your SSD, and select Properties. Go to the Policies tab and check the Enable write caching on the device option. Then click OK to save the changes. You may need to restart your computer for the change to take effect.
According to community forums, enabling write caching provided a noticeable boost in performance for many users, with benchmarks showing 50-100% faster write speeds in some cases (Source). However, there is a small risk of data loss if power is interrupted. Weigh the performance benefits against the risks before enabling write caching.
Optimizing for SSD
To get the best performance from your SSD, you’ll want to optimize your Windows settings. Here are some key steps to take:
First, disable automatic defragmentation, as this is not necessary for SSDs and can actually shorten their lifespan. To do this, open the Optimize Drives app and uncheck the option to run on a schedule. Defragging forces unnecessary writes which wear out SSD cells.[1]
Next, enable AHCI mode in BIOS if it is not already enabled. AHCI allows features like hot swapping and native command queuing which improves SSD performance. Reboot into BIOS, look for SATA settings, and switch the mode to AHCI if it is not already set.[2]
You may also want to enable the TRIM command which helps maintain performance by clearing invalid cells. To enable TRIM, open an admin Command Prompt and run ‘fsutil behavior set DisableDeleteNotify 0’. This tells Windows to send TRIM commands.[3]
Finally, ensure write caching is enabled for maximum write speeds. Go to Device Manager, find the SSD, go to Policies, and enable write caching.[2]
With these optimizations, your SSD will run as fast as possible within Windows.
Benchmarking and monitoring
After enabling and optimizing your SSD, it’s important to test its performance. One of the best free tools for benchmarking SSDs is CrystalDiskMark. CrystalDiskMark allows you to measure sequential and random read/write speeds, providing detailed metrics on your SSD’s capabilities.
To use CrystalDiskMark, simply download and install the program. Then select your SSD drive and choose the benchmark tests you wish to run. The ‘all’ profile runs a comprehensive suite of read/write tests using different block sizes and access patterns. After running, you’ll see detailed results on MB/s speeds and IOPS performance.
For ongoing monitoring and optimization, SSD toolbox utilities like Samsung Magician are handy. These let you view disk health stats like total bytes written, perform firmware updates, enable overprovisioning, and maintain peak SSD performance.
By periodically benchmarking your SSD with CrystalDiskMark and utilizing an SSD toolbox, you can verify your SSD is operating at its full potential and monitor it over time.
