Enabling an M.2 SSD in BIOS is an important step to get your solid state drive detected by your system. M.2 drives offer incredibly fast data transfer speeds and are becoming increasingly popular, but they won’t work correctly unless properly configured in BIOS.
Quick Steps to Enable M.2 SSD in BIOS
Here is a quick overview of the steps to enable M.2 SSD in BIOS:
- Enter BIOS settings menu on system startup
- Navigate to advanced settings if not already there
- Locate settings related to SATA or NVMe operation modes
- Set SATA mode to RAID or AHCI (disable IDE/compatibility mode)
- Enable NVMe if M.2 SSD is NVMe based
- Save changes and exit BIOS
That covers the basic process, though specific steps can vary across motherboards. Read on for more details on navigating BIOS and correctly configuring your M.2 drive.
What is an M.2 SSD?
An M.2 solid state drive is a high-speed storage device that mounts directly onto your motherboard via an M.2 slot. M.2 drives use either SATA or PCIe NVMe interfaces to transfer data much faster than traditional hard disk drives. They come in a compact rectangular form factor and are a popular choice for both laptop and desktop PCs.
There are a few key advantages of M.2 SSDs:
- High sequential read/write speeds – Up to 3500MB/s for PCIe NVMe models
- Lower latency and faster random access performance than SATA SSDs
- Small footprint conserves space for other components
- Direct motherboard mounting for neat, tidy build
However, you need to properly configure BIOS settings for boot and connectivity protocols to utilize these benefits. If not enabled in BIOS, the M.2 SSD may not be detected or will underperform.
How to Enter BIOS Settings
The first step is accessing your BIOS settings menu on system boot. Here’s how:
- Restart your computer and press the BIOS key as the system POST screen displays. This is usually F2, F10 or Delete.
- Refer to your motherboard manual for the exact key if not sure.
- Once in BIOS, navigate to the advanced settings tab if not already there.
Now you can locate and adjust the relevant settings for M.2 operation. The options vary across motherboard models, but commonly include:
- SATA Controller Mode
- M.2 Slot # Enable/Disable
- NVMe Controller Enable/Disable
Setting SATA Controller Mode
M.2 drives that use the SATA interface require the SATA controller to be switched from IDE/Compatibility to AHCI or RAID mode:
- Find the SATA Controller option in advanced BIOS settings.
- Change setting from IDE/Compatibility to AHCI or RAID.
- AHCI is recommended for using a single M.2 SATA drive. Select RAID if you want use more than one drive in a RAID array.
- Save changes and exit BIOS after switching SATA to AHCI/RAID.
This ensures the M.2 drive will be detected and avoids performance issues caused by IDE/legacy mode limitations. Disabling IDE/compatibility may require reactivating your Windows installation.
Why Switch from IDE/Compatibility Mode?
IDE/compatibility mode has some technical drawbacks that affect M.2 performance:
- Limited to only 4 drives without extensions
- No hot swapping support
- Lower transfer speeds
- No native command queuing
AHCI and RAID modes lift these limitations so your M.2 SSD can achieve its full potential. The benefits include:
- Hot swapping drive support
- Native command queuing for faster transfers
- No 4 drive limit allowing more SSDs
- Better performance for SSDs like M.2 drives
Enabling M.2 Slot in BIOS
Most motherboards with M.2 slots allow you to enable or disable the slot itself:
- Locate the M.2 related settings in advanced BIOS.
- Make sure the slot is enabled if currently disabled.
- Some boards have multiple slots, so enable the specific slot your drive uses.
- Double check the slot mode – M.2 SATA drives use SATA mode.
- Save settings and reboot once the slot is enabled.
If your BIOS doesn’t have a direct M.2 enable option, it should be enabled by default. But double check the storage device list for detection once in Windows.
M.2 Slot BIOS Settings
Here are some common M.2 related settings you may see in BIOS:
- M.2 Slot 1 Enable/Disable
- M.2 Mode (SATA / PCIE)
- M.2 Drive Detection
Make sure the slot is enabled and set to SATA mode for SATA M.2 SSDs. Some boards disable slots by default to avoid conflicts.
Enabling NVMe for PCIe M.2 Drives
If your M.2 SSD uses the PCIe NVMe interface, you need to enable NVMe support in BIOS:
- Find NVMe settings under advanced options.
- Enable NVMe support if disabled.
- Adjust NVMe mode from boot or storage if available.
- Save changes and reboot to detect NVMe drive correctly.
This ensures the PCIe lanes are correctly configured for NVMe. The drive will not function without NVMe enablement.
NVMe BIOS Settings
Common BIOS settings related to NVMe include:
- NVMe Controller Enable / Disable
- NVMe RAID Mode Enable / Disable
- NVMe Boot Support Enable / Disable
Make sure NVMe controller is enabled along with any storage or boot support options.
Verifying M.2 Drive Detection
After enabling your M.2 drive in BIOS, verify it is detected within your operating system:
- Boot into Windows or Linux.
- Open disk management utility.
- Check for your M.2 drive in the list.
- The drive should show the correct capacity if properly detected.
If not found, re-check BIOS settings related to the M.2 slot and storage protocols. The drive needs to be enabled and SATA or NVMe correctly configured based on the M.2 type.
Checking M.2 Detection in Linux
On Linux, use the lsblk or fdisk commands to verify detection. The M.2 drive should be listed alongside other attached storage drives.
Checking M.2 Detection in Windows
In Windows, launch Disk Management and expand the drive list. The M.2 drive should be present along with its capacity, format and drive letter if properly detected.
Common BIOS Settings for M.2 Drives
Here is a summary of the key BIOS settings to check when enabling M.2 SSDs:
| Setting | Recommended Value |
|---|---|
| SATA Mode | AHCI or RAID |
| M.2 Slot Enable | Enabled |
| M.2 Mode | SATA for SATA M.2 drives |
| NVMe Enable | Enabled for PCIe NVMe M.2 drives |
Adjust these values as needed and save changes to have your BIOS properly detect the M.2 SSD.
Performance Benefits of M.2 Drives
Once enabled, M.2 drives provide a clear performance advantage over traditional SATA SSDs and hard drives. Some benchmark examples:
- Sequential read speeds up to 3500MB/s vs 550MB/s for SATA SSDs
- Up to 800K IOPS random read vs 100K IOPS for SATA SSDs
- Access latency as low as 5-10 microseconds vs 60-100 for SATA SSDs
This level of speed boost enhancesboot times, loading performance, and overall responsiveness for a snappier system.transfer and access speeds with their compact form factor. Just be sure to double check those BIOS settings first!
Troubleshooting M.2 Detection Issues
If your M.2 SSD still isn’t recognized after adjusting BIOS settings, try these troubleshooting steps:
- Reset BIOS to default settings and reconfigure for M.2.
- Try updating to the latest BIOS version if available.
- Check for dirt in the M.2 connector and reseat the drive.
- Test with another M.2 slot if available.
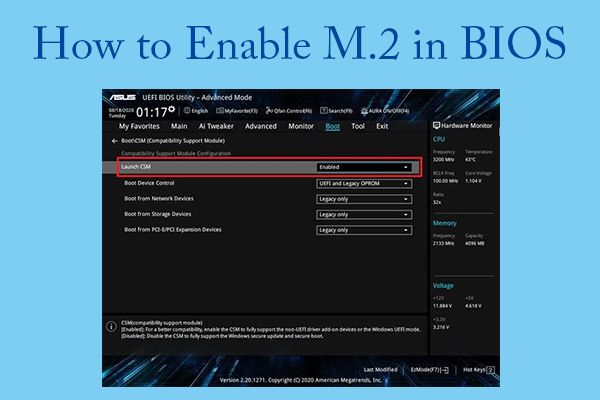
- Disable CSM/Legacy mode in BIOS which may cause conflicts.
- Double check M.2 drive compatibility with your motherboard.
Consult your motherboard manual and SSD manufacturer for further troubleshooting tips. An incompatible BIOS or drive firmware can also cause detection issues.
Closing Thoughts on Enabling M.2 SSDs
Adjusting a few key settings in BIOS is required to unlock the full performance of M.2 solid state drives. Ensure SATA controllers are switched to AHCI/RAID mode, M.2 slots are enabled, and NVMe is turned on for PCIe drives.
The small effort to correctly configure BIOS for M.2 SSDs pays dividends through markedly faster system and application speeds. M.2 drives deliver exceptional performance but need proper support enabled first.
Frequently Asked Questions
Why won’t BIOS detect my M.2 SSD?
Common reasons BIOS won’t detect an M.2 SSD include:
- The M.2 slot is disabled in BIOS.
- SATA controller mode is set to IDE/Compatibility.
- NVMe support needs to be enabled for a PCIe M.2 drive.
- Old BIOS version with poor M.2 and NVMe support.
- The drive is not fully inserted or loose connection.
How can I tell if my M.2 slot supports SATA or NVMe?
Check your motherboard manual or specifications to confirm which interfaces are supported by the M.2 slot. There are usually different slots for SATA vs. PCIe/NVMe drives. SATA M.2 slots connect via SATA lanes while NVMe slots use PCIe lanes to the CPU.
Do all M.2 slots need to be enabled in BIOS?
Only the specific M.2 slots that are occupied need to be enabled. However, enabling unused slots does no harm if you want flexibility to add drives later. Disabling empty slots can avoid boot conflicts in some cases.
Should SATA or NVMe mode be used for PCIe M.2 drives?
NVMe mode must be used for PCIe M.2 SSDs. The NVMe driver and protocol is required to communicate over PCIe lanes. SATA mode is for SATA SSDs using the AHCI driver even in M.2 form factor.
Can I use NVMe and SATA M.2 drives together?
Yes, SATA and PCIe NVMe M.2 SSDs can operate together in one system. Ensure SATA controllers are in AHCI/RAID mode, NVMe is enabled, and the correct modes are applied to each M.2 slot based on the drive type installed.
