What is an Internal Hard Drive?
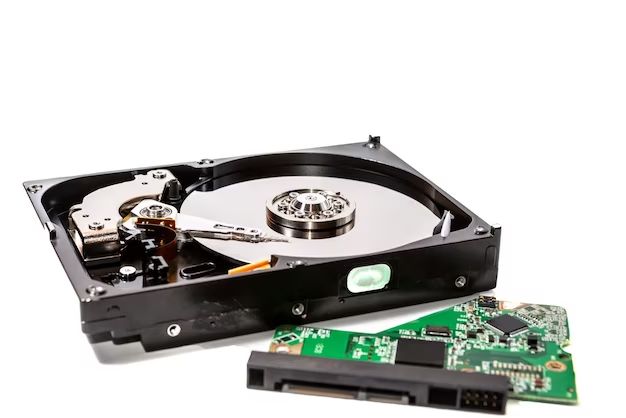
An internal hard drive is a data storage device that is located inside a computer system, typically mounted in the drive bays or a dedicated slot on the motherboard. In contrast, an external hard drive is encased in its own chassis and connects to the computer through a USB, Thunderbolt or other port.
Internal hard drives come in two main types – hard disk drives (HDDs) and solid state drives (SSDs). HDDs store data on spinning platters accessed by read/write heads, while SSDs use flash memory chips and have no moving parts. Internal drives connect directly to the motherboard through SATA, SAS or NVMe interfaces for much faster speeds than external drives.
The main benefits of internal drives versus external are faster access speeds, ability to boot the operating system, and not requiring an external power source. However, external drives have the advantages of being portable and able to connect to multiple computers. Both serve an important role in storing and accessing data.
Reasons to Enable a Disabled Internal Hard Drive
There are a few key reasons why you may want to enable an internal hard drive that is currently disabled or not being recognized by your computer:
Access stored data – An internal hard drive contains all of your files, documents, photos, music, and other data. If the drive is disabled, you lose access to everything stored on it. Enabling the drive lets you access that data again.
According to Western Digital, internal hard drives offer a cost-effective way to store large amounts of data, with capacities up to 16TB for desktop models. Re-enabling a disabled internal drive restores your access to all of that valuable data (https://www.westerndigital.com/solutions/internal-hdd).
Expand available storage space – Internal hard drives add to your computer’s overall storage capacity. If you are getting low on space on your primary drive, enabling a disabled secondary internal drive effectively expands the total storage space available. This provides room for more files, applications, games, and media.
As noted on Quora, external hard drives can supplement internal storage, but enabling internal drives allows you to directly expand the native storage capacity of your computer (https://www.quora.com/What-are-the-benefits-of-using-an-external-hard-drive-over-an-internal-one-What-is-the-difference-between-external-and-internal-hard-drives).
Check if the Internal Hard Drive is Recognized
The first step is to open Disk Management to see if Windows detects the hard drive. To open Disk Management on Windows 10 or 11:
Press Windows Key + R to open the Run dialog box. Type “diskmgmt.msc” and click OK to launch Disk Management.
In Disk Management, look in the lower panel for a list of all the disk drives connected to your computer. If you see your hard drive listed here, Windows has detected it but has not assigned a drive letter.
If the hard drive does not show up in Disk Management at all, Windows has not detected the hard drive. This could indicate a hardware issue, driver problem, or BIOS misconfiguration. Consult your motherboard manual and ensure the SATA ports are enabled. You may need to update SATA drivers or adjust BIOS settings related to AHCI/RAID modes. If the BIOS and drivers are configured properly but the hard drive still does not show up in Disk Management, the hard drive itself may be defective.
Enable Disk in Disk Management
Disk Management is a Windows utility that allows you to manage internal and external disks. Here are the steps to enable your internal hard drive using Disk Management:
- Open Disk Management. You can do this by pressing Windows Key + R and typing “diskmgmt.msc” into the Run dialog box.
- Locate the internal hard drive that you want to enable in the lower panel. It may show up as Unknown or Not Initialized.
- Right click on the disk and select Online. This will activate the disk and make it accessible to Windows.
- If the disk shows up as Not Initialized, right click it and select Initialize Disk. Choose a partition style like MBR or GPT and click OK.
- Right click on the area showing Unallocated space and select New Simple Volume. Follow the wizard to format and assign a drive letter.
Enabling the disk in Disk Management will make your internal hard drive detectable to Windows. You can then format it and begin storing files if needed.
Assign a Drive Letter
One of the most common reasons an internal hard drive may not be accessible is because it doesn’t have a drive letter assigned. Drive letters like C: and D: allow Windows and applications to locate the hard drive and access files stored on it. To assign a drive letter:
1. Open Disk Management by right clicking on This PC or My Computer and selecting Manage. Then go to Disk Management on the left side.
2. Locate the internal hard drive which doesn’t have a drive letter assigned. It may show up as Unknown or Not Initialized.
3. Right click on the hard drive and select Change Drive Letter and Paths.
4. Click Add to assign a new drive letter from the available letters.
5. Click OK once a drive letter is selected. The hard drive will now show up with the assigned drive letter.
This allows Windows and other programs to detect, access and write to the internal hard drive. Be sure to assign a letter not already in use or it may cause conflicts with existing drives. Refer to Microsoft’s guide for more details on changing drive letters.
Format the Hard Drive
Once the hard drive is recognized and assigned a drive letter, the next step is to format it for use with Windows. The most common file system for Windows is NTFS (NT File System). Here are the steps to format the drive to NTFS:
1. Open Disk Management.
2. Right-click on the Unallocated space on your hard drive and select “New Simple Volume”.
3. Follow the prompts to initialize the disk if it’s a brand new drive. Select the default values like 1024 KB allocation unit size and perform a quick format.
4. Give the hard drive a name under the “Volume Label” section, like Data Drive. Make sure the File System is NTFS.
5. Click “Next” then “Finish” to start the formatting process. This may take a few minutes.
Once completed, the drive will show the assigned drive letter and format (NTFS). The drive is now ready to store your files and folders. Formatting to NTFS allows support for larger files (over 4GB) and better security like file/folder permissions (Source).
Perform a Full Scan for Errors
Scanning the hard drive is an important step to check for any errors or bad sectors. This will help identify and repair any issues to ensure proper functioning of the hard drive.
To perform a full scan on the hard drive in Windows:
- Open File Explorer by pressing Windows + E on your keyboard or selecting the folder icon in the taskbar.
- Right-click on the hard drive you want to scan and select Properties.
- Under the Tools tab, click on Check.
- A window will open with scan options. Select “Scan drive” and check “Automatically fix file system errors”.
- Click “Start” to begin the scan.
- Windows will comprehensively scan the drive, checking the disk and file system for errors and bad sectors. This may take some time depending on the size of the hard drive.
- Once complete, you will see a message if any errors were found and fixed. Restart your computer for the changes to take effect.
Scanning regularly helps maintain your hard drive by proactively catching and repairing issues. You can also adjust scan settings for more comprehensive and extended scans. Refer to Microsoft’s guide for more details on using the Check Disk tool in Windows.
Source: https://www.lifewire.com/how-to-scan-a-hard-drive-using-error-checking-2624497
Update Hard Drive Drivers
It’s important to keep your hard drive drivers up-to-date to ensure proper functionality and system security. The manufacturer’s website usually provides the newest compatible drivers. Here are the steps to update drivers:
1. Find your hard drive manufacturer and model number. This information is often listed in Disk Management or Device Manager. Popular hard drive brands include Seagate, Western Digital, Toshiba, etc.
2. Go to the manufacturer’s website and locate the downloads or support section. For example, Western Digital’s drivers can be found at https://www.westerndigital.com/support/software-downloads.html.
3. Download the latest hard drive driver for your specific model. Make sure it is intended for your version of Windows.
4. Run the downloaded setup file and follow the on-screen prompts to install the updated driver. You may need to restart your computer after installation.
Updating to the newest hard drive drivers can fix performance issues, add new features, and close security vulnerabilities. However, it’s a good precaution to create a system restore point before installing new drivers in case they cause issues. Overall, keeping drivers up-to-date is vital for getting the most out of your hardware.
Resolve Conflicts with Other Devices
If the internal hard drive is not being detected due to a hardware conflict with another device, there are a few steps you can try to resolve the issue:
First, check for hardware conflicts in the Device Manager. To open Device Manager, right-click the Start menu and select “Device Manager”. Look for any devices with yellow exclamation icons, which indicate a problem or conflict. You may need to uninstall the conflicting device drivers and restart your PC for the changes to take effect.
You can also try disabling or uninstalling less important devices one by one and restarting to see if the hard drive is detected. For example, you could temporarily disable or uninstall devices like printers, scanners, cameras, external hard drives, etc. Re-enable them one by one while checking if the internal hard drive shows up.
Additionally, be sure to install the latest drivers and firmware for both the hard drive and motherboard, as driver conflicts can prevent the hard drive from being detected. Check the hard drive manufacturer’s website for the latest updates.
If the hard drive is still not recognized after resolving hardware conflicts, there may be a deeper issue that requires professional help. Contact a technician or the device manufacturer for further troubleshooting.
Sources:
https://recoverit.wondershare.com/computer-problem/common-hard-drive-problems-and-solution.html
https://forums.tomshardware.com/threads/hard-drive-conflict-issue.665399/
When to Call a Professional
There comes a point when troubleshooting and trying to recover data from a hard drive failure is beyond most users’ technical capabilities. Here are some signs it’s time to call in a professional for assistance:
The hard drive is making unusual clicking or grinding noises. This often indicates physical damage that requires specialized tools and a clean room environment to repair. Attempting a DIY solution risks making things worse.
You’ve tried all the basic troubleshooting steps but the drive still isn’t being recognized. A pro has more advanced diagnostics tools and techniques to work with drives with electronic failures.
Critical or sensitive data needs to be recovered from the drive. Secure file recovery requires specialized tools and expertise to ensure no data is overwritten in the process. Amateur attempts risk permanent data loss.
There are strange behaviors like frequent crashes, blue screens, or very slow performance. An expert can diagnose if the issue stems from a deeper hardware problem or drive failure.
You’ve reformatted or repartitioned the drive and now need files recovered. Professional data recovery services specialize in recovering data even after drives have been reformatted or partitions deleted.
If the internal hard drive is still under warranty, the manufacturer may cover professional repairs or data recovery services. Checking this can save money over third party services.
In general, if you lack the technical skills or tools to diagnose and address a hard disk problem, calling a professional becomes the safest and most efficient option. Data recovery services are the best solution when sensitive or critical files need to be recovered from a failed drive.