Enabling an M.2 drive on your computer can seem intimidating at first, but it’s actually a straightforward process that only takes a few steps. M.2 drives are becoming increasingly popular due to their fast speeds, small size, and versatility. Once enabled in your system BIOS, an M.2 drive acts just like any other storage drive. This guide will walk you through everything you need to know to get your M.2 drive up and running.
What is an M.2 Drive?
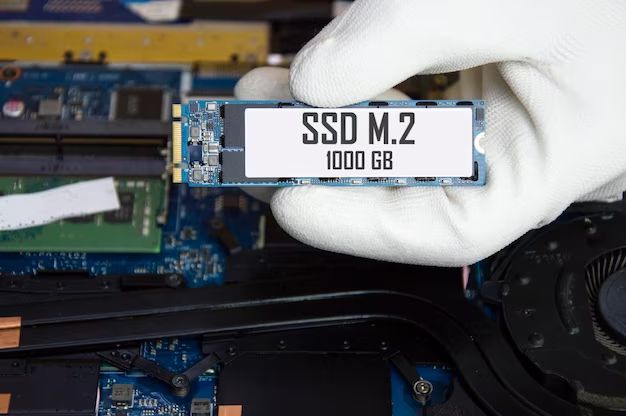
An M.2 drive is a type of solid-state drive (SSD) that uses the M.2 form factor. M.2 drives utilize the PCI Express bus for data transfer, allowing for very fast read and write speeds compared to traditional SATA SSDs. Additionally, M.2 drives are much smaller and more compact than 2.5″ SSDs. An M.2 drive looks like a stick of RAM and mounts directly onto your motherboard in an M.2 slot.
There are several key advantages to using an M.2 drive:
- Faster speeds – M.2 drives leverage the PCIe bus for much higher bandwidth than SATA drives. This results in ultra-fast transfer speeds, decreasing load times.
- Compact size – The small M.2 stick design allows them to fit in tight spaces and eliminates cable clutter.
- Versatility – M.2 drives come in various lengths and keyed connectors (M, B, B+M) to work with different slot configurations.
- Easy installation – M.2 drives mount directly onto the motherboard without any cables.
M.2 drives have become the go-to option for lightning fast solid state storage. But you’ll need to enable them in your BIOS before you can start enjoying those blazing transfer speeds.
Check for M.2 Slot on Motherboard
Before purchasing an M.2 drive, you’ll want to open up your computer and verify that your motherboard actually has an M.2 slot. This slot will be a small, thin, horizontal connector that resembles a stick of RAM.
Refer to your motherboard manual to find the exact location of the M.2 slot. On many boards, the M.2 slot is positioned near the CPU socket, but placement can vary. There may be multiple M.2 slots with different keyed connectors. The most common configurations are:
- M Key – Supports PCIe x2 and SATA M.2 drives.
- B Key – Supports PCIe x4 M.2 drives.
- B+M Key – Supports PCIe x4 and SATA M.2 drives.
Make sure to get an M.2 drive with the appropriate keyed connector for your motherboard slot. Also, be aware that some slots may share bandwidth with other ports like SATA ports. Refer to your motherboard specs for details.
Install M.2 Drive in Slot
Once you’ve verified that your motherboard has an M.2 slot, it’s time to install the M.2 drive:
- Power off your computer and open the case.
- Locate the M.2 slot on the motherboard.
- Release the latch holding the metal bracket in place, if there is one.
- Slide the M.2 drive into the slot at an angle.
- Push the drive down flat until it clicks into place.
- Optionally, secure the drive with a small screw.
- Replace the metal bracket, if needed.
The installation process takes just a few seconds when inserting the M.2 drive into the slot. Make sure the notched end matches up with the slot. Apply even pressure when inserting to avoid damaging the pins. Some motherboards have screws or latches to hold the drive in place, while others rely solely on the PCIe connector’s friction. Refer to your motherboard manual for specifics.
Enable M.2 Drive in BIOS
After the M.2 drive is physically installed, you’ll need to enable it in your computer’s BIOS so that your operating system recognizes it. Here are the general steps:
- Restart your computer and enter the system BIOS (by pressing F2, F10, Del, etc).
- Navigate to the “Advanced” tab in the BIOS.
- Locate the menu for M.2, NVMe, or PCIe drives.
- Enable the M.2 drive and change any related settings.
- Save changes and exit BIOS.
The process for enabling M.2 drives can vary across manufacturers and motherboard models. On some boards, it’s as straightforward as toggling between Enabled/Disabled. On others, you may need to adjust the slot’s operating mode or link speed.
Here are some common BIOS settings related to M.2 drives:
- SATA Mode – May need to be switched to M.2 or PCIe/NVMe.
- Boot Option – Can select drive as a bootable device.
- Link Speed – For setting PCIe generation (Gen1, Gen2, etc).
Search for terms like “M.2”, “NVMe”, or “PCIe” to find the relevant BIOS menu for your motherboard. Refer to your motherboard manual if you have trouble locating the appropriate settings.
Install Operating System on M.2 Drive
With your M.2 drive enabled in the BIOS, it’s time to install your operating system and get it up and running:
- Insert bootable OS installation media (USB drive, DVD, etc).
- Boot to the installation media.
- Follow the on-screen prompts to begin installing the OS.
- When prompted, select the M.2 drive as the destination.
- Continue with the OS installation.
- Reboot once finished and boot from the M.2 drive.
At the drive selection screen during installation, your M.2 drive will appear as an available option if you’ve enabled it correctly in BIOS. Be sure to select the full drive capacity when installing the OS; this will wipe and format the M.2 drive.
An M.2 slot configured for SATA drives will work with standard SATA OS installation. For NVMe M.2 drives, you may need to initialize the drive with diskpart before installing Windows on it.
Once you finish the OS installation, reboot your computer. You should now be able to boot directly from your super speedy M.2 solid state drive!
Initialize M.2 Drive in Disk Management
If your OS drive does not show the full capacity of your M.2 drive after installing, you may need to initialize it in Disk Management:
- Open Disk Management (press Windows Key + X and select Disk Management).
- The M.2 drive will show up as an unknown volume.
- Right click the volume and select Initialize Disk.
- Right click it again and select New Simple Volume.
- Follow the prompts to initialize the full capacity on the drive.
This issue is common after installing Windows on NVMe M.2 drives that were not initialized prior to OS installation. Initializing in Disk Management resolves this, making the full drive capacity accessible to Windows.
Partition and Format M.2 Drive
If you want to use your M.2 drive for extra storage instead of a boot drive, you will need to partition and format it through Disk Management:
- Open Disk Management (press Windows Key + X and select Disk Management).
- Right click anywhere on the M.2 drive and select New Simple Volume.
- Walk through the wizard prompts to initialize and format the drive.
When partitioning the drive, you can choose to create a single large volume or split it into multiple volumes. File systems like NTFS and exFAT work with M.2 drives. Format the volume to your desired file system.
Once formatted, your M.2 drive will show up like any other storage drive in Windows File Explorer. You can now copy files to it and access it like you would an internal hard drive or SATA SSD.
Install M.2 Drivers
Most M.2 drives utilize standardized drivers built into Windows and do not require any special drivers. However, some newer PCIe 4.0 and NVMe drives may need proprietary drivers from the manufacturer installed on your boot drive for maximum performance:
- Download the latest M.2 drivers from the manufacturer’s website.
- Open the downloaded driver package and run the setup executable file.
- Restart your computer after the drivers are installed.
Manufacturer drivers contain custom settings, communication protocols, and features tailored specifically to a drive. Keep these updated for optimizations, bug fixes, and improved compatibility. The motherboard manufacturer may also provide certain M.2 drivers.
Troubleshoot M.2 Drive Detection
If your BIOS or operating system is not detecting your M.2 drive, here are some troubleshooting steps:
- Reseat the M.2 drive in the slot. Remove and reinsert the drive with even pressure on both ends.
- Try a different M.2 slot if available.
- Update motherboard BIOS to the latest version.
- Disable CSM/Legacy mode in BIOS which can prevent NVMe detection.
- Disable any SATA ports shared with an M.2 slot.
- Try an alternative PCIe riser adapter if dealing with bandwidth limitations.
Incompatible BIOS, firmware issues, and loose connections are common causes of M.2 drives not being recognized. Following proper installation steps and verifying BIOS settings can resolve most detection problems.
M.2 in Laptops
Many laptops also incorporate M.2 drives for internal storage. The process for enabling an M.2 drive in a laptop is similar to that of a desktop:
- Locate the M.2 slot, often under a service panel on the laptop’s bottom.
- Insert the M.2 drive and secure it with the retention screw.
- Enable the drive in the laptop’s BIOS menu.
- Install OS or partition drive in Disk Management.
With laptops, you’ll likely be replacing an existing M.2 drive rather than adding a secondary drive. Pay close attention to properly configuring the drive in the laptop manufacturer’s BIOS/UEFI settings for detection. Driver installation and optimization can help maximize performance gains.
Conclusion
Although M.2 drives require a few more steps compared to standard drives for installation, the extra work is well worth it. With an M.2 drive properly configured, you can take advantage of lightning quick system boot times, faster game and application loading, and more efficient workflow.
Following the steps outlined in this guide, you’ll be able to seamlessly integrate an M.2 drive into your rig. Just be sure to verify motherboard compatibility, enable it in BIOS, install your OS or partition the drive, and install drivers. With speeds rivaling the fastest consumer SSD options, M.2 drives are an awesome upgrade for both desktop and laptop users alike.
