Erasing and resetting your Mac to its factory settings can be useful if you’re selling or giving away your computer, experiencing performance issues, or want a fresh start with the operating system. This process completely wipes the hard drive by overwriting it, removing all your files, apps, settings, and macOS itself. It restores your Mac to the state it was in when you first unboxed it.
After erasing, you’ll need to reinstall the latest version of macOS and start from scratch customizing preferences and settings. You can then choose to restore your personal files and data from a backup. Taking these steps lets you eliminate any unwanted apps, files or configurations for a clean slate.
This guide will walk through how to fully erase and reset a Mac running macOS Big Sur to factory settings. The main steps involve backing up your data, signing out of iCloud, erasing the hard drive, reinstalling macOS, and restoring your files.
Back Up Your Mac
It’s important to back up your Mac before erasing it. This will allow you to restore your files, settings, and apps if needed after erasing the Mac. The best way to back up a Mac is using Apple’s Time Machine software.
Time Machine is included for free on Macs running macOS. It allows you to back up everything on your Mac – documents, music, photos, emails, applications, system files, settings, etc. Time Machine saves hourly backups for the past 24 hours, daily backups for the past month, and weekly backups until your backup drive is full (Apple).
With Time Machine, you can restore your entire Mac or specific files from any point in time when backups exist. It’s easy to navigate and restore from backups through the Time Machine interface. Time Machine works with either an external hard drive connected to your Mac or with network-attached storage on your network (Reddit).
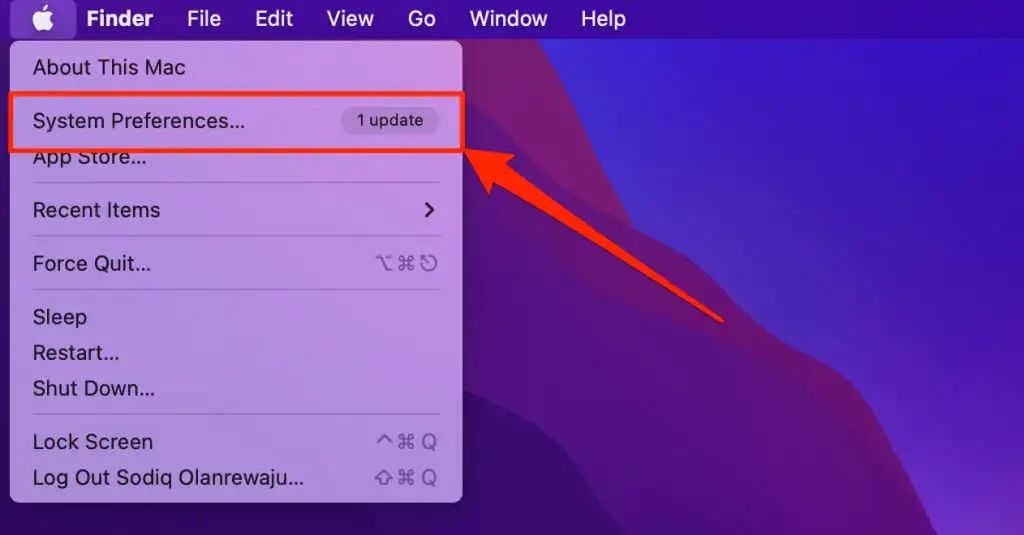
Before erasing your Mac, make sure you have a current Time Machine backup. Connect your external Time Machine backup drive if you use one. Then go to System Preferences > Time Machine and select “Back Up Now” to start a manual backup. Allow the backup process to fully complete before erasing your Mac.
Sign Out of iCloud
Before erasing your Mac, it is important to sign out of iCloud to ensure none of your data or settings remain linked to your account. Here is how to sign out of iCloud on your Mac running macOS Big Sur:
Go to Apple menu > System Preferences and click on Apple ID. Select Overview in the sidebar and click on Sign Out. This will sign you out of iCloud and break the link between your account and the Mac.
If you forgot to sign out of iCloud before erasing your Mac, you can still release it from Activation Lock by contacting Apple Support with proof of purchase. See this Apple Discussion thread for more details.
Signing out of iCloud ensures your information is no longer available on the Mac and your Apple ID will not be linked to it. This is an important step before erasing the Mac.
Erase Your Mac
To erase the contents of your Mac’s drive, you will use Disk Utility. Disk Utility allows you to securely erase and reformat the drive.
To open Disk Utility, restart your Mac and hold down the Command and R keys. This will boot your Mac into Recovery Mode. Once in Recovery Mode, select Disk Utility from the Utilities menu and click Continue.
In Disk Utility, select your startup disk from the sidebar. This is typically named “Macintosh HD.” With the startup disk selected, click the Erase button in the toolbar. Choose a name for the erased volume, specify a format (Mac OS Extended is recommended), and select Scheme: GUID Partition Map.
Finally, choose an erase option. The most secure is a full 7-pass erase, which overwrites the data multiple times to prevent recovery. However, a 1-pass erase is sufficient for most needs. Click Erase to wipe your startup disk (source).
Once the disk is erased, you can reinstall macOS to your wiped drive.
Reinstall macOS
After erasing your Mac, you’ll need to reinstall the macOS to get it functioning again. There are a couple options for reinstalling macOS Big Sur:
- Reinstall from macOS Recovery – All Macs come with a built-in recovery system that allows you to reinstall the macOS and other utilities without needing an external installer. To access this, reboot your Mac and hold down Command + R until you see the recovery system. From there, you can reinstall a fresh copy of Big Sur.
- Reinstall from external media – You can also create a bootable installer on an external USB flash drive or hard drive and use that to install Big Sur. This may be faster than reinstalling over the internet from Recovery. See this guide for steps on how to make a Big Sur bootable installer.
Once you’ve reinstalled Big Sur using one of the above methods, you’ll be able to configure the Mac with a new user account and settings.
Restore From Backup
Once you have reinstalled macOS, you can restore your apps, files, and settings from a backup using Time Machine or another backup service. Time Machine is the built-in backup service for macOS. To restore from a Time Machine backup on an external drive:
- Make sure your external Time Machine backup drive is connected to your Mac and powered on.
- Open Finder and select Applications > Time Machine. The Time Machine interface will open.
- Navigate the Time Machine interface to locate the backup you want to restore from. Time Machine keeps hourly backups for the past 24 hours, daily backups for the past month, and weekly backups prior to that.
- Select the backup date and time to enter the backup. Locate and select the apps, files, and folders you want to restore. Click the Restore button.
- Time Machine will restore the selected items to your Mac. Allow time for the restoration process to complete.
This process restores your apps, files, and settings while maintaining the freshly installed macOS system files. You can repeat it to restore additional items until your Mac is back to its pre-erase state. See Restore your Mac from a backup on Apple Support for more details.
Reconfigure Settings
After erasing your Mac, you’ll need to reconfigure some key system preferences and settings. Here are the most important ones to walk through:
Go to System Preferences > Desktop & Screen Saver to set your desktop background image and screensaver settings back to your preferences. See this Apple support article for details.
In System Preferences > Displays, adjust your display settings like resolution, calibration, and Night Shift. Refer to these instructions from Apple if needed.
Open System Preferences > Keyboard to reconfigure settings like key repeat rate, delay until repeat, and keyboard shortcuts. This Apple guide explains the options.
Go to System Preferences > Trackpad to tweak gestures, scrolling, tap to click, and other trackpad settings. Check Apple’s trackpad help for more information.
Adjust energy saver settings like display sleep and computer sleep in System Preferences > Battery. See these tips from Apple on optimizing battery life.
Set date, time, and time zone settings back to your preferences in System Preferences > Date & Time. Apple has instructions here.
Finally, go through the other system preferences like Sound, Network, and Sharing to complete your settings.
Reinstall Apps
After erasing your Mac, you’ll need to reinstall the apps you were using before. The easiest way is to re-download them from the App Store. Open the App Store app and go to the Purchases tab to find apps you’ve downloaded previously (1). You can download them again for free.
For apps not available on the App Store, you’ll need to reinstall them from their original download links or discs. Check the app developer’s website to find the latest version to download. If you don’t remember where you downloaded an app from, search for the app name and “download” to find the source.
Some apps keep your preferences and data in dedicated folders or files outside of the main app bundle. After reinstalling the app, you may be able to recover customized settings by copying these files and folders from your backup into the new app installation (2).
Recover Data
If you did not properly back up your Mac before erasing it, you may still be able to recover your files using data recovery software. Tools like EaseUS Data Recovery can scan your Mac’s drive and find deleted files that have not yet been overwritten. The sooner you run the recovery after the erase, the better chance you have of retrieving your data. Just make sure not to save anything new to the drive or you risk overwriting what you want to recover.
You can also try booting your Mac into recovery mode and using Disk Utility’s “Undelete” feature to restore recently deleted files. Keep in mind this will only work on files deleted right before the erase, not older files already removed from your trash.
Finally, if you were using iCloud services like Photos, Contacts, Calendar, or Notes, connecting your erased Mac back to your iCloud account may restore some of that cloud-synced content. Just don’t expect anything locally stored like documents or media to come back this way.
Recovering lost data is not guaranteed, but using professional tools right after an erase gives you the best chance. Just act quickly and avoid overwriting the drive before attempting a recovery.
Summary
In summary, completely erasing all content and settings on your Mac running Big Sur involves several steps. First, you’ll want to back up your important files, photos, and documents to an external hard drive or cloud storage. Then sign out of iCloud and any other accounts. From there, restart your Mac into macOS Recovery mode and erase the disk using Disk Utility. Reinstall a fresh copy of Big Sur and restore your files from the backup. Afterwards, customize your settings again and redownload any apps you need. While the process takes some time, it will completely reset your Mac to a clean state.
A few additional tips: be sure your backups are complete before erasing the disk, have your WiFi password handy to reconnect after reinstalling the OS, and consider resetting password using a password manager for any accounts you use. With patience, resetting your Mac will give you that fresh out-of-the-box feeling again.