Check Finder on Your Mac
When you connect your iPhone to your Mac via a USB cable, the device should show up in Finder as long as the connection is active. Finder is the default file management and access application on Mac, similar to Windows Explorer on Windows PCs.
To check if your iPhone appears in Finder:
- Connect your iPhone to your Mac using the USB cable that came with your device.
- Open Finder on your Mac. The easiest way is to click the Finder icon on the dock at the bottom of the screen.
- In the Finder sidebar on the left, look under the “Locations” section for your iPhone. It will be listed by its model name (e.g. “Joe’s iPhone”).
- If you see your iPhone there, you can click on it to access files, photos, backup information and manage the connection.
If your iPhone does not show up in Finder, there may be an issue with the USB connection. Check that the cable is properly plugged in at both ends and that your iPhone displays the “Connected to USB Accessories” notification. You can also try restarting your Mac and reconnecting the iPhone to make it appear.
Use Image Capture on Mac
The Image Capture app on Mac provides an easy way to import photos and videos from an iPhone. Image Capture comes pre-installed on all modern versions of macOS. To use it to transfer media from an iPhone:
1. Connect your iPhone to your Mac using the included USB cable. Make sure the iPhone is unlocked.
2. Open the Image Capture app on your Mac. It can usually be found in the Applications folder.
3. The iPhone should appear in the sidebar of the Image Capture app. Select it to view thumbnails of photos and videos on your iPhone.
4. Choose the images you want to import by checking the boxes below the thumbnails. Or select “Import All” to transfer everything.
5. Click the Import button at the bottom right. This will copy the selected media to your Mac’s Pictures folder.
The Image Capture app provides a streamlined way to quickly get photos and videos off your iPhone and onto your Mac. It’s simple to use with an intuitive interface. For more details, refer to Apple’s Image Capture user guide.
Sync iPhone with iTunes
One way to connect your iPhone to your Mac is through iTunes. The iTunes app allows you to sync various content libraries between your iPhone and Mac, back up your iPhone data, and manage iPhone apps and settings.
To sync your iPhone with iTunes on a Mac, first connect your iPhone to your Mac using the included USB cable. Open iTunes on your Mac, and your iPhone should appear in the sidebar under Devices. Click on it to access syncing options.
In the different sync tabs in iTunes, you can choose to sync items like music, movies, TV shows, audiobooks, and more from your Mac to your iPhone. This will transfer the selected libraries and files from your Mac to your iPhone storage. You can also sync photos from your iPhone to your Mac via iTunes.
Additionally, within the Summary tab, you can opt to back up your iPhone data and settings to your Mac. iTunes can create either encrypted or unencrypted backups, which provide a way to preserve and restore your iPhone information if needed.
Finally, the Apps tab in iTunes allows you to install, remove, rearrange, and update apps on your iPhone through syncing. Overall, connecting through iTunes provides full device management capabilities.
For more details on using iTunes to sync your iPhone, refer to this Apple support article.
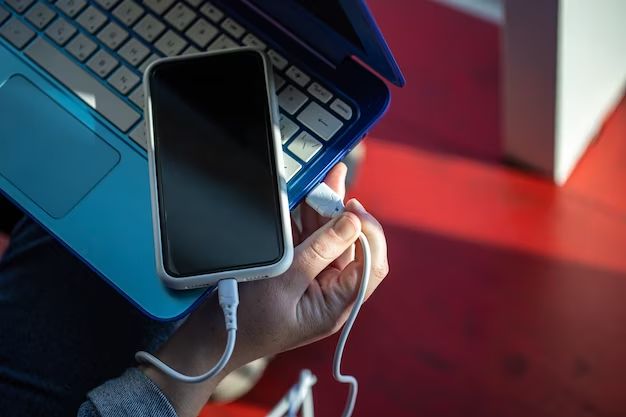
Charge Your iPhone
One convenient way to charge your iPhone battery is by plugging it into your Mac using a Lightning cable. When you connect your iPhone to your Mac, it will begin charging right away as long as your Mac is turned on and has sufficient battery. According to Apple Support, you can use Apple USB power adapters for iPad and Mac laptops to charge iPhone, Apple Watch, AirPods, and other Apple products (source).
Charging your iPhone by plugging it into your Mac is a safe and effective method. As noted on Apple Discussions, it is fine to charge an iPhone plugged into a MacBook Air while the MacBook is asleep or closed (source). The MacBook will continue charging the connected iPhone as long as it has battery power. This makes it easy to charge your iPhone using your Mac on-the-go or while working.
One thing to note is that charging speed may be reduced when charging your iPhone from your Mac compared to using the iPhone’s own power adapter. But plugging into your Mac is still a convenient way to get a battery boost when needed.
Enable Personal Hotspot
You can use your iPhone’s cellular data connection to get internet access on your Mac by turning on Personal Hotspot on your iPhone (Sources: https://support.apple.com/guide/iphone/share-your-internet-connection-iph45447ca6/ios, https://support.apple.com/en-us/HT209459). This allows your Mac to connect to the internet through your iPhone’s cellular data plan.
To enable Personal Hotspot on your iPhone:
- Go to Settings > Cellular.
- Tap Set Up Personal Hotspot.
- Follow the onscreen instructions to set it up.
Once Personal Hotspot is enabled, you can connect your Mac to your iPhone’s WiFi network to access the internet. This gives your Mac cellular data connectivity without needing a built-in cellular modem.
Personal Hotspot uses your iPhone’s cellular data plan, so you may incur additional data charges. Review your carrier’s rates before using this feature extensively.
Troubleshooting Tips
If your iPhone is not connecting properly to your Mac, here are some troubleshooting tips to try:
First, perform a hard reset on your iPhone by holding down the Power and Home buttons together until you see the Apple logo (Apple Support). This will reboot your device and clear any software glitches that may be preventing the connection.
You should also make sure both your iPhone and Mac are updated to the latest iOS and macOS versions. Go to Settings > General > Software Update on iPhone and the App Store on your Mac to check for and install any available updates (Wondershare). Keeping your software up-to-date can resolve compatibility issues.
Inspect the Lightning cable you are using to connect your iPhone to your Mac. Try replacing the cable if it is damaged, as a faulty cable can prevent your device from being recognized. Use an authentic Apple Lightning cable for the most reliable connection.
Following these tips should help get your iPhone communicating properly with your Mac again.
Access iPhone Storage
You can access the internal storage and iCloud photos from your iPhone directly on your Mac in a few ways. The easiest is to use the Finder app on your Mac. Simply connect your iPhone to your Mac via USB cable, then open Finder. Your iPhone should appear in the sidebar under Devices. Click on it to browse the folders and files stored locally on your iPhone. You’ll be able to access your photos, videos, documents and more (Apple Support).
For photos stored in iCloud, open the Photos app on your Mac. Go to Preferences > iCloud and make sure “iCloud Photos” is enabled. This will sync your iCloud photo library to your Mac. You can then access all your photos in the Photos app without needing your iPhone physically connected. The Images Capture app can also import photos directly from your iPhone to your Mac (iMobie).
Disable USB Restricted Mode
USB Restricted Mode is a security setting in iOS that disables data connections over the Lightning port after your iPhone or iPad has not been unlocked for one hour. This prevents unauthorized access to your device’s data. However, it can also prevent your iPhone from connecting properly to your Mac.
If you need to transfer photos or other data from your iPhone to your Mac, you may need to temporarily disable USB Restricted Mode in iOS. To do this:
- Go to Settings > Face ID & Passcode on your iPhone
- Enter your passcode to access settings
- Scroll down and toggle off USB Accessories
With USB Restricted Mode disabled, you should be able to connect your iPhone to your Mac and access its contents in the Finder or Image Capture app. Just remember to re-enable USB Restricted Mode when you are done for security.
For more details, see this Apple support article on managing accessory access.
Alternative Transfer Options
If you don’t want to connect your iPhone directly to your Mac, there are some alternative wireless transfer options you can use to move photos, videos, and other files between devices.
One easy option is to use iCloud. With iCloud Photos enabled on your iPhone and Mac, your photos and videos will automatically sync between devices over WiFi and cellular. You can access your iCloud Photos library from the Photos app on your Mac to view or download anything from your iPhone. iCloud Drive can also be used to transfer other types of files.
AirDrop is another great wireless option. From Finder on your Mac, you can AirDrop files to an iPhone or iPad that’s nearby. Just make sure both devices have Bluetooth and WiFi enabled. AirDrop works seamlessly without any cables or internet required.
You can also email files from your iPhone to your Mac. Attach photos, videos, or documents to an email on your iPhone and then open it on your Mac to save the files. This uses your regular email service over WiFi or cellular.
While direct USB connections are often the fastest way to transfer iPhone files to your Mac, wireless options give you more flexibility without cables. iCloud, AirDrop, and email get the job done wirelessly.
Summary
Connecting your iPhone to your Mac via USB serves several key functions. First and foremost, it allows you to charge your iPhone using your Mac as the power source. The USB connection also provides a means to sync data like contacts, calendars, photos, videos, and music between your iPhone and Mac. This allows you to keep both devices up to date with the latest information and media.
Another benefit of connecting your iPhone to your Mac is to enable Personal Hotspot. This turns your iPhone into a mobile WiFi hotspot that can provide internet access to your Mac or other devices. The USB connection allows your Mac to use your iPhone’s cellular data plan for internet connectivity when WiFi is not available.
Finally, plugging your iPhone into your Mac gives you access to the internal iPhone storage. This allows you to transfer files and documents between the devices like you would with a flash drive. You can use Finder on Mac to browse and manage the files and folders saved to your iPhone.
Overall, using a USB connection between your iPhone and Mac opens up key functionality to charge your iPhone, sync data, enable Personal Hotspot, and directly access the iPhone’s file storage from your Mac.
